Gemstone Crab/Strategies
This copy was last processed on . The copied wiki revision is dated .
Transportation
Children of the Sun must first be completed to access Varlamore.
After partial completion of Twilight's Promise, the quetzal transport system will become accessible to players. The Civitas illa Fortis Teleport or quetzal whistle can be used to reach the quetzal transport system quickly, which can be used to fly to Tal Teklan to reach the Tlati Rainforest for the first time. From there, run south to the crab nest. Each gemstone crab nest has a cave that leads to the location of the fight, or the next respawn location if between fights. If there is no crab at the location you arrive at, simply use the cave to reach the correct area. After each fight, this is also used to reach the next crab respawn point.
Other methods to reach the gemstone crab include:
- A charged Pendant of ates can be used to teleport just north of Kastori after activating the Statue of Ates located there. From here, the player can run north to reach the eastern gemstone crab site.
- The Quetzal landing site that must be built at Kastori, which is about the same distance to the eastern crab nest as the Tel Teklan quetzal is to the southern crab nest.
- The Hunter cape teleport to the Hunter's guild is also next to a Quetzal landing site
- Fairy ring code AIS to Auburn Valley. From here, the player can run south west to Achilka, who can take them to both Tal Teklan or Kastori, with both boat endpoints being close to gem crab nests to their north.
- If lacking any of the methods above, walking from Civitas illa Fortis to the Quetzacalli Gorge is safe and there is a mountain guide who will take you to Nemus Retreat. From there you can walk south to Achilka and take her boat.
Strategy
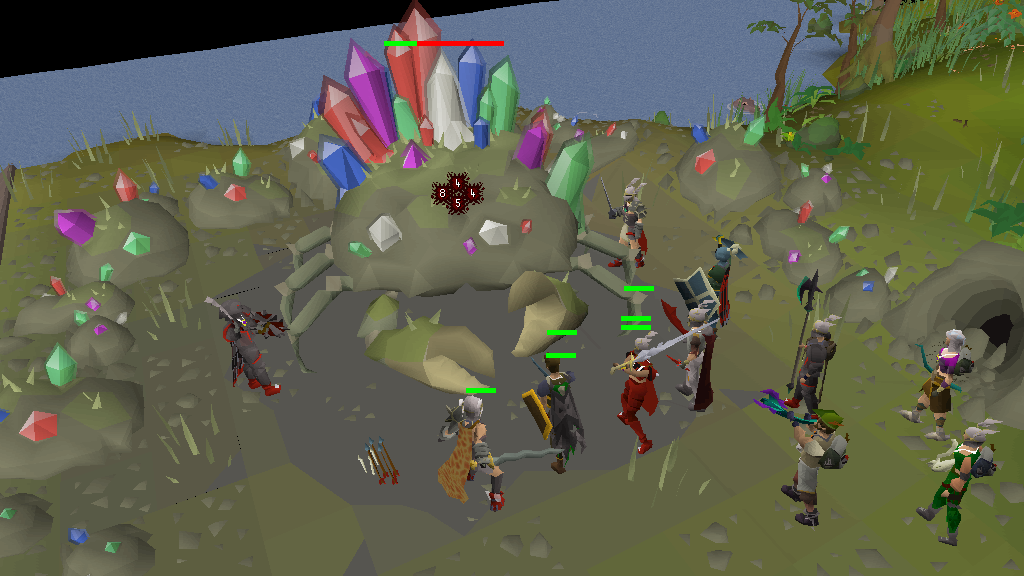
Unlike most monsters, the crab does not die. It has effectively infinite health and remains in its nest for 10 minutes before burrowing. As a result, fighting it serves as an idle training method, allowing players to gain combat experience with minimal interaction and little to no downtime.
Almost any equipment can be used effectively, and players of all levels can participate. The crab has no defensive stats, and uses a melee attack that can only hit for 1 damage to players it is facing. As such, accuracy is unnecessary and damage increasing items (those with strength bonus or ranged strengh bonus) should be prioritised as possible.
Players may wish to consider using low level prayers like Burst of Strength which will always increase max hit, while draining prayer extremely slowly.
Combat experience is reduced by 12.5%, but as there's very little downtime and no overkill damage experience rates are still favorable compared to e.g sand crabs. Melee is the most effective combat style when training against the gemstone crab. Ranged training can be worthwhile at lower levels or if less effort is desired, especially before unlocking better methods such as chinchompas. Magic is less recommended as it's inefficient at all levels (see the section on magic for more information).
The gemstone crab does not count as a crab for the sake of slayer tasks, and so the slayer helmet (i) provides no benefit here.
Equipment
When selecting gear, the primary consideration is maximising damage to increase experience gain. The crab's minimal defensive stats and high health make nearly all weapons viable for consideration; players are able to use whatever their best weapon is already. As the boss is intended to be fought AFK, not all recommendations are required to be followed if the player does not wish to afford the extra effort to use them, such as special attacks or the use (and upkeep) of Prayers; however they are still listed here if one wishes to use them.
Generally, the tabs in the following sections are ordered from least to most effective; or lowest requirements to highest.
Melee
The three strongest setups are the full blood moon armour set, an obsidian armour setup, and the dharok's armour set (past 90 Strength and Hitpoints). The blood moon set is the most powerful set, but is the most expensive (18,222,126 coins) and has the highest repair costs. The obsidian setup is cheaper (5,961,743 coins for the required items) and has no repair costs. Dharok's armour is powerful at high levels, though requires a bit more attention to maximise its damage.
If a player can't afford or obtain these sets, players should use their best fast attacking (4 tick) melee weapon with as much strength bonus as they can acquire in the remaining item slots. See the "Lower Level" section for item choices.
(Not included in these sets are the soul reaper axe and the uncharged scythe of Vitur. These outperform the other sets, but it's unlikely players training combat will have access to these. If they are available, use them with the highest strength bonus gear.)
For lower levelled players, some of the other armour sets may be too expensive. If that's the case, the primary weapon has the largest effect on damage and should be the focus for a budget. For the other item slots, the main stat to prioritise is Strength bonus, with a secondary focus on prayer bonus items (such as Monk's robes) if that's not available.


The obsidian set — composed of the three piece obsidian armour set, the berserker necklace and the toktz-xil-ak (not the closely named toktz-xil-ek) — gives a 30% damage boost and is the strongest set outside of blood moon armour and Dharok's equipment at high levels (90+ Strength and Hitpoints). The setup has no hourly costs, unlike the blood moon set and Dharok's equipment with 100,000 coins and 22,000 coins respective hourly costs.
While inferior to obsidian, the void armour set has a similiar strength scaling and can be used with any weapon (see the "Lower levelled" tab for weapon options), so is placed here for clarity.


The blood moon armour set with the dual macuahuitl is the strongest melee set at Gemstone Crab, outside of Dharok's at Hitpoint and Strength levels close to 99. The set is more expensive (18,222,126 coins) than obsidian and Dharok the Wretched's equipment (which cost 5,961,743 coins and 4,147,798 coins respectively) and the full set must be used.
The set also has a 100,000 coins coin hourly repair cost. If you're near-exclusively fighting the crab and don't need to take off the armour for other activities, you can keep the armour on after it degrades; this removes the repair costs in exchange for a small DPS loss.
Dharok's equipment is a powerful option at higher Hitpoint and Strength levels. Dharoks matches obsidian sets at level 90 Hitpoints and Strength, and matches Blood Moon sets at level 97 Hitpoints and Strength. The set requires the player to stay at very low hitpoints (3-4) to maximise its effect; this can be done with items that deal damage to yourself, namely the locator orb and dwarven rock cake. To maintain this hitpoint level against the natural regeneration, either use a dwarven rock cake to periodically offset the regeneration, or turn on and off the Rapid Heal prayer once a minute (which interrupts the natural regen). This takes a bit more activity than the other sets, though simply resetting hitpoints between each crab fight still provides competitive damage. Dharok's equipment has an hourly maintenance cost of 22,000 coins.
The gemstone crab does occasionally deal damage (it has a ~15% chance to hit in the minute between natural Hitpoint regenerations, and a 1% chance to hit twice) so do not drain your Hitpoints down to 1 or 2. Bring a handful of multihealing food items (such as cake, Guthix rest, cooked giant crab meat) to heal in case of draining mistakes.
| Slot | Item (most effective → least effective) | ||||
|---|---|---|---|---|---|
 | Dharok's helm | N/A | N/A | N/A | N/A |
 | Amulet of rancour | Amulet of torture |  Amulet of strength Amulet of strength | N/A | N/A |
 |  Infernal cape Infernal cape |  Fire cape Fire cape |  Mixed hide cape / Mixed hide cape /  Mythical cape Mythical cape |  Soul cape[a] > Soul cape[a] >  Ardougne cloak 4[a] Ardougne cloak 4[a] |  Trimmed skill cape[a] Trimmed skill cape[a] |
 | Dharok's platebody | N/A | N/A | N/A | N/A |
 | Dharok's platelegs | N/A | N/A | N/A | N/A |
 | Dharok's greataxe | N/A | N/A | N/A | N/A |
 |  Rada's blessing 4 Rada's blessing 4 |  God blessing God blessing | N/A | N/A | N/A |
 |  Ferocious gloves Ferocious gloves |  Barrows gloves > Barrows gloves >  Rune gloves Rune gloves |  Regen bracelet / Regen bracelet /  Granite gloves Granite gloves |  Combat bracelet > Combat bracelet >  Shayzien gloves (5) Shayzien gloves (5) |  Red spiky vambraces / Red spiky vambraces /  Steel gauntlets Steel gauntlets |
 |  Avernic treads (max) Avernic treads (max) |  Primordial boots Primordial boots |  Dragon boots (or: Dragon boots (or:  ) ) | Guardian boots / Echo boots[a] |  Mixed hide boots / Mixed hide boots /  Climbing boots Climbing boots |
 | Ultor ring |  Berserker ring (i) Berserker ring (i) |  Brimstone ring Brimstone ring | Ring of shadows / Ring of the gods (i)[a] |  Lightbearer Lightbearer |
 |  Dragon dagger / Dragon claws Dragon dagger / Dragon claws | Burning claws > Abyssal dagger |  Dragon battleaxe[b] Dragon battleaxe[b] | Crystal halberd > Dragon halberd | Ancient mace[c] / Saradomin godsword[c] |
Melee inventory
Fighting the gemstone crab does not require any items, although some may be brought to increase damage dealt at the cost of reducing AFK time:
- Super strength potions, or Strength potions. Black warlock mixes can also be used, and will share the Strength buff to other nearby players, but have low trade volume. Several black warlocks spawn to the east of the southern and northern crab nests, and south of the eastern nest; with 55 Hunter they can be caught before initiating combat with the crab to boost Strength.
- Bring a method to reach the crab, such as a pendant of ates, quetzal whistle, or runes for Civitas illa Fortis Teleport. Banking can be done in Tal Teklan, so holding onto it isn't necessary.
- (Optional) Prayer restoring items such as prayer potions if using offensive prayers to increase damage. Moonlight moth mixes can be used to restore your own Prayer and that of 3 other nearby players fighting the crab, and at lower levels can provide more Prayer restoration than potions. If fighting the crab with a group of friends, or multiple of your own accounts, the moths can be coordinated to maximise their effectiveness across the recipients of the restoration.
- If using prayer potions, bring a holy wrench or other items which share its effect.
- If only using the lowest tier of Prayers, it can be more efficient to just restore Prayer at the altar in Tal Teklan, as it would only need to be done every 5-10 crabs.
- Using the Ancient Mace special attack can restore low amounts of prayer, negating the need for prayer restoring items.
- (Optional) A special attack weapon, such as the dragon claws or dragon dagger to use up special attack energy for bonus damage.
- A defender will be beneficial if using a two-handed main weapon with a one-handed special attack weapon. Ideally a dragon or Avernic defender.
- If looking to conserve supplies or not worry about using special attacks frequently, using a Dragon battleaxe special attack at the start of each new crab fight can replace the need for Strength potions.
- (Optional) A pickaxe, to mine the boss after defeat and loot gems.
Ranged
The strongest training weapons are darts, especially with a blowpipe or a ranged strength offhand (twisted buckler). Darts are relatively cheap, have a high DPS from their fast attack speed, and their relatively low accuracy doesn't matter against the zero defense crab.
At level 46 Ranged, a crossbow firing ruby bolts (e) becomes the strongest weapon until level 65-70 Ranged, as the ruby bolt passive effect gives a huge chunk of experience when it activates. The eclipse atatl scales off your Strength level and bonuses, and can outperform darts if your Strength level is above your Ranged level.
Make sure you're using the "Rapid" weapon style when training Ranged, as this will increase your attack speed and greatly increase the damage dealt compared to the "Accurate" or "Longrange" styles.
The prayer Sharp Eye is worth using around level 30 Prayer, as it drains very slowly and can be sustained by a trip to the Tal Teklan altar when the crab is nearby. The higher tier offensive prayers require prayer restoration to sustain and don't always give an additional max hit; their usefulness depends on your exact weapon, Ranged level, and budget. You can experiment or use the wiki's DPS Calculator to check if your max hit increases with a higher-tiered prayer.
Equipment
At level 30 Ranged, obtaining an Ava's attractor is a high priority, as it automatically picks up the majority of your ammunition. At level 50 Ranged, it should be promptly upgraded into an Ava's accumulator (which has an enhanced ammuniation saving effect).
Lower-levelled Ranged armours only provide ranged accuracy, which has little impact on the Gemstone Crab that has zero defence. As such, the more useful pieces of equipment are items that grant prayer bonus (such as monk's robes), which make using offensive ranged prayers more convenient.
Weapon
Before level 46 Ranged, use mithril darts or steel darts. These darts are very cheap and, because of their fast attack speed and the crab's low defence, will outperform shortbows. Adamant darts can optionally be used at level 30. It takes around 5,000 darts to go from 5 Ranged to 46 ranged (with an Ava's attractor).
At level 46, the strongest weapon becomes an adamant crossbow firing ruby bolts (e). The ruby bolts (e) passive effect hits for 60 damage every ~20 attacks on average, giving a huge chunk of experience. Make sure your ruby bolts are enchanted (have an (e) at the end of their name), as the unenchanted version will be worse than using darts. The ruby bolt effect damages the player for 10% of their current Hitpoints; this effect can't kill the player, and natural Hitpoint regeneration will nearly offset the damage, but the effect will deactivate at 1 Hitpoint. As such, stay out of the crab's melee range and bring some cheap food items to stay above 4 Hitpoints.
Ruby bolts are comparatively expensive, costing 53,424 coins per hour with an Ava's accumulator (at level 50) and 76,320 coins per hour with an Ava's attractor. Adamant darts or mithril darts can be used as a budget alternative (with an hourly cost of 19,320 coins and 5,880 coins respectively).
At level 65, a rosewood blowpipe with adamant darts matches the ruby bolts with a crossbow, and overtakes them at level 70-75 Ranged. Using rune darts allows the blowpipe to easily surpass ruby bolts, although those darts are much more expensive to use (costing 189,000 coins per hour).
The eclipse atlatl can outshine the dart-based options if your Strength level is above your Ranged level (and with melee gear). As a rule of thumb: with equal Ranged and Strength levels, an atlatl with "mid-game" strength items (around 40 strength bonus excluding the atlatl itself) matches an adamant dart rosewood blowpipe with elite void and no other ranged strength items. This atlatl configuration matches a rune dart rosewood blowpipe with 10 extra Strength levels, and it matches a twisted buckler firing amethyst darts with 15 extra Strength levels. Melee strength items tend to be easier or cheaper to obtain than ranged strength items, which allows the atlatl to reach most of its potential damage earlier.
Note: Use a (super) Strength potion and a Ranged prayer while using an atlatl.
| Slot | Item (most effective → least effective) | ||||
|---|---|---|---|---|---|
| Torva full helm | Neitiznot faceguard / Oathplate helm | Serpentine helm |  Helm of neitiznot (or: Helm of neitiznot (or: ) ) | Zombie helmet |
| Amulet of rancour | Amulet of torture / Amulet of strength | Amulet of fury | N/A | N/A |
| Infernal cape > Dizana's quiver[a] | Fire cape > Ava's assembler[a] | Mixed hide cape[b] > Ava's accumulator[a] | N/A | N/A |
| Torva platebody | Bandos chestplate (or: ) ) |  Eclipse moon chestplate / Eclipse moon chestplate /  Obsidian platebody Obsidian platebody |  Mixed hide top / Blue moon chestplate Mixed hide top / Blue moon chestplate | N/A |
| Torva platelegs | Bandos tassets (or:) |  Obsidian platelegs (or: Obsidian platelegs (or: ) ) | N/A | N/A |
| Eclipse atlatl | See other strategies | N/A | N/A | N/A |
| Atlatl dart | N/A | N/A | N/A | N/A |
| Ferocious gloves | Barrows gloves > Rune gloves | Regen bracelet > Granite gloves | Red spiky vambraces | N/A |
| Avernic treads (max) | Primordial boots | Dragon boots (or:) |  Rune boots (or:) Rune boots (or:) | N/A |
| Ultor ring | Berserker ring (i) | Brimstone ring | Ring of shadows | N/A |
| Rosewood blowpipe | Dragon battleaxe | N/A | N/A | N/A |
The ideal weapons are dart firing: the toxic blowpipe, the twisted buckler or dragonfire ward, and the rosewood blowpipe. The toxic blowpipe is the strongest but far more expensive to use than other weapons, with an additional 314,000 coins of hourly cost in Zulrah's scales. If a player is willing to spend 432,800 coins an hour training Ranged, they should strongly consider training at e.g maniacal monkeys instead, which is a much faster training method (roughly three times as fast) with the same gold cost per experience. The twisted buckler and rosewood blowpipe are 5-10% slower but have far more competitive usage costs [a].
Void ranged and Masori both give max hits and are therefore ideal. Elite void is marginally better than Masori, though the latter can be purchased directly from the Grand exchange with no requirements (note: the Masori armour does not have to be fortified). Ava's assembler reduces ammunition costs by 30% from an Ava's accumulator.
Ranged inventory
- Ranging potions, Divine ranging potions, or Lizardkickers
- If using the Eclipse atlatl or hunter's spear, instead bring Super strength potions, or instead use special attack energy with the dragon battleaxe.
- Teleport to the crab, such as a pendant of ates, quetzal whistle, or runes for Civitas illa Fortis Teleport
- Food, especially if using ruby bolts (e)
- (Optional) Prayer restoring items such as prayer potions or moonlight moth mixes, if not using the altar in Tal Teklan
- (Optional) A special attack weapon, such as the magic shortbow (i)
- (Optional) a pickaxe, to mine the boss after defeat and loot a gem.
Magic
The reduction in experience at the gemstone crab along with the lack of an elemental weakness means that the experience and cost-efficiency is not as good as other options. For example, Frost Crabs have a 100% weakness to fire spells, and allow the player to idle for 10 minutes at a time with a quick reset in between (the same as the gemstone crab). Rock Crabs are also available with a 20% earth weakness, for those without completion of The Heart of Darkness, and are otherwise nearly identical.
Generally, Magic is much faster and more cost-efficient to train on other monsters or with utility spells, since the gemstone crab has a negative experience multiplier, and does not possess an elemental weakness. One method of magic training that is recommended to be done at the gemstone crab for more active players is to weave in spellcasts while efficiently training one of the other combat styles.
High Level Alchemy is the most accessible spell, and can be cast in between hits. This does take a lot of effort, but can be done without losing any ticks. As an example, alching noted yew longbows profits 28 coins per cast, granting the player up to 33,600 coins per hour along with 78,000 magic experience per hour, if alching consistently. This can be done with a large variety of items, for variable profit.
The spell Telekinetic Grab can also be cast at most times as long as the player is not an Ironman. There is usually a pretty consistent stack of dropped ammunition under the boss from lower level players shooting it without a fully upgraded Ava's device. This can result in upwards of about 125k experience per hour on sufficiently populated worlds that are uncontested for picking up the ammo. Additionally one can profit from the resulting ammo picked up. If using the Eclipse atlatl method with a melee strength boosting cape instead of an Ava's device, this can be done on your own ammunition to not need to rely on other players.
Alternatively, the player can cast Magic Imbue on the Lunar spellbook. This can give passive magic experience at a cost of −3.09 coins/xp. The spell, which costs −266 coins and grants 86 experience every 12.6 seconds, adds an additional 24,500 magic experience per hour to the player's total experience, and requires half as many clicks as the previous spells per cast, and is cast less often.
If fighting the gemstone crab is still preferred, the following methods and equipment are recommended:
Low level magic is different to the other combat styles when facing the gemstone crab, in that magic accuracy bonus increases accuracy significantly, magnifying damage and therefore experience rates. With low-tier spells, magic strength bonus is unlikely to result in an increased maximum hit, so it is recommended to bring the best accuracy boosting gear available.
| Slot | Item (most effective → least effective) |
|---|---|
| Elder chaos hood > Xerician hat / Wizard hat |
| Amulet of magic / Amulet of glory |
|  Ardougne cloak 1 Ardougne cloak 1 |
| Elder chaos top > Xerician top / Black robe |
| Elder chaos robe > Xerician robe / Zamorak monk bottom |
| Elemental staves |
 | Book of darkness > Broodoo shield |
| Unholy blessing |
| Chaos gauntlets |
| Aranea boots > Wizard boots |
| Beacon ring |
Inventory
- Magic potions or Wizard's mind bombs if 1-2 Magic levels below the next element of spell unlock. (i.e. if casting Earth Bolt at level 34 Magic, boosting to level 35 will increase the max hit to that of Fire Bolt.)
- Teleport to the crab, such as a pendant of ates, quetzal whistle, or runes for Civitas illa Fortis Teleport
- Runes to cast the spell of choice, such as mind runes, chaos runes, and air runes.
- (Optional) a pickaxe, to mine the boss after defeat and loot a gem.
Elder chaos robes provide a 3% magic damage bonus (1% per piece) and good accuracy, and require only 40 Magic and 1 Defence, making them a good low-mid level option for Magic. This magic damage is not enough on its own to grant a max hit, but with Mystic Lore active and casting Iban's Blast, one can hit up to 26 damage. For those without access to Iban's staff, a smoke battlestaff in conjunction with the whole set and Mystic Lore can allow Fire Bolt to hit up to 17 damage.
Elite void knight equipment is a strong option, offering a 5% magic damage bonus alongside increased accuracy, enough for a max hit without using Prayer; however obtaining the set requires a significant time investment. It also requires completion of the hard Western Provinces Diary, which requires 64 Magic; at which point Smoke Burst is available to players and can be used for much greater experience against monsters in multicombat.
While the twinflame staff might appear to be an appealing option due to its higher damage output; the reduced attack speed, and no experience for the second spellcast means it provides less experience than other options.
| Slot | Item (most effective → least effective) |
|---|---|
| Void mage helm > Elder chaos hood |
| Amulet of magic / Amulet of glory |
| Ardougne cloak 2 |
| Elite void top > Elder chaos top |
| Elite void robe > Elder chaos robe |
| Iban's staff (u) > Elemental staves |
| Book of darkness |
| Unholy blessing |
|  Void knight gloves > Chaos gauntlets Void knight gloves > Chaos gauntlets |
| Aranea boots > Wizard boots |
| Seers ring |
Inventory
- Teleport to the crab, such as a pendant of ates, quetzal whistle, or runes for Civitas illa Fortis Teleport
- Runes to cast the spell of choice, such as fire runes and death runes.
- (Optional) Prayer restoring items such as prayer potions or Moonlight moth mixes, if not using the altar in Tal Teklan.
- (Optional) a pickaxe, to mine the boss after defeat and loot a gem.
For higher levels, it is best to bring the highest magic damage boosting gear available and cast the highest tier standard elemental spell you can. Usage of elemental tomes can improve experience rates, but may be more expensive to use than preferred, so a normal offhand can be brought. Augury or Mystic Vigour should be activated to further improve damage, along with Prayer restoration items in the inventory to sustain them.
| Slot | Item (most effective → least effective) |
|---|---|
| Ancestral hat |
| Occult necklace |
| Imbued saradomin cape |
| Ancestral robe top |
| Ancestral robe bottom |
| Harmonised nightmare staff |
| Tome of fire[a] > Elidinis' ward (f) |
| Rada's blessing 4 |
| Confliction gauntlets |
| Avernic treads (max) |
| Magus ring |
Inventory
- Teleport to the crab, such as a pendant of ates, quetzal whistle, or runes for Civitas illa Fortis Teleport
- Runes to cast the spell of choice, such as air runes and wrath runes.
- (Optional) Saturated heart for slightly more damage.
- (Optional) Prayer restoring items such as prayer potions or moonlight moth mixes, if not using the altar in Tal Teklan.
- (Optional) a pickaxe, to mine the boss after defeat and loot a gem.
| Aldarin | |
|---|---|
| Auburn Valley | |
| Avium Savannah | |
| Civitas illa Fortis | |
| Hailstorm Mountains | |
| Tlati Rainforest | |
| Other areas | |