Tombs of Amascut/Strategies
This copy was last processed on . The copied wiki revision is dated .
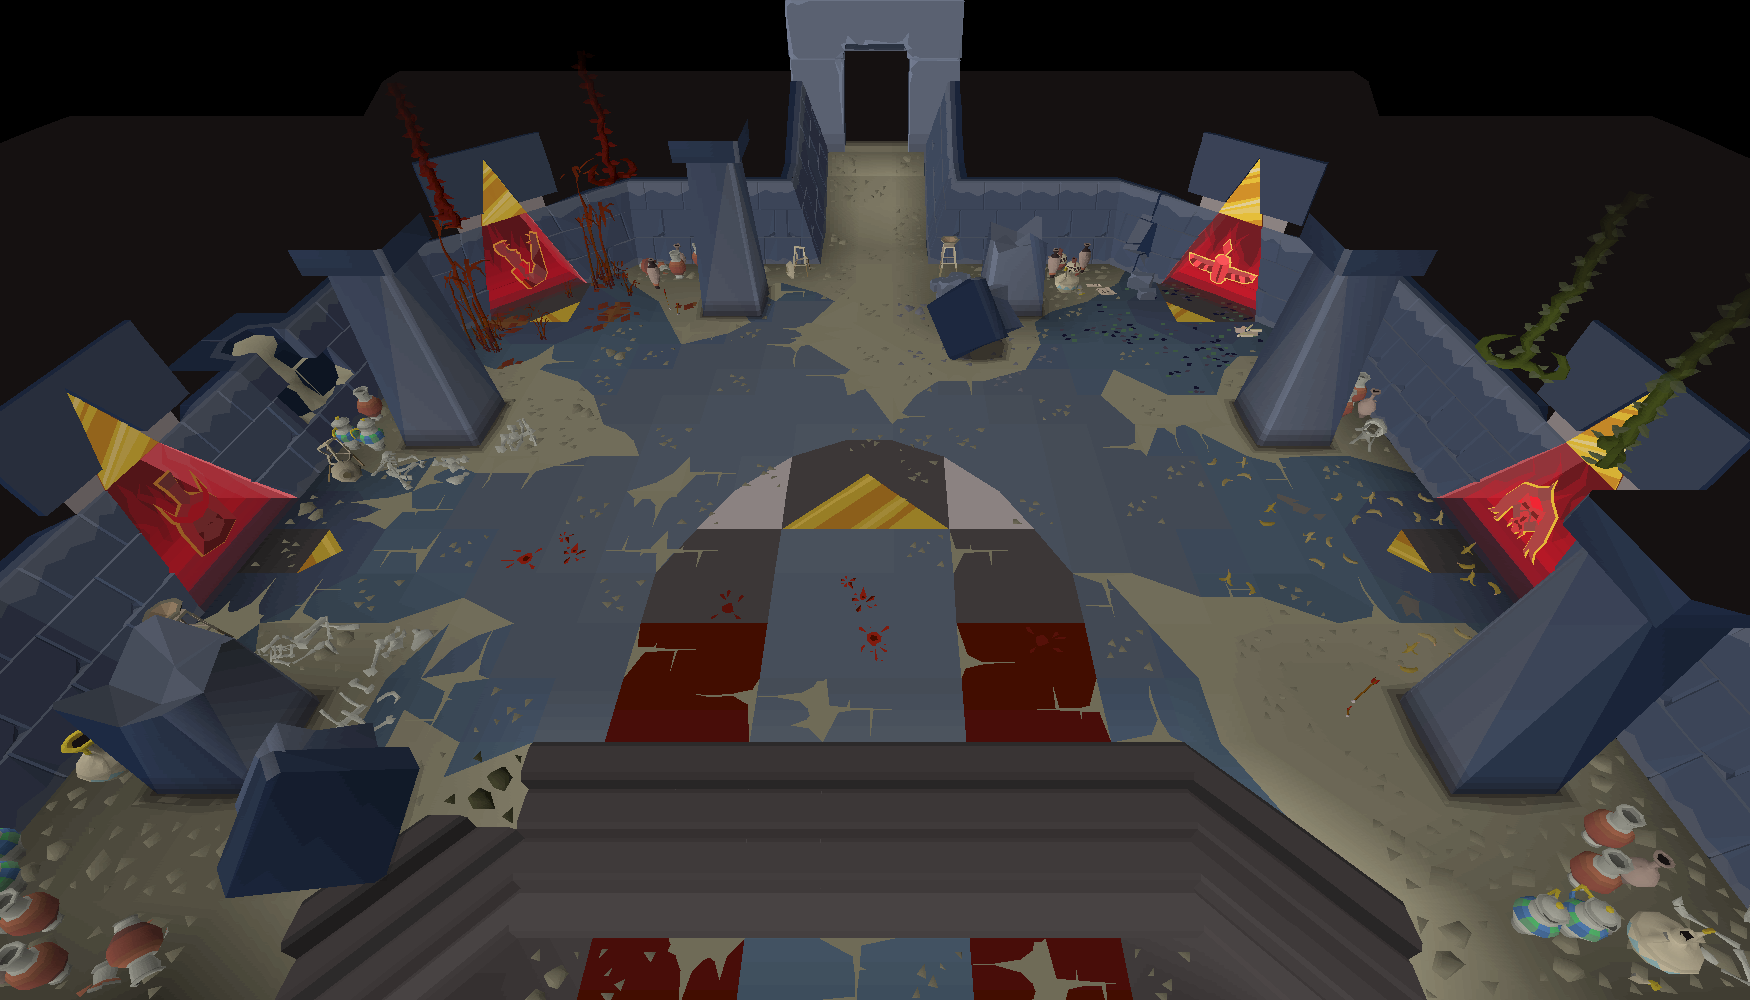
The Tombs of Amascut is a raid located within the Jaltevas Pyramid in the necropolis. The raid makes use of the invocation system, allowing players to customise the difficulty of the raid by choosing to enable various invocations that act as difficulty modifiers to the raid.
The raid is composed of four paths, with each comprising a challenge section followed by a boss. These can be taken on in any order the player(s) chooses, although the order in which they are fought can slightly change clear times.
By default, players may die any number of times if the team does not have a limited attempt invocation enabled. If one of these invocations are enabled, however, then an attempt is counted once the entire team dies during a challenge. Additionally, the team will have to restart the room they all died in, with previous raid progression being conserved. If the entire team is killed and no more attempts are remaining, the team will "fail" to survive the raid, and be placed back outside in the lobby room with normal death rules applying.
If the player logs out during the raid (including disconnects), the game considers the player to have wiped and applies normal death mechanics. Therefore, assuming that Hardcore Run is not active, the player should simply suicide in the room they're in and leave through the exit to avoid paying unnecessary death fees. Hardcore ironmen should always bring a teleport regardless.
Requirements
- Completion of
Beneath Cursed Sands for access to Jaltevas Pyramid
Suggested skills
70+
70+
70+
75+
70+
70+
77+ for Piety, Rigour, and Augury
41+ to use a Rune pickaxe or better
Invocations and Raid Level
| Mode |  Raid Level Raid Level
| |
|---|---|---|

|
Entry Mode | 0 - 149 |

|
Normal Mode | 150 - 299 |

|
Expert Mode | 300 - 600 |
There are a total of 44 invocations that the player can activate; each one increases the level of the raid as well as the player's loot potential at the end of the raid, affecting the player's quantity of loot and the chances of receiving the unique rewards.
For every 5 raid levels, enemy hitpoints, defence, accuracy, and damage increase by 2% additively, with damage capping out at +150%. For example, a raid level of 100 will modify these stats for all enemies within the raid by +40%, whereas a raid level of 500 will modify enemy hitpoints, defence, and accuracy by +200%, and their damage by +150%. The formula is:
where CalculatedStat is capped at 150% when calculating for damage.
Note: The increased defence is a modifier on the enemy's calculated defence roll, not to the enemy's Defence level itself, while Defence-draining attacks such as the special attack from a Bandos godsword will drain the enemy's base Defence level. This means that Defence-draining weapons are recommended to bring in to the raid, especially at higher raid levels. Keep in mind that different targets throughout the raid have various caps on Defence reduction (see their respective sections).
Boss invocations are listed in their respective section instead of here. In each boss section there is a recommendation whether or not the invocation should be toggled on in both solo and group settings. The recommendation assumes that the player has enough experience to do a run of level 400 or lower. Higher or specialized runs, such as level 540 raids or transmog raids require toggling less favourable invocations, which is likely to kill inexperienced players.
| Invocation | Details | Raid lvl modifier | Category | |
|---|---|---|---|---|

|
Try Again | Players have ten attempts to complete a raid; an attempt is failed if every member of the party dies during a challenge or boss fight. If the team wipes when a boss is killed, it will not count as a fail.
Only one invocation in the Attempts category can be active. |
+5 | Attempts |
|
|
Persistence | Players have five attempts to complete a raid. | +10 | Attempts |
|
|
Softcore Run | Players have three attempts to complete a raid. | +15 | Attempts |
|
|
Hardcore Run | Players have one attempt to complete a raid. | +25 | Attempts |

|
Walk for It | Players have 40 minutes to complete the raid, including time spent between each Path. If unsuccessful, the raid level will decrease by 20.
The timer begins upon entering the first Path and ends when the Warden reaches 0 health in the final phase of the fight. Only one invocation in the Time Limit category can be active. |
+10 | Time Limit |
|
|
Jog for It | Players have 35 minutes to complete the raid.
If unsuccessful, the raid level will decrease by 30. |
+15 | Time Limit |
|
|
Run for It | Players have 30 minutes to complete the raid.
If unsuccessful, the raid level will decrease by 40. |
+20 | Time Limit |
|
|
Sprint for It | Players have 25 minutes to complete the raid.
If unsuccessful, the raid level will decrease by 50. |
+25 | Time Limit |

|
Need Some Help? | The quantity of items offered by the Helpful Spirit sometimes reduced to 66%, with a minimum of one of that supply.
Only one invocation in the Helpful Spirit category can be active. |
+15 | Helpful Spirit |
|
|
Need Less Help? | The quantity of items offered by the Helpful Spirit will be reduced to 33%, with a minimum of one of that supply. | +25 | Helpful Spirit |
|
|
No Help Needed | The quantity of items offered by the Helpful Spirit will be reduced to 10%, with a minimum of one of that supply. | +40 | Helpful Spirit |

|
Walk the Path | Completing a path during the raid can cause other paths to level up. Four level ups are given per raid, although the path selected is random.[1] Completing the first path randomly adds levels to two other paths; the second adds a level to one of the other two paths, and then the third path adds another level to the final path.
The first path level will modify most enemy hitpoints and damage by +8%, with every additional level modifying these stats by +5%, up to six levels. Furthermore, every two path levels changes each path's boss mechanics, capping at four path levels:
When an uncompleted path is levelled up, a message will appear in the game box stating |
+50 | Paths |

|
Pathseeker | All paths will level up once upon entering the raid.
Only one invocation in the Path Level category can be active. |
+15 | Path Level |
|
|
Pathfinder | All paths will level up twice upon entering the raid. | +40 | Path Level |
|
|
Pathmaster | All paths will level up three times upon entering the raid. | +50 | Path Level |

|
Quiet Prayers | Protection prayers will be 10% less effective within the raid. | +20 | Prayer |
|
|
Deadly Prayers | Prayer is drained by 20% of damage taken in the raid, outside of self-inflicted damage (e.g. a hit of 5 will drain prayer by 1).
This invocation can be activated alongside Quiet Prayers. |
+20 | Prayer |

|
On a Diet | Players can no longer eat food within the raid, though Snowy knights and potions that restore health (such as Saradomin brews) can still be used.
Players will also no longer be offered silk dressings and honey locusts should this invocation be active. Guthix Rest cannot be used with this invocation. Despite its "Drink" option, it counts as food in TOA. |
+15 | Restoration |

|
Dehydration | Players can no longer drink potions that restore health. | +30 | Restoration |

|
Overly Draining | All special attacks use 100% special attack energy.
Drinking liquid adrenaline will temporarily reduce the cost to 50%. |
+15 | Restoration |
-
A sample expert Tombs of Amascut preset with a raid level of 300.
-
Another alternative of a level 300 raid.
-
A sample expert Tombs of Amascut preset with a raid level of 400.
Equipment
Melee is primarily used for Ba-Ba, Kephri, Akkha, and Warden's core, and most bosses in the raid are weakest to Stab. Osmumten's fang scales very well with invocation, capable of maintaining high accuracy even against defensive targets. Equipment like the Serpentine helm can negate venom and poison from the path of Apmeken, Kephri, and Zebak. Moon equipment also works well as hybrid armour, benefitting multiple styles. Most bosses can have their defence drained by flat amount, so a Bandos godsword or sometimes the Bone dagger are preferable to other defence draining weapons.


Ranged is primarily used for Zebak, Akkha, and Wardens. The Twisted bow does well against the Wardens and is the strongest weapon at Zebak. The Toxic blowpipe and Eclipse atlatl do well on bosses with lower defence and the various minions, while the Bow of faerdhinen and Crossbows with ruby bolts can deal with higher HP and defence targets.
Magic is primarily used for Akkha and Wardens. The Tumeken's shadow receives a 4x buff from magic damage equipment while inside the raid, and is the strongest weapon against Akkha, Soldier Scarabs, and Wardens. Against Zebak, if defence is drained (a certain amount for the raid level), it is only slightly surpassed by a Twisted Bow.
| Minimum
(0-100 Invocation) |
Hybrid/Normal
(100-250 Invocation) |
Masori/Expert
(250-350 Invocation) |
Bowfa+Ayak/Expert+
(350-450 Invocation) |
Max/Expert+
(450+ Invocation) | ||||||||||||||||||||||||||||||||||||||||||||||||||||||||||||||||||||||||||||||||||||||||||||||||||||||||||||||||||||||||||||||||||||||||||||
|---|---|---|---|---|---|---|---|---|---|---|---|---|---|---|---|---|---|---|---|---|---|---|---|---|---|---|---|---|---|---|---|---|---|---|---|---|---|---|---|---|---|---|---|---|---|---|---|---|---|---|---|---|---|---|---|---|---|---|---|---|---|---|---|---|---|---|---|---|---|---|---|---|---|---|---|---|---|---|---|---|---|---|---|---|---|---|---|---|---|---|---|---|---|---|---|---|---|---|---|---|---|---|---|---|---|---|---|---|---|---|---|---|---|---|---|---|---|---|---|---|---|---|---|---|---|---|---|---|---|---|---|---|---|---|---|---|---|---|---|---|---|---|---|---|
|
|
|
|
||||||||||||||||||||||||||||||||||||||||||||||||||||||||||||||||||||||||||||||||||||||||||||||||||||||||||||||||||||||||||||||||||||||||||||||
|
|
|
|
| ||||||||||||||||||||||||||||||||||||||||||||||||||||||||||||||||||||||||||||||||||||||||||||||||||||||||||||||||||||||||||||||||||||||||||||
Notes:
- The last setup is intended for high-level runs with invocations such as Overly Draining and Dehydration active.
- It is recommended to pre-pot antipoison; an antidote++ or an anti-venom potion will be more than enough to carry into Kephri, assuming that More Overlords isn't active.
- If using antipoison protection, avoid stepping on venom pools left behind by cursed baboons, as this will remove poison immunity.
- Chinchompas for level 2 or higher Kephri, however not required if not swarming during phase interlude.
- Damage-boosting rings, such as an ultor and magus ring can be brought only if the player can complete the raid with less supplies. A lightbearer is encouraged otherwise.
| NPC | Notes |
|---|---|
| Zebak | -20 |
| Kephri | -20 |
| Akkha | -10 (regens quickly) |
| Ba-Ba | -20 |
| Obelisk
(Warden p1) |
-40 |
| Warden p3
(pre-enrage) |
-30 |
| Warden p3
(post-enrage) |
-60 |
The Nexus
The Nexus serves as a secondary lobby that allows players to pick the path they want to complete the raid. The timer will not count down until they begin their first path. The leader must enter the path in order for any other team members to follow.
After each challenge is cleared, any active poison or venom effects will be removed from the player. Upon entering a boss chamber, the player's run energy will be restored to full. After clearing a boss challenge, the player's health, prayer, run energy, and special attack will be fully restored alongside removing any active poison or venom effects. This will also apply in the case of wipes.
Once two paths are cleared, a Helpful Spirit will appear to provide raid-only supplies to the team. The spirit will provide three selections of bundles to choose from. The amount of supplies offered varies based on the raid's active invocations: "Need Some Help?", "Need Less Help?", and "No Help Needed" reduce the given supplies down to 66%, 33%, and 10% respectively, although there will be a minimum of one of that supply if guaranteed. A Deposit pot will also be present near him, where players can clear up inventory space if needed. The deposit pot acts as a normal bank deposit box.
The items are delivered as a Supplies Bag which can be interacted with to remove the consumables. It is recommended to become familiar with the 'Resupply' option, to reduce inventory management.
| Bundle | Contents |
|---|---|
| Life | Supportive bundle, consisting of nectar, tears of elidinis, silk dressings, blessed crystal scarabs, and ambrosia. The nectar and tears are given in a set of 5; dressing and scarabs are 1-3 and ambrosia at 1-2. If "On a Diet" is enabled, the dressings are removed. Assuming no supply reduction invocations are active, they will be replaced with two scarabs and ambrosia. |
| Chaos | Mixed bundle, consisting of a subset of nectar, tears of elidinis, smelling salts, ambrosia, and liquid adrenaline. Quantity for nectar varies from 1-8, tears 0-6, salt 0-2, ambrosia 0-1, and adrenaline 0-2; latter two are rare. |
| Power | High-burst bundle, consisting of 2 smelling salts and 1 liquid adrenaline. |
| Item | Effect | |
|---|---|---|
| Honey locust | Stacks in the inventory. Heals 20 Hitpoints (can overheal), and restores prayer points equal to a dose of prayer potion. Automatically given during wipes, unless the "On a Diet" invocation is enabled. | |
| Ambrosia | Has 2 doses. Fully restores hitpoints, prayer points, and run energy, as well as acting as a dose of antidote++.
| |
| Blessed crystal scarab | Has 2 uses. Restores 8 Prayer points every 4 ticks (2.4 seconds), 9 times.
This yields a total restoration of 72 Prayer points over the course of 40 ticks (24 seconds). | |
| Liquid adrenaline | Has 2 doses. Halves special attack costs for the next 150 seconds. | |
| Nectar | Has 4 doses. Heals Hitpoints (can overheal), and drains Attack, Strength, Defence, Ranged, and Magic.
| |
| Silk dressing | Has 2 uses. Heals 5 hitpoints every 5 ticks (3 seconds), 20 times.
This yields a total restoration of 100 hitpoints over the course of 100 ticks (60 seconds). Not provided if the "On a Diet" invocation is enabled. | |
| Smelling salts | Has 2 uses. Restores run energy by 25% and boosts Attack, Strength, Defence, Ranged, and Magic by .
The combat boost is refreshed every 15 seconds for 8 minutes. | |
| Tears of elidinis | Has 4 doses. Restores combat stats and prayer points, and affects party members in a 3x3 area.
| |
Power or sometimes Chaos should be taken first for the smelling salts. They greatly increase damage, will result in less supplies being used overall, and typically the healing/prayer restoration brought into the raid should be enough to get through all paths.
- If Dehydration is active, having Liquid adrenaline for P1 and P2 wardens is crucial, in order to use Keris partisan of the sun special attacks to heal.
For the second choice, take supplies you will find useful. Typically, choose life as the final fight will have loads of unavoidable chip damage. This decision could change if you died and lost boosts. Prioritise being boosted by salts and having enough supplies to heal through the damage. In team encounters, it can be useful to quickly coordinate what supplies people are offered/need.
Path clearing
The four paths can be cleared in any order. Unless the team is attempting specific boss challenges or combat achievements, the order should be as follows:
- Zebak > Kephri > Akkha > Ba-Ba - Done when learning the raid to avoid sudden deaths late into the raid from upset stomach or level 4 Zebak (assuming path level ups are on).
- Ba-Ba > Kephri > Akkha > Zebak - This format is more efficient, since the salt provides a greater boost to ranged and magic compared to melee. Baba and Kephri are predominantly fought with melee, whereas Akkha and Zebak require a great deal more ranged and magic, with the former also needing a form of run energy restoration, which the salt provides. While kill times can exceed a single dose for both Akkha/Zebak and the Wardens, the stat boost persists even after the eight minutes expire; it just doesn't reapply itself. Using preserve, one salt can be enough if used during Akkha (Akkha before Zebak is crucial for run energy regain) and Wardens.
If quiet prayers, walk the path, and at least path finder are turned on, starting Zebak is recommended in order to avoid excess chip damage in enrage phase.
While Walk the Path is active, switching Ba-Ba and Kephri will result in about a 0.07% increase in point total and will slightly reduce the time taken. However, as Apmeken is more dangerous than Scabaras, this is not recommended as a death in Apmeken will result in greater time loss.
Before entering the tombs, make sure to pre-pot as needed.
- If entering Zebak first, the player can drink a dose of super combat and ranging potion (divine can be used) if ranging, or a saturated heart if maging.
- If entering Ba-Ba first, pre-pot with a dose of divine super combat and normal ranging potion, a saturated or imbued heart, and overheal with one anglerfish. If a divine ranging potion is being used, the boost will likely wear off before the second set of boulders.
Once all four paths are cleared, the path to the Wardens will open.
Path of Crondis
Challenge room
To walk the Path of Crondis, players must fully grow the Palm of Resourcefulness in the centre of the room. The tree requires 175 units of water, with an additional 125 for every additional player in the raid.
Players must pick up the water containers on the ground and fill them with the water from the waterfalls in the room. The waterfalls are guarded by statues intent to prevent players from easily acquiring the water; the statues on the side launch long spikes in a retracting motion and the statue in front of the waterfall discharges poisonous clouds on the tiles in front of it that flow to the other end of the path. The poison only damages on the darker cloud; the lighter clouds serve as a warning to move out of the way. Getting hit by either of these traps will reduce any water in the container by 50% of its total amount, alongside lowering the player's Defence by 6, Agility by 3 and also two prayer points per hit.
After taking water from the waterfall, it will take time for it to recover, so players are advised to head to another waterfall to collect more water. In group encounters, the water will respawn accordingly to team size.
Periodically, red crocodiles will also spawn from the corners of the room, whose number varies depending on the number of the players in the raid. If the palm is watered, they will focus on reducing it down in size. The crocodiles follow a unique aggression mechanic in which they prioritise the tree if it has been watered, then players carrying water, and finally players without any water as highest to lowest priority. While the crocodiles do not scale with raid level, they will always hit a max of 18 if they successfully hit that player. If the player in question had been hit by the spears or acid pools, an additional 3 damage is added for each hit to a maximum of 36. If Protect from Melee is active and the crocodile would have hit the player, the player will lose 12 prayer points and take 33% of the damage dealt. This will also reduce any water in the container by 50% much like getting hit by the traps. It takes ~40 seconds, after the challenge has been started, for first crocodiles to get to the palm. If player or group can carry enough water to the palm before that, they can safely ignore all crocodiles in the room.
It is possible in solo encounters to complete the challenge without taking any damage in 34.8 or 32.4 seconds. This is done by walking through the gate right as player spawn in, picking up a northern water container and instantly running to the waterfall in the north-eastern corridor (importantly, player should make sure to run along the second most eastern row of tiles). Once player has filled the container, they click the palm to path to, and water it. As soon as player has watered the palm, they click the waterfall north-west. Again, as soon as water is collected, player clicks on the palm to deposit the water.
This method will usually skip all damage using tile-skipping and due to the traps being on a sequence, which fits the timing. If player isn't confident about being on the right cycle, they can also manually dodge the poison clouds within 2 closest rows to the statues. If done right, no time is lost dodging. In order to achieve 32.4 seconds completion time, player must use the water container on palm and waterfalls, instead of left clicking them. This saves 1 tick on each interaction, for a total of 4 ticks (2.4s) timesave.
Making use of run and tile-skipping (similar to avoiding wall beasts) can allow players to bypass most of the traps. The traps in each section follow a specific pattern which can be used to avoid damage. In order to skip all damage from spikes, player must start from one tile north or south of the first statue and then run past the statues without stopping. This also requires a moving start, meaning that in order to tile-skip a spike, player had to be moving continuously before arriving to start tile. Trying to tile-skip a spike after staying on a start tile for longer than 1 tick, will not work for the first spike.
-
Crocodiles stunting the palm's growth.
-
The obstacles players must avoid to prevent spillage.
-
Tiles for 32 seconds challenge solve. Water container and first tile to path to (after picking up the container) highlighted.
-
Player solving the Path of Crondis puzzle in 32.4s.


Zebak, Guardian of Crondis
Zebak is the Guardian of Crondis, Tumeken's avatar of resourcefulness. Zebak is considered the easiest boss in the raid due to his blockable attacks and fairly simple mechanics.
Zebak attacks with all three attack styles, however, his melee attack hits the hardest and also has a chance to apply a bleed that causes the player to take damage if they move. It is possible to flinch the melee attack, but this is highly discouraged as it is possible to get killed in one hit on higher raid levels. Zebak's standard attacks will be indicated by visual and audio cues: his magic attack spits a pot into the air that splits into red orbs, while his range attack spits a large rock in the air that splinters into smaller rocks. The magic and ranged attacks can be fully blocked against if Quiet Prayers are not enabled, whereas the melee can hit through prayer, albeit with reduced accuracy and damage. The attacks will only deal damage right before impact with the player, so the magic and ranged attacks can be easily flicked. Zebak has an attack speed of 7 (4.2 seconds), assuming the path level is not modified.
His Defence can be lowered to a minimum level of 50 from 70, therefore it can be beneficial to use a Defence-draining attack. If the player is ranging, a Defence-draining weapon like a bandos godsword can be beneficial to slightly increase accuracy. The twisted bow is very strong against Zebak, even at lower levels due to his high magic accuracy bonus. If maging, Tumeken's shadow is all but required, as all other weapons are unlikely to hit as Zebak possesses both a high Magic level and defence.
Once Zebak reaches 85%, 70%, 55%, and 40% health, he will queue up one of two special attacks listed below and alternate between them. Poison and jugs are always spit out with each special attack. Should Zebak's health fall to the enrage point threshold before a queued attack, it will be discarded.
- Great Roar - Zebak will throw jugs, poison and two/three rocks onto the arena. Several attacks after doing so, he will let out a great roar, dealing massive damage to any players caught in these soundwaves for three hits. The only way to avoid this attack is to stand behind a rock (up to three tiles behind one), causing the rock to take 50 damage (each rock has 150 health).
- Every pattern that Zebak throws out will always have at least one jug that will create safespot(s).
- Rarely, acid may not cover a tile behind a rock.
- Jugs can be pushed or pulled straight or diagonally, so make use of direction to find a jug suitable to destroy near the rocks. However, be wary of diagonally pushing or pulling jugs into rocks, as indirect hits (jug not on the rock) can cause the water to be applied incorrectly.
- Tidal Waves - Zebak will throw jugs and poison before slamming his tail, causing boulders to drop from one direction and cause a massive tidal wave to sweep from that side of the arena. Much like Galvek's tsunami, players must avoid these tidal waves; getting caught by one will push the player down the direction it was going and deal moderate damage. This will push jugs and sometimes clean up poison splatters on the arena, though this is not guaranteed. If the player is shoved out of the arena from the waves, crocodiles in the waters will attempt to bite them for melee damage, which can be partially blocked with Protect from Melee. The player is also reduced to walking speed and cannot attack while in the water, necessitating the use of the nearby ramp to get back on the main arena.
The poison from these mechanics will splatter on a random tile in the arena and may splatter additional times in a 3x3 radius around the impact tile. The poison pools generally remain in the arena permanently unless a jug shatters near them, automatically dispersing the acid pool. Passing waves pushing jugs can also clear pools. Standing on a poison pool will deal fairly low damage at the start, but will quickly spike to dangerous levels that they will easily kill a player in a few ticks, so it is imperative to avoid them at all costs. Regardless, standing in these pools will also inflict poison status at 2 damage.
The first iteration of Great Roar will always place rocks in front of him, poison right behind them and solves to the sides. The second iteration adjusts the position further east, with solves usually next to the rocks.
Likewise, the first iteration of Tidal Waves always starts to the south, and the second one comes in from the north. Every two raid levels will tighten the gap between each wave by one tile. At raid level 0-1, the gap is large enough for the player to fire from ten tiles away without issue. At raid level 2+, there is a slight chance that it will not be possible to attack, as the safe tile would be eleven tiles away, which would drag the player into a tidal wave if they tried to attack from that tile.
-
Zebak's roar attack. The player has cleared the acid pools around the rocks and is standing behind them to avoid massive damage.
-
Zebak's wave attack. The acid pools will clear up as the wave passes by.


During the fight, if the Not Just a Head invocation is enabled, Zebak will periodically cast a blood spell which will either result in a special version of Blood Barrage or summons a Blood Cloud. This barrage attack will always land regardless of the player's defence bonuses. In groups, players must spread apart for this attack, or it will deal increased damage and hit accordingly to the amount of players overlapping with each other. Zebak will usually heal for ~66% of the damage inflicted from the attack if not mitigated. The path levels and whether he is enraged determines whether barrages can be flicked against while also blocking his next projectile attack.
- For levels 2 and 3, barrage can be flicked anytime during the fight. During enrage, blood barrage will hit you a tick before the next projectile hits.
- For levels 0-1 and 4+, barrage can only be flicked before enrage starts. During enrage, prioritise praying against projectiles as they do significantly more damage.
If a Blood Cloud is summoned instead, they will spawn to either side of the arena by the ramps and will follow a random player upon spawning, dealing 2 damage to itself every tick. If it touches a player, it will siphon their health to prolong itself. In the off chance the blood clouds and the rocks from the roar attack are simultaneously present, players can use the rocks as a safespot from the blood clouds should their pathing bring them towards the rocks. If no targets are within range when they initially spawn, they will wander about aimlessly and will not aggro even if the player gets close to them, making them harmless. Note: An extremely easy way to avoid blood clouds altogether is to simply go to the opposite side of where they spawned and stay on one of the two tiles next to that side's ramp. With the clouds taking 2 damage/tick, the distance the clouds must traverse in order to reach players on these tiles perfectly lines up with the time it takes for the clouds to die on their own. Furthermore, most ranged weapons can still attack Zebak from the ramp tile closest to him.
If Upset Stomach is active, players will need to be considerate of the jugs to ensure that their AoE can provide safe tiles to walk on. It can be helpful to begin pushing jugs to create safe areas to stand on for the wave attack.
Once Zebak falls below 25% of his health, he will enter an enrage state, increasing his attack speed to 4, or every 2.4 seconds assuming the path level is not modified, and no longer do the roar or wave special attacks. This is indicated with a distinct roar if sound effects are active, alongside his examine text changing. Depending on raid level, gear and overall luck, it is possible to skip the last special attack.
| Slot | Item (most effective → least effective) | ||||
|---|---|---|---|---|---|
 | Twisted bow | Tumeken's shadow | Bow of faerdhinen[a] / Toxic blowpipe[b] / Zaryte crossbow | Armadyl crossbow / Dragon crossbow | Eclipse atlatl[c] / Rune crossbow |
Zebak's Invocations
The fight with Zebak can be made more challenging with the use of the following invocations. Should players have the Path Level invocations active, every two levels will cause the following:
- Zebak's auto-attacks will be faster. This speed only affects the projectile launch, not when it shatters into the team below.
- The Tidal Waves open gap is tightened by one tile.
| Invocation | Effect | Raid lvl modifier | Toggle (solo) | Toggle (group) | Reason | |
|---|---|---|---|---|---|---|
| Not Just a Head | Zebak will gain access to blood magic. He can also summon Blood Clouds and he will occasionally perform a unique Blood Blitz on all players. This attack will always hit regardless of defensive bonuses unless Protect from Magic is used; if damage is inflicted, Zebak will slightly heal. | +15 | Yes | Yes | Harmless invocation. | |
| Arterial Spray | The radius and healing of Zebak's blood magic will be increased.
Not Just a Head must be active in order to activate Arterial Spray. |
+10 | Yes | Yes | Harmless invocation. | |
| Blood Thinners | Three blood clouds appear rather than one each time they appear.
Not Just a Head must be active in order to activate Blood Thinners. |
+5 | Yes | Yes | Harmless invocation. | |
| Upset Stomach | The acid pools and the jugs' AoE are swapped; acid can now splatter in a 5x5 AoE whereas the water from jugs is reduced to a 3x3 AoE. | +15 | Yes | Yes | While this invocation may initially seem daunting, it builds up experience and is harmless when mastered. | |
Path of Scabaras
Challenge room
To walk the Path of Scabaras, players must test their wits in a series of puzzles. There are five puzzles to complete between two branched paths. While solving the puzzles, scarabs will appear from the first two puzzle rooms. These attack with ranged and serve little outside of being a nuisance, so use Protect from Missiles to block incoming damage. The scarabs' spawn point is the start of the first room, though in larger groups they may move up to the second room.
Players must complete the puzzles in both paths before moving forward. In a solo raid, once the first puzzle is cleared, they must head to the other side (via shortcuts between the rooms), pass the opened door, and then solve the next puzzle there. Solo raiders should always avoid the pillar room, as it involves randomness that on average is far slower to solve than any other puzzle. To skip pillars, path such that you will be solving the room next to it. Once finished, cross over, and proceed.


Kephri, Guardian of Scabaras

Kephri is the Guardian of Scabaras, Tumeken's avatar of isolation. Kephri is one of the easier bosses in the raid, although some coordination is needed to handle her mechanics properly.
Kephri's main attack is a fireball that she launches into the air every few ticks. A shadow forewarns the targeted tile(s) to avoid, otherwise immense damage will be taken; Protect from Magic will mitigate ~66% of the damage if hit.
She is weakest to stab attacks, slightly resistant to crush attacks and highly resistant to slash attacks. She is also very resistant to ranged and magic attacks, despite taking 35% more damage from fire spells.
Her Defence can be lowered to a minimum level of 60 from 80, however this will get restored when she enters final phase. Due to her high defence bonuses, it is recommended to dump damaging special attacks instead of debuffing her stats if a soulflame horn is not being used.
Kephri has two special attacks she can use whilst shielded:
- Dung Strike - Kephri will target a player for a dung strike, indicated with scarabs flying around the targeted player. The scarabs will scatter shortly afterwards before Kephri sends them flying to the back of the arena, indicated with the message , stunning them for 2 seconds. Piles of dung will then fall down the direction the player was knocked back in, limiting the amount of space the player can use. If the player doesn't move out of the way of the strike, they'll take light damage and be shoved into a walkable tile within ten tiles of the player.
- The attack will generally prioritise players orbs in order from the top to bottom row then left and right - e.g in a trio encounter, the first instance of dung would apply on the first player, then the second would apply onto the second player. The same rule still applies with Blowing Mud - the first instance would target the first and second player, while the second instance would target the third and first player.
- If there are no walkable tiles within a ten tile radius, the player will instead take rapid damage, resulting in a quick death.
- Mass Incubation - Kephri will splatter eggs around the arena. There are two types of eggs, a small light-coloured egg and a large darker-coloured egg. If left unattended, they will explode in a 3x3 area, and the large dark-coloured eggs will hatch Agile Scarabs. They attack with ranged and will run away from players if approached. The ranged attack is very accurate despite their low ranged level (in part due to their accuracy bonus) and has a max hit of 5. Their stats are not affected by raid levels.
- If too many scarabs are present, Dung Strike will be used in its place.
- If dung lands on a dark egg, the egg will not be destroyed, although the scarab will be instantly killed once it hatches.
- Players will deal their max hit on the eggs regardless of combat style.

Once Kephri's shield is depleted, she will become temporarily dazed, calling upon her "children" to assist and restore one shield charge. Players will deal max damage to the swarms when they appear, who have negative defence bonuses in all combat styles. The remaining attackable scarabs are weak to stab like Kephri.
- Scarab swarms recover Kephri's shields, usually ~10% or lower (for larger teams) per swarm and they can overcharge Kephri's shields, but are capped to roughly ~15% over her max capacity.
- In the first intermission, only the first 18 swarms out of 28 will heal Kephri, the rest do not reach her in time for healing
- In the second intermission, only the first 14 swarms out of 24 will heal Kephri
- There are six spawn points on the edges of the room (NE, SE, S, SW, NW, and N), the first spawn location will be random and then proceed clockwise, occasionally skipping a spawn location
- Swarm spawn speed accelerates in batches: first 4 spawn every 4 ticks, next 4 every 3 ticks, then next 4 every 2 ticks, and finally last 16 swarms spawn every tick
- Bomber Scarabs are the same as Kephri's auto-attack (including the 3x3 AoE if Aerial Assault is active) and have the same flight distance regardless of where they spawn.
- Arcane Scarabs slowly charge up an explosive swarm around it. If allowed to charge fully, it will unleash the swarm and deal well over 65 damage if not using Protect from Magic; doing so reduces the damage by ~66%. This scarab will always appear south-east of Kephri.
- A heavy hit (over 39+ damage within 4 ticks), three moderately damaging hits or successful use of the charge attack will force it to relocate to another quadrant, automatically dispersing the swarm. The locations are always the same. (south-east > north-west > mid-south > north-east)
- Spitting Scarabs attack with ranged and can inflict poison starting at 6 damage. They are fairly accurate and can hit through prayers. This scarab will always appear north-east of Kephri. This scarab attacks all players within 8 tiles of it.
- Soldier Scarabs attack with melee and send out an unattackable scarab swarm which recharges Kephri's shield roughly every 5 seconds for ~5-7 charges. If Kephri is on actual health, they will heal her instead. The amount recharged/healed scales on the scarab's current health. This scarab always appears east of Kephri.
The swarms will spawn in a clockwise pattern around Kephri, which can be easily managed with a fast ranged weapon such as a blowpipe although care should be taken not to accidentally run back into a tile targeted by a bomber scarab. At path level 2 and higher, a trio of scarabs will periodically appear. While any AoE attack works in dispelling this trio, chinchompas are highly recommended as they have a range of 9 and an attack speed of 3 on rapid. Ancient Magicks are notably slower with an attack speed of 5, and will likely result in swarms leaking onto Kephri.
In all encounters, the player can attack a combat scarab twice (with a 4-tick weapon) or once (with a 5-tick weapon) before attempting to clear swarms. Done properly, a solo player will usually leak three swarms onto Kephri; it is possible to only leak two swarms, but is much harder. The second cycle depends on how fast the arcane scarab is killed, which is usually not an issue if a voidwaker is brought along. In group encounters, one or two players (depending on team size) can focus on killing the swarms while others kill the larger scarabs, which allows the phases to be cleared faster at the cost of some points.
The first shield threshold will cause a single Spitting Scarab to spawn, while the second threshold causes a Soldier and Arcane Scarab to spawn, assuming More Overlords was not toggled on. The range scarab will hit all players in a ten tile radius from it, and it is incredibly accurate; therefore, while it is alive, use Protect from Missiles and try to take it down as quickly as possible. The scarabs' combat stats, barring their Defence, will scale accordingly to raid level. The melee scarab can only hit one target, but will launch clusters of swarms at Kephri, charging her shield/restoring her health. The amount restored scales to its current health. Finally, the mage scarab does not attack players, but will charge up energy around it in a 3x3 AoE on itself. If allowed to charge fully, it will launch a powerful magic projectile on all players that can deal extremely high damage, even through prayer. This scarab should be focused immediately. The scarab will forcibly change position after every 3 successful hits (+1 for every additional player), or if one of these hits deals over 40 damage, dispersing any accumulated energy.
The melee scarab can be trapped by simply standing east of Kephri on the top and bottom tiles aligned with her while minimising the amount of dung that can spawn. If the dung lands in any other position, the scarab will walk out of it. The scarab will heal Kephri based on its health, so some players can opt to leave it at low health, while others may simply kill it off instead.
To successfully trap the ranged scarab, the player has to run west (towards the teleport crystal), as the scarab will force walk itself into the enclosed area and prevent it from moving; moving to the south will cause it to walk out and attack normally. Trapping the ranged scarab is only recommended with More Overlords toggled on in solo encounters, since trying to handle a melee, mage and range scarab at once will likely overwhelm the player.
After the third shield is cleared, the swarm surrounding Kephri dissipates, prompting her to use a single instance of Dung Strike on all players. This marks the start of her fourth and final phase; Kephri's health pool is now able to be damaged directly. If another instance of the attack was used just before the transition, players can be stun-locked by the chained knockback, which could force them into an unfavourable position - therefore, only phase when the attack is not in use.
When Medic! is active, a player should periodically switch to a ranged weapon to kill the swarms that appear around the room, as they will significantly prolong the fight if not checked. This invocation is only toggled in group encounters, as they're far too tedious to deal with in solo encounters.
| Slot | Item (most effective → least effective) | ||
|---|---|---|---|
|  Osmumten's fang[a] / Osmumten's fang[a] /  Keris partisan of breaching[b] Keris partisan of breaching[b] |  Keris partisan of amascut Keris partisan of amascut | Keris partisan |
-
Trapping the Spitting Scarab between two rows of dung, preventing it from moving out and attacking the player.
-
A Soldier Scarab trapped between two rows of dung, preventing it from moving out and attacking the player.
-
The spawn locations for scarab swarms.


Kephri's Invocations
The fight with Kephri can be made more challenging with the use of the following invocations. Should players have the Path Level invocations active, every two levels will cause the following:
- Kephri's auto-attacks will be faster.
- During the shield recharge phase, groups of three scarab swarms may appear instead of one. The frequency of these increase at raid level 4.
| Invocation | Effect | Raid lvl modifier | Toggle (solo) | Toggle (group) | Reason | |
|---|---|---|---|---|---|---|
| Lively Larvae | The number of dark brown eggs launched during Kephri's Mass Incubation attack will increase from 2 to 3-5. | +5 | Yes | Yes | Harmless invocation. | |
| More Overlords | An additional scarab is summoned during Kephri's shield transition phases, with a Soldier Scarab appearing for the first threshold and a Spitting Scarab for the second. Spawn locations are still the same as the original. | +15 | No | Optional | Slows down kill times in solo encounters. Can be handled easily in group encounters. | |
| Blowing Mud | The number of players targeted by Kephri's Dung Strike attack is increased to two.
This invocation has no effect in solo encounters. |
+10 | Yes | Yes | Harmless invocation. | |
| Medic! | Scarab Swarm will periodically appear from the edges of the arena outside of shielding phases. | +15 | No | Yes | Similarly to More Overlords, but much more time consuming. Not an issue in groups. | |
| Aerial Assault | Kephri's auto-attack will do more damage, and her attack range will increase from a single tile to a 3x3 AoE. Also applies to bomber scarabs. | +10 | Yes | No | Can be easily dodged in solo encounters, but watch health. Not recommended for large groups with poor coordination; otherwise not an issue. | |
Path of Het
Challenge room

To walk the Path of Het, players must break Het's Seal in the centre of the room. The Seal has 119 health in solo encounters; its health scales with the number of players but not with raid level or invocations.
There are statues at the entrance, exit and within the challenge room itself that hold a pickaxe. By default these hold a bronze pickaxe, but players can store a higher-tier pickaxe in the statue, where it will remain for subsequent raids. Better pickaxes break the stone barriers faster and deal more damage to the Seal.
Breaking the seal involves using mirrors to reflect the energy beams shot by the caster statue, and redirecting it to shoot the shielded statue. There are three mirrors that can be picked up, placed, rotated and pushed in a desired direction. The other mirrors are fixed; in group encounters, some of these are dirty and must be cleaned first to reflect light. The undamaged stone barriers block the light's path, but the worn barriers can be broken using a pickaxe to create a path for the light. The light can always be reflected correctly using 1-3 mirrors, with the removal of some barriers.

Throughout the room Orbs of Darkness will appear at the edges and move in a straight line to the other end of the room, dealing moderate damage to players they hit. Sometimes two orbs will appear on the same tile, and both will deal damage if they hit. In group encounters orbs may cause mirrors they collide with to become dirty, forcing players to clean it in order for it to reflect light again. Getting caught in the light beam will also inflict damage, albeit lower than the orbs.
Once the light beam hits the shielded statue, the seal is removed from the obelisk and players can proceed to mine the obelisk for 15 ticks (9 seconds) before the seal is protected once more. It is possible to hit the statue 8 times per cycle by standing 1 tile away from the seal and clicking to mine the seal one tick before the statue fires the beam. Runelite plugins such as "Visual Metronome" can be very useful to assist with the timing required for this technique.
If the team wipes during this room, the statue progress is reset, along with a new puzzle being drafted in the process.
Damage dealt to the seal scales in stages with the player's Mining level as well as with the pickaxe used, but is not influenced by the mining speed. The Dragon pickaxe, Crystal pickaxe, and 3rd age pickaxe are equivalent. Only visible boosts will affect the damage dealt; invisible boosts like the celestial ring will not have any effect. For example: a player with a mining level of 65 has the same max hit as a player with a mining level of 84, and a player with level 85 is equivalent to one with level 95, assuming both players are using equivalent tools and no level boosting special is used. A player at level 82+ can use the Dragon Pickaxe special to boost to the next bracket, however, though will leave them with insufficient energy for special attacks at Akkha (such as an emergency keris heal).
Players whose max hit is not equal to or greater than 17 (as per the chart below) will be unable to consistently 1-cycle this puzzle.[a 1] A player with a Dragon Pickaxe and 85 mining can always 1-cycle the room even by only hitting 7 times. A rune pickaxe at 85 mining will almost always 1-cycle the puzzle if doing a tick-perfect start.
The following table shows the damage dealt to Het's Seal using different pickaxes at different Mining levels,[2] bold text indicates enough damage to 1-cycle the room if hitting 8 times:
| Visible mining level | Dragon pickaxe |
Rune pickaxe |
Bronze - Adamant pickaxe |
|---|---|---|---|
| 99+ | 19-21 | 17-19 | 14-16 |
| 85-98 | 17-19 | 15-17 | 12-15 |
| 1-84 | 10-12 | 8-10 | 5-7 |
- ^ The average damage across 8 hits needs to be 16.25 damage. Because the Rune Pickaxe at 85-98 only hits an average of 16 damage, it is only occasionally possible to 1-cycle with this tool.
Akkha, Guardian of Het
Akkha is the Guardian of Het, Tumeken's avatar of health. Akkha is generally considered to be the hardest boss due to his mechanics, especially for solo encounters.
Akkha will become aggressive towards the first player that enters his arena. He will not focus on other players until performing a mechanic, upon which he becomes aggressive to a player based on distance; if all players are in the same distance, then he checks defence bonuses and targets the one with the highest bonus. Therefore, a designated "tank" can be assigned after a special attack by standing close to him so he will always target them and not other players. The tank may switch into melee gear during memory blast to retain aggression.
Akkha makes use of overhead protection prayers, protecting him from attacks of that style. The prayer he uses is the same as the combat style being used; e.g. if he is using melee, his overhead would be Protect from Melee.
The melee attack is only directed at his target, but it is capable of cleaving nearby targets and he will still use it anyway if a non-target is in his path while chasing his main target. The ranged and magic attacks hit everyone in the arena. Akkha's ranged attack consists of a sand projectile, while the magic attack is a glowing red sand projectile. The damage is calculated once the projectile spawns.
Unlike the other bosses, Akkha has a lower Defence reduction, with a minimum of level 70 from 80, and he also restores drained levels significantly faster, although the magic defence drain from the Eye of Ayak is permanent.
It is recommended to try and keep Akkha in his melee state for as long as possible to delay the eventual change to another protection prayer, which also can minimise damage taken if kiting Akkha successfully. The Tumeken's shadow is by far the most effective weapon against him, although players with lower-tier weapons may instead opt to range him until he phases without this.
Similar to The Nightmare or the effects of Quiet Prayers, protection prayers do not negate the full damage from all combat styles. Akkha's magic and ranged attacks deal ~80-90% less damage when protected against, while the melee attacks deal ~75% less damage when protected against.
The arena is divided into four quadrants; a symbol of fire, skull (shadow), lightning and ice to the north-west, north-east, south-east and south-west respectively, which modifies the boss' special attacks depending on where the player is standing. This is inflicted alongside a heavy hit:
- Fire-based attacks will inflict a burn that periodically deals 5 damage for several hits and can spread to unaffected players if next to them.
- Shadow-based attacks will deal low, but rapid damage on the player and drain all combat stats by 3.
- Lightning-based attacks will temporarily disable protection prayers.
- Ice-based attacks will temporarily slow players' attack speed by 1 tick. Players will be notified when the ice thaws out, indicated with the message

When Akkha reaches 80% of his health, he will enter an invulnerable state and four shadows will appear, indicated with the message . The shadows do not directly attack players, but in order to force Akkha out of his invulnerable state, one of the shadows needs to be dispelled and he must be lured there. Only focus one shadow at a time, as the mechanic is repeated at 60%, 40% and 20% thresholds, with the message instead stating , which fully restores all damaged shadows. The shadows share the same combat stats as Akkha himself, but with lower Defence. Tumeken's shadow is the strongest, though players who don't have it should swap to a blowpipe instead.
Regardless if the shadow is invulnerable or not, the shadows will charge an attack on their respective quadrant through the hourglass and a bar appears on their head. Defeating the shadow before the bar fills will spare that quadrant from an incoming attack. If the bar is filled, the shadow will slam its spear to the ground to envelop the quadrant in its respective element from the edge to the centre. It is possible to avoid the attack with precise timing, but this should only be done if the shadow cannot be dispelled in time. If the shadows do charge to full, it is recommended to run to the ice quadrant since it has the least dangerous effect of the four should the player be unable to skip or improperly time the run. The shadows will resume charging after a short time should this occur. The shadows will continue charging during the fight, but progress will be reset during any triggered health thresholds and will be temporarily halted during the Memory Blast attack. If the bar fills just as the same time Memory Blast did, the attack will be launched after the blast ends.
Every seven attacks (six with Stay Vigilant enabled), Akkha will use one of the following special attacks:
- Detonate - Akkha will mark all players for detonation, indicated by all players turning white along with the message The damage from this attack can be avoided by not standing in the same row or column as another player, as the player will detonate in a 3x3 plus-shaped pattern. If the Feeling Special? invocation is active, it can be a 3x3 cross-shaped pattern instead. This attack can also be negated by having every player stand on the same tile. This attack is only used in group encounters.
- Memory Blast - Akkha will disappear into the shadows; at the same time, the markers on the floor will begin to glow in a set pattern, indicating the safe areas for each quadrant of the incoming blasts. This is indicated with the message , with the markers on the floor flashing as an indicator as to the order to safely avoid the attack, as the other three will be engulfed in a blast of energy. The player has four ticks to move into the safe quadrant between each burst of energy. The markers will always be adjacent to each other - for example, if the skull marker was lit up, the next marker in line would either be the fire or lightning marker; never the ice marker. If the player isn't in the correct quadrant, they'll take heavy damage and suffer from the quadrant's side effects. Similarly to the shadow charge attack, it is possible to dodge the incoming blasts with proper timing.
- Trailing Orbs - Akkha will summon orbs in a trail behind the player as the players move around his arena, indicated with the message The orb will detonate if a player is on top of it (with a minor delay), dealing heavy damage and activating the quadrant's effects. This attack can be avoided by simply standing still, as no orbs will be able to spawn behind you, or simply avoiding stepping on any spawned orbs. The mechanic ends with the message

In his melee form, it is possible to temporarily kite Akkha as he will only change attack styles whenever he is able to attack players. An advanced tactic for higher raid levels is the "butterfly" method, which involves running clockwise or counterclockwise in each quadrant when Akkha is in his melee form. As with most melee-using monsters, Akkha is incapable of diagonally attacking players, which causes him to simply run around in circles chasing the player.
When butterflying with Feeling Special, it is very common for Akkha to use Trailing Orbs. The player is still able to butterfly Akkha as long as they were at the north/south tile of the quadrant before the attack started, though this requires tick-perfect movement as being one tick off will result in the player getting clipped by the orb. This will not work if the player is on the west/east tile when the attack started.
In solo encounters, should Feeling Special and Double Trouble be active, Akkha will always perform Memory Blast and Trailing Orbs together, which can be daunting for inexperienced players. There are two methods as to handling both mechanics at once:
- The normal method, which involves using the centre of the arena to dodge attacks. Players will need to run two tiles instead of walking one, however, to avoid getting clipped by the orb.
- At level 0 or 1, the blasts will expire before the orbs do. At level 2 and higher, it is the opposite way around.
- If using any of the Path Level invocations, it should be noted that level 4+ is actually easier than levels 2 and 3. This is because the orbs will expire much earlier than the memory blasts on level 4+, making the final 2 blasts essentially completely free.
- The staircase method, which involves walking in a "staircase" motion in a quadrant to avoid the blasts. This is a more advanced tactic that should only be used with minimal lag, as this is a tick-centric method. Start at the edge of the arena (one tile from the visible line in the cardinal directions) and do not move until the last light shines and proceed to move one tile accordingly up/down and left/right until the sequence ends.
Enrage phase
Upon depleting all of Akkha's health, he will restore 20% of his health and enter a final stand. He will also enable Protect from Magic and Missiles simultaneously, making melee the only way to damage him. Rather than attacking players, he will launch numerous Unstable Orbs all over the arena. The orbs are white in colour and will only go in one direction, indicated with an arrow underneath them. Getting hit by an orb will deal moderately high damage. The damage scales to the raid and path level, but will cap at 25 damage.
Protect from Magic reduces damage taken from the orbs by 25%, with it being applied before the orbs have their damage capped if above 25. As such, its effectiveness in practice depends on raid level:
- If the raid level is below 300, the damage dealt by the orbs is low enough that Protect from Magic will reduce damage dealt in both solo and team encounters.
- If the raid level is at 300 or above, Protect from Magic will only mitigate damage if multiple players are stacked on the same tile when they are hit (causing the damage to be split between all players on that tile), meaning solo players will not benefit from using Protect from Magic. Solo players are advised to either not pray at all (to see incoming orbs better) or pray Redemption.
Akkha will occupy one shadow at a time and will switch places with another shadow when he takes three successful attacks in solo encounters (the hits of multi-hitting special attacks like dragon claws will all be treated as individual hits, much like how Xarpus' final phase works); in larger sizes, he will take an additional hit per player before swapping places. Deploying a thrall is optional but helpful, as their attacks will not count towards Akkha's counter.
It is highly important to avoid the orbs to the best of your ability, as getting hit by multiple orbs will deal rapid damage, drain a substantial amount of prayer (if Deadly Prayers are active) and likely spell a swift death. Do not rush towards Akkha; slowly path around the orbs to reach him, then remain vigilant for other orbs in the vicinity. This will help reduce a significant amount of damage, and in some cases, you may take no damage at all.
Equipment
Find the two best styles to use against Akkha, as he only protects against 1 combat style at a time.
| Slot | Item (most effective → least effective) | ||||
|---|---|---|---|---|---|
| Tumeken's shadow | Eye of ayak[a 1] | Bow of faerdhinen[a 2] / Toxic blowpipe[a 3] | Eclipse atlatl (With full Eclipse moon armour) / Osmumten's fang | Crossbow + Sanguinesti staff / Trident of the swamp |
| Slot | Item (most effective → least effective) | ||||
|---|---|---|---|---|---|
| Tumeken's shadow | Toxic blowpipe | Bow of faerdhinen[a 2] / Eye of ayak | Eclipse atlatl (With full Eclipse moon armour) | Osmumten's fang |
-
Akkha's memory blast attack. The player correctly remembers where to stand.
-
Akkha's final stand. The unstable orbs move in one direction, as indicated by the arrows under them.


- ^ Performs noticeably better with confliction gauntlets
- ^ 2.0 2.1 Only with a full set of crystal armour.
- ^ Performs worse with lower tier gear and levels compared to alternatives.
Akkha's Invocations
The fight with Akkha can be made more challenging with the use of the following invocations. Should players have the Path Level invocations active, every two levels will cause the following:
- An additional iteration to the Memory Blast attack.
- The unstable orbs deal more damage (still capped at 25 damage).
| Invocation | Effect | Raid lvl modifier | Toggle (solo) | Toggle (group) | Reason | |
|---|---|---|---|---|---|---|
| Double Trouble | Akkha will perform two special attacks at once. | +20 | No | No | Significantly slows down kill times and increases chances of wipe with Feeling Special?, especially if staircase method is not used. | |
| Keep Back | Akkha's ranged and magic attacks will also deal melee damage to anyone next to him. The melee attack will strike first with no animation before the ranged/magic attack. | +10 | Maybe | Maybe | If the main tank can avoid getting hit by Akkha, he will not change combat styles and simply use a special attack, essentially negating the danger from this invocation. If Akkha manages to attack just once, he is likely to change combat styles. Though the melee attack has no visual animation, players still have enough time to pray against the melee attack and then the magic/ranged attack, minimising damage from both styles. The attack also deals slightly less damage than his standard melee. | |
| Stay Vigilant |
|
+15 | Yes | Yes | Invocation is worth learning on higher levels. Essentially free when using the butterfly method. | |
| Feeling Special? |
|
+20 | Yes | Yes | Mostly free invocation, will only need practice on memorising the memory blast attack. Also builds up experience if Double Trouble has to be activated. | |
Path of Apmeken
Challenge room
The Path of Apmeken is the only path that is not a puzzle room, rather it is a pure combat room where players must battle Ba-Ba's pack while handling quick-time events to avoid taking damage while fighting them. The baboons have the same amount of health regardless of raid level. Players must clear 8 waves of baboons to clear the challenge.
The baboons are somewhat strong for their level, with moderately high accuracy and damage. Their health varies, though this is static regardless of raid level and party size. Most importantly, the baboons are extremely resilient to combat styles they are neutral to or strong against, with massive defence bonuses against that entire combat style. Each combat baboon is weak to their corresponding style in the combat triangle, including the shamans. The volatile and cursed baboons are equally weak to ranged and magic.
When using the corresponding combat style strongest against a baboon, the player will always land a maximum hit regardless of accuracy bonuses. This only applies to the brawler, thrower and mages. For the specialist baboons, using a ranged weapon will guarantee a maximum hit.
| Monster | Weaknesses | Description |
| |
|---|---|---|---|---|
| Baboon Brawler | Magic
|
These baboons use melee against the player. | 25 (small) 30 (large) | |
| Baboon Thrower | Melee
|
These baboons use ranged against the player. | 30 (small) 35 (large) | |
| Baboon Mage | Ranged
|
These baboons use magic against the player. | 20 (small) 25 (large) | |
| Baboon Shaman | Ranged
|
These baboons can summon Baboon Thralls to assist their fellow simians in combat. Each shaman can summon up to four or five thralls; if the cap is hit it will switch to a magic attack instead of summoning. If successfully poisoned or envenomed, they will stop spawning thralls; there is no visual indicator when this occurs, so players should take them out immediately. Their magic attacks will also drain prayer by the amount they hit if not protected against. | 40 | |
| Baboon Thrall | Melee Ranged Magic
|
These weak baboons are summoned by shamans and attack with melee. They have lower health compared to other baboons. They share a similar prayer drain mechanic as the shamans, draining some prayer based on a percentage of what the hit dealt, including successful hits that would otherwise be blocked by prayer. | 9 | |
| Volatile Baboon | Ranged Magic
|
These explosive baboons will pick a random player and attempt to reach them. When they reach their target, they will charge up slightly before exploding in a 3x3 AoE around it, dealing heavy damage to anyone near them. The damage dealt appears to be based on the amount of health they had prior to exploding, much like the Zombified Spawn of Vorkath. If any other nearby baboons are caught in the explosion, they are automatically killed regardless of how much health they have left. | ||
| Cursed Baboon | Ranged Magic
|
Unlike the other baboons, this baboon is not aggressive, but will wander around the room, dripping venom pools in the process. Stepping on a pool will cause 6-8 damage per tick as well as inflicting venom if the player lacks venom immunity. The baboon will never walk over a vent tile or the tile in front of a pillar, it will usually not walk under the player. | 20 | |
.png)
.png)
.png)


Upon entering the challenge room, players will be greeted with a room with pillars on either side, four vents located in the corners of the room, and crates containing hammers and neutralising potions. Players should take a hammer and potions.

The first player who enters the room will be given "Apmeken's Sight". This allows for groups to decide who is given the sight first. Throughout the encounter, messages will appear in player's chat boxes stating, The player that has Apmeken's Sight will need to communicate with the other players what needs to be fixed in the room:
- Roof supports - Players should click on the roof supports once to repair them with a hammer. A dragon warhammer works as a substitute. Call "P" (pillars).
- Floor vents - Players should step into the centre of the vent and pour the neutralising potion by clicking it in their inventory. Call "V" (vents).
- Corruption - Players with Apmeken's Sight will see the rest of their team glow dark red. When this occurs, players should all gather on the same tile together, and the player with the sight should then pour a neutralising potion in order to cure the team of corruption. This status will only occur in group encounters. Call "DD" (death-dot). Alternatively, the player with the sight can use the potion on a corrupted player to remove it.
If players fail to meet the necessary amount of roof support repairs, vents cleansed, or fail to cleanse the corruption, every player in the room will take damage, scaled to the amount of actions missed in group encounters. If a player attempts to fix a pillar or cleanse a vent without it needing to be performed, that player will also take damage. The amount of actions required depends on the player count in the raid. Solo players will only be required to pour liquid on one vent or fix one pillar. This scales up in single increments. For example, three players will be required to pour liquid on three vents or repair three pillars. Apmeken's Sight will randomly cycle between players until the encounter is completed in group encounters.
The waves and enemies are listed below, although the table assumes that the player is completing the raid in a solo encounter. In group encounters, an extra combat baboon is added into the mix.
| Wave | Monsters |
|---|---|
| 1 | 2x Brawler, 1x Shaman
|
| 2 | 2x Thrower, 1x Volatile
|
| 3 | 2x Mage, 1x Cursed
|
| 4 | 2x Thrower, 3x Special
|
| 5 | 2x Mage, 1x Shaman, 2x Special
|
| 6 | 2x Brawler, 1x Shaman, 2x Special
|
| 7 | 1x Brawler, 1x Thrower, 1x Shaman, 2x Cursed
|
| 8 | 1x Shaman, 2x Volatile, 2x Special |
Players should use range armour and make switches as necessary in order to one hit brawlers and throwers. Range boosts, along with rigour, should allow the player to kill the remaining baboons in two hits. Focus shamans as soon as they appear, as their thralls are extremely tedious to deal with if they are given the chance to summon many of them. Use volatiles to remove clusters of baboons, and try to eliminate cursed baboons if no other threat is around, as having two or three of them wandering around the area will quickly rag a lot of tiles.
Easy strategy for lower levels (150 or less) of invocation, inexperienced players and/or solo encounters:
Keep Protect from melee active at all times, then follow this order: Mages/Shamans, using ranged weapon > Throwers, using melee weapon > Cursed, using magic or ranged weapon > Brawlers/Thralls, using magic. Only kill brawlers/thralls if no other type is available or clearing the room on the final wave.
Ba-Ba, Guardian of Apmeken
Ba-Ba is the Guardian of Apmeken, Tumeken's avatar of companionship.
Ba-Ba attacks with melee, which deals hefty damage if not protected against. Protect from Melee will block all damage from the attack. She is immediately aggressive to the first player who enters her arena, and she will change aggression afterwards if multiple players are inside based on their current Hitpoints. A base tank can keep aggro on her by keeping their health low.
Throughout the fight, Ba-Ba will make use of various mechanics:
- Rockfall: Ba-Ba will swipe her claws, causing rocks to fall from the ceiling. One will spawn for every player in the arena, and will always land on the tile the player is on when the ability was used. This will deal heavy damage if a player is underneath the shadow. Two large piles of debris will also drop at the same time, also indicated by the same shadow. This has a 3x3 AoE, though players are only damaged if directly under the shadow; otherwise, they will be harmlessly pushed aside. The debris has 10 health, increasing by 10 for every player in the room.
- Rock Throw: Ba-Ba will throw a large boulder at every player in the arena, which will hit them ~6 ticks after being used. This will deal massive damage, but can be mitigated by standing next to debris, an unopened sarcophagus, or a baboon. Using one of these three sources will fully null the incoming damage.
- This attack deals less damage in a group encounter than solo ones, though still very high damage.
- Debris takes 10 damage (instantly destroying it), an unopened sarcophagus 30 damage, and a baboon 12 damage in the process.
- After the attack is used, if debris was destroyed, Ba-Ba will use Rockfall again.
- Shockwave: Ba-Ba will face one of eight directions and shadows will appear on the ground in front of her. Shortly afterwards, she will swipe the area, dealing damage dependent on the player's position if they did not move out of the way. This attack has a rough 5x5 AoE, or 7x7 if Shaking Things Up is active.
- This attack is also used as a "stomp" attack if Ba-Ba's target is underneath her for a prolonged amount of time, and she reacts much faster if prompted to use it in this manner.
- Baboon's Discharge: Ba-Ba will periodically call her troupe to assist her in the form of level 77 baboons, ranging from 2-4 depending on party size. These have 10 health and attack with ranged, and players are guaranteed to land max hits on them. Periodically, one of the baboons will stop attacking players and attempt to open a sarcophagus. They will deal 20 damage per hit to it. If the sarcophagus is opened, it will begin launching unstable energy in a conical pattern in front of it, dealing damage to anyone caught in the blast, increasing in damage the lower the player's Prayer points if Gotta Have Faith is active.
- Rolling Stones: After reaching 66.6% and 33.3% of her health, Ba-Ba will stop attacking, leap to her throne and unleash a massive scream, knocking all players to the other side of the arena. She will then proceed to throw large boulders of rubble that will roll down the slope, which must be destroyed to avoid taking damage. If the player makes contact in front of a boulder, they will be knocked back four tiles and take heavy damage in the process. Ba-Ba will stop the attack after throwing ten sets of boulders or if attacked with melee past the boulder starting point.
- One of the five boulders in each column is cracked; attacking this boulder with ranged will always land as a maximum hit regardless of accuracy bonuses.
- The first column of boulders will always have the cracked boulder appearing in the middle three starting points. After that, subsequent columns will have the cracked boulder appearing up to two positions north or south of the last one.
- The subsequent scream will destroy any debris present in the arena, though it is possible for one to persist if phased at the right time.
- Boulders will instantly destroy any debris and instantly kill any baboons they run into.
- In a solo encounter, the health of the boulders starts at 25 and increases every 2 path levels for Apmeken, meaning they have 27 health in a path level of 2/3 and 31 in a path level of 4+.
| Slot | Item (most effective → least effective) | ||||
|---|---|---|---|---|---|
| Osmumten's fang |  Ghrazi rapier / Zaryte crossbow Ghrazi rapier / Zaryte crossbow | Bow of faerdhinen / Dragon crossbow | Keris partisan of amascut /  Zamorakian hasta Zamorakian hasta | Rune crossbow / Eclipse atlatl (With full Eclipse moon armour) |
Ba-Ba's Invocations
The fight with Ba-Ba can be made more challenging with the use of the following invocations. Should players have the Path Level invocations active, every two levels will cause the following:
- The speed of which the boulders drop from the ceiling will significantly increase.
- The potential AoE from an opened sarcophagi increases.
- The boulders will gain additional health - an additional 2 at level 2 for 27 health, and an additional 4 on top of this at level 4 for 31 health.
| Invocation | Effect | Raid lvl modifier | Toggle (solo) | Toggle (group) | Reason | |
|---|---|---|---|---|---|---|
| Mind the Gap! | When Ba-Ba knocks back the player to the bottom of the room at 66% and 33% health, the pit now becomes a danger zone and any player knocked into it will be instantly killed. | +10 | Yes | Yes | Mostly harmless, only remember to run to the sides or be positioned at the very top of the arena before thresholds. | |
| Gotta Have Faith | Energy blasts from open sarcophagi in Ba-Ba's room will deal additional damage based on the player's remaining prayer points. | +10 | Yes | Yes | Harmless invocation. | |
| Jungle Japes | Ba-Ba's baboons will drop two banana peels upon death. If stepped on or run past, players take a small amount of damage and are stunned for 3 seconds. | +5 | Yes | Yes | Mostly harmless invocation. | |
| Shaking Things Up | The shockwave from Ba-Ba's slam attack has its AoE increased from 3x3 (+1 tile on all centre cardinal directions) to 5x5 (+1 tile on all centre cardinal directions). | +10 | Yes | Yes | Harmless invocation. Arguably makes the shockwave easier to dodge by increasing the amount of time to move out of the way. | |
| Boulderdash | Doubles the speed in which Ba-Ba sends boulders. | +10 | Optional | Optional | Mostly harmless invocation. | |
The Wardens
Once all paths have been completed, the entry to the lower level will open, where players fight the final bosses of the raid: Tumeken's Warden and Elidinis' Warden, large automatons imbued with divine power. All party members must speak to Osmumten (or Amascut during the Into the Tombs miniquest) before the fight can begin.
Before starting the fight, reapply any salt if necessary. If special attacks are being used, also drink a dose of liquid adrenaline.
Phase 1

During the first phase of the battle, the obelisk will begin to emit orbs that transfer energy to the Wardens. They initially flow out on one trough, but it soon branches into three. Players can block these orbs by standing on either side of the energy troughs. This will significantly reduce, although not prevent, the Wardens' energy gain, however each orb absorbed will cause the player to take 3 damage. It is recommended to block one side of the energy troughs to desynchronise the Wardens' charged attacks, as it is much harder and troublesome to deal with if both simultaneously go off. Players may also choose which Warden to fight in the second phase by selectively blocking the flow of energy to the Warden that they would rather avoid.
The obelisk can have its Defence lowered to a minimum level of 60 from 100. The obelisk is weakest to standard ranged damage (e.g. bows). However, any attack type is viable for damaging the obelisk, so the player should use their strongest attack type based on their levels and equipment.
If using special attacks, dump them until the special attack bar reaches 25% (with melee) or 37% (zaryte crossbow). If maging with a magus ring swap, keep the bar at 37% and higher. Defence-draining specials are recommended if not maging, as the obelisk is quite resistant to melee and ranged. This allows for special attacks to be used in the next phase.
When a Warden is charged up (the red circle filled up under them and Amascut's seal forming in front of them), it will discharge one of two types of attacks:
- Charged Shot - slow-moving balls of energy will be shot towards players for unavoidable damage, indicated with the warning . Elidinis' energy is small and the warning message is blue; Tumeken's is larger and the message is orange.
- In group encounters, stand apart from other players for Elidinis' attack to avoid clipping other players with the damage. For Tumeken's attack, stand next to or on top of each other to disperse damage, otherwise massive damage will be taken.
- The damage is capped at 30 for Elidinis and ~7 for Tumeken's, if dealt with properly.
- In solo encounters, there is no way to mitigate the damage dealt. Tumeken's attack is ~33% weaker than Elidinis'. The damage is capped at 45 for Elidinis and 30 for Tumeken's shots.
- In group encounters, stand apart from other players for Elidinis' attack to avoid clipping other players with the damage. For Tumeken's attack, stand next to or on top of each other to disperse damage, otherwise massive damage will be taken.
- UFOs - small floating pyramids will spread throughout the area and discharge damaging lights. If the Wardens perform this attack simultaneously, players can avoid the attack by standing at the edge of the arena, adjacent to the stairs. Otherwise, blocking the energy paths can cause the timings between each to be offset.
The Wardens will alternate between UFOs and Charged Shot respectively until the phase ends. In a solo encounter, block the flow to Tumeken's orb; at 360+ raid level in solo encounters, keeping health at 76 or higher will allow for Redemption, however this will drain all Prayer and result in faster obelisk attacks, which can potentially result in two orb cycles. Alternatively, to delay Tumeken's shot even further, the player can drop their health to a minimum of 46, leaving the player with 1 health. If Tumeken's shot is launched in this case, the player can simply brew back up to 31 or more to survive its shot. This method minimises the risk of two orb cycles due to the significant delay between the two shots.
It is possible to tick-heal the incoming shots, but this requires perfect timing or the player will die through the heal.
Once the obelisk's health hits zero, the Warden whose energy gain was disrupted the most will be destroyed, but the other will activate and engage players in the fight. If an orb is mid-air with ~3 seconds to spare, it will deal damage; otherwise, it will not, so heal accordingly to avoid unexpected deaths.
Depending on invocations, either heal with ambrosia or a sun keris special. The latter will prevent players from two-downing the core however.
It is generally recommended to tackle Elidinis' Warden for this phase, since Tumeken's Warden during phase 2 is much more tedious to handle and Elidinis' phantom bosses are even moreso than Tumeken's in the third phase.
| Slot | Item (most effective → least effective) | ||
|---|---|---|---|
| Tumeken's shadow | Bow of faerdhinen / Eclipse atlatl (With full Eclipse moon armour) / Toxic blowpipe (After defence reduction) Osmumten's fang (Cannot always reach) | Keris partisan of amascut / Zamorakian hasta |
Phase 2
Regardless of which Warden powers up, the second phase of the fight is nearly identical.
The Warden will always have protection prayers active against two attack styles, with Protect from Melee being always active; however Tumeken's Warden will always initially pray against magic, while Elidinis' will always initially pray against ranged.
During this phase, the Warden will have an active shield (similarly to The Nightmare's totems), with the player having 100% accuracy regardless of equipment; however, the damage dealt corresponds to the player's accuracy bonuses. Maximising accuracy bonuses by removing equipment will help increase damage. The twisted bow and Tumeken's shadow are highly recommended if available due to their high accuracy bonuses, resulting in significantly increased damage over any other weapon in their respective combat style. If not attacked for a while, the Warden will slowly restore its shields.
Do not stand near the north, east, south or western central tiles and edges as this will make the player susceptible to the Windmill Beam and Converging Beam attacks, causing unnecessary damage. Likewise, do not stand around the tiles next the obelisk, as players may get zapped for unnecessary damage.
Players must attack the Warden until it is thrown off balance (i.e. the yellow bar above them being full), resulting in the ejection of the core from its body.
The Warden's attacks
The Warden attacks with all styles, with a red skull as a magic attack and a normal skull as a ranged attack. They also have different attack animations before launching, although this is less distinguishable. (For the Magic attack, it raises a blade and has a "zapping" sound effect before firing. For the Ranged attack, it rears back and sounds like the clanging of metal. Do note that the Imprisonment special attack shares the same animation and sounds with the Magic attack, so be prepared to react to either!) Similarly to Zebak, the attacks will only damage on impact, so it's possible to reduce the damage even with late reactions. The Wardens can also perform a melee attack which cannot be reacted to, so praying melee is recommended when in melee distance.
While the Wardens can target and chase players, Elidinis' Warden will stop a few tiles short of its target. On the other hand, Tumeken's Warden will close the gap, making Protect from Melee mandatory since it is not feasible to continually run away from it.
Both of the Wardens are weak to magic, though their prayers will prevent it from being exploited once every two cycles. They are equally resistant to all melee and ranged attacks.
The Warden also has two special attacks of its own. The special attacks are launched using the magic attack animation, so make sure to watch carefully.
- Divine Projectile - the Warden will disable all players' overhead prayers and fire either a red scimitar (melee), white arrow (ranged) or blue spell (magic) at everyone. Depending on the projectile launched, use the according prayer to block it, or high damage will be taken. This attack is used when the Warden has more than 55% its health.
- Imprisonment - the Warden will fire a dark-coloured projectile at the player's last position when the attack was initiated. Getting hit by this projectile will encase the player in stone, temporarily preventing them from moving or attacking. It is still possible to change overhead prayers and eat while imprisoned. This attack is used when the Warden has less than 55% of its health.
Obelisk's attacks
While the player is fighting the Warden, the obelisk will also discharge a series of attacks in a set pattern; it can only perform a special attack again after the other attacks in that set have been exhausted. Getting caught in any of these will deal moderately high damage and, if the Penetration invocation is enabled, temporarily disable overhead prayers:
- Converging Beam - the obelisk will shoot out two beams heading north and south of the arena before shooting another two beams to the east and west. Each beam will spread out and converge towards the obelisk. Players can avoid the beams by staying within the opposite quadrant of where the beams had initially irradiated. Skilled players may avoid the damage from the incoming beams by running over them with proper timing. Red lightning will surround the obelisk as a warning indicator for the attack.
- Windmill Beam - the obelisk will periodically shoot out beams clockwise in four directions like a windmill. The floor will briefly glow before the beam is discharged, giving players some time to move away from it. Orange lightning will surround the obelisk as a warning indicator for the attack.
- Lightning Skull - the obelisk will launch several red skulls and discharge lightning outwards in 7x7 areas centred on where each skull landed. The two tiles in each cardinal direction (not diagonally) of the tile where the skull will land are safe to stand and will allow the player to avoid taking damage from the lightning. Yellow lightning will surround the obelisk as a warning indicator for the attack.
-
A player fights Elidinis' Warden, while the obelisk unleashes the Converging Beam attack.
-
The obelisk unleashes the Windmill Beam attack.
-
The obelisk unleashes the Lightning Skull attack. Shadows on the ground indicate where the skull lands; the player here is standing in one of the safe tiles where the skull landed to avoid damage from the lightning.
-
Green tiles indicate safe tiles to stand on to avoid the Lightning Skull attack.
-
Set of tile pairs that can be used to completely avoid the Windmill Beam attack when facing Elidinis' Warden. Stand on any of the light green or light blue tiles and run diagonally to corresponding dark green or dark blue tile when the beam gets next to the tile player is standing on. Return to the original tile when it's clear from beam again, repeat.
-
Warden phase 2: windmill rotation. The mill will start in 4 places at the brightest blue colour and rotate anti-clockwise around the room. You can use the graphics to setup tile markers to better avoid getting hit using minimal movements.


Once the Warden's core is ejected, players must damage it as it essentially acts as the Warden's "true" health. Damage dealt to the core deals five times the damage towards the Warden, so a hit of 55 would deal 275 damage. Players will always deal their max hit when using melee against the Warden's core, so it is highly recommended to bring the strongest and fastest melee weapon possible (e.g. a Blade of saeldor or Ghrazi rapier).
This table shows how long the core is exposed, with the duration increasing as the Warden's health falls:
| Warden HP | Core Exposure |
|---|---|
| 100%-80% | 21 ticks (12.6s) |
| 79.9%-60% | 29 ticks (17.4s) |
| 59.9%-0% | 37 ticks (22.2s) |
Due to melee attacks landing as maximum hits, a common and popular method is to use the dragon dagger special attack while under the effects of liquid adrenaline, causing every special attack to cost 12.5% energy. With best-in-slot (or near, such as not bringing an ultor ring, using an amulet of blood fury instead of amulet of torture), the player can easily deal upwards of 450+ damage per special attack, quickly whittling away at the core's durability.
Teams can choose between a two or three-down cycle, depending on the needs of the team and their equipment. A two-down cycle results in faster raids, while a three-down results in slightly more points per raid.
Ideally, all player(s), assuming the invocations and gear allow for it, should dump at least five dragon dagger specials and finish up with a two-handed weapon for the first core exposure. This should drop the Warden's health below 55% in most scenarios, resulting in it launching a binding projectile rather than the prayer disabling one. If the team is intending to do a two-down phase, use Death Charge when the core is exposed, as the game considers it to be "dead" once the Warden returns it back into its body, restoring special attack energy. If the effects of liquid adrenaline expire, drink it again before the core is exposed a second time, then dump all available special attacks. The player should have enough energy to perform at least five or six special attacks beforehand, or they will get a three-down instead.
If intending to do a three-down phase, swap to the 4-tick weapon during the second core. Three-downs, while a bit slower, give a significant point increase (roughly a 0.3-0.4% increase in a solo 400 raid level); subsequent downs after the third will not yield any additional points. In order to three-down in a solo run with 500 invocation level and Overly Draining on, players should ensure they have a minimum of +134 melee strength bonus (+136 if using Dragon Defender) and end each down with an auto-attack from a godsword. You may also choose to use max melee gear with an inquisitor's mace to three down without a godsword, however this is only recommended for experienced players.
Once the Warden's core is destroyed, its body will collapse. However, it will use the last of its power to restore the Warden that was destroyed at the end of the first phase. The obelisk will grow unstable and explode, and the room becomes warped in a void, beginning the final phase of the fight. If any potions are dropped to make room for space, quickly pick them up before the next phase begins.
| Slot | Item (most effective → least effective) | ||
|---|---|---|---|
| Tumeken's shadow + Twisted bow | Eye of ayak + Bow of faerdhinen | Best powered staff + Toxic blowpipe |
| Slot | Item (most effective → least effective) | ||||
|---|---|---|---|---|---|
| Dragon dagger (Special attack) + Elder maul > Elder maul > Bandos godsword last hit Bandos godsword last hit | Ghrazi rapier / Blade of saeldor / Blade of saeldor /Inquisitor's mace | Abyssal tentacle > Voidwaker Voidwaker | Keris partisan of amascut / Zamorakian hasta | Keris partisan / Osmumten's fang |
Phase 3

The restored Warden will not use any protection prayers or perform any combat style attacks. Rather, it will raise/slam the ground as its primary means of attack, dealing typeless damage.
The Warden's defence bonuses are adjusted during this phase, being less resistant to melee and equally weak against both magic and ranged. Its Defence can be lowered to a minimum level of 120 from 150.
The Warden will always raise the floors to its right (east) first, then its left, and lastly slam the ground in both directions. For the Warden's side attacks, players must stand at least one tile left/right from the centre opposite of where the Warden is facing. When the Warden slams in both directions, players must stay in the centre tiles in front of its face. It is best to stay within the three central floor columns to minimize unnecessary movement. Failing to stand in the correct areas for these attacks will result in the player being hit for moderate or heavy damage. Like Akkha's quadrant attacks, the attack takes time to travel, so the player can avoid the attack with late reactions as long as they are 6-9 tiles away from the boss.
The frequency of the slams depends if Overclocked, Overclocked 2 and/or Insanity is active; by default, the Warden has an attack speed of 7, and these will decrease them to 6, 4 and 3 ticks between attacks.

At 80%, 60%, 40% and 20% health, the Warden will stop slamming the ground and instead focus its energies, creating a set amount of Energy Siphons onto the field. The amount created are dependent on team size, with solo and groups having their own batch. Each siphon is immune to ranged and magic damage, and must be destroyed with melee. The siphons start off with 1 hitpoint, but will increase by 1 when four players are present, increasing another 1 for every two players afterwards for 3 and 4 health at 6 and 8 players respectively. The layout and health is determined by the amount of players remaining in the arena; e.g. if a six-man team fought the boss and one player died, subsequent siphon sets would have 2 health instead of 3. Likewise, if two players remain and one dies, the next set of siphons would use the solo layout instead. There is no delay when attacking the siphon with melee.
Players must force the energies back into the Warden before it charges them for detonation; when a siphon is sufficiently damaged, it will face the Warden instead. If all of the siphons are reversed in time, they will collide into them, dealing damage that scales to a percentage of their maximum health. If the siphons are not reversed in time, the Warden will detonate all of them, unleashing a shockwave from the centre of the arena. This shockwave will deal immense, if not outright fatal damage if caught in it; this damage scales to raid level and is also determined by the amount of siphons that were untouched prior to explosion. Essentially, failing to reverse two siphons in higher enrage levels will result in instant death if the shockwave is not avoided. The amount of time allotted to destroy the siphons is dependent on group size and whether or not Insanity is active.
It is possible to avoid the shockwave, but this is not feasible and should be avoided for the sake of completion. If the player is looking for the maximum points per raid, they can skull skip, which involves ignoring the mechanic (mostly or completely). Since the shockwave is avoidable, standing sufficiently far enough from the centre and running towards the middle shortly after the explosion will avoid the damage completely. The damage the Warden would have taken from properly clearing the mechanic would not occur, and the player can take advantage of the extra health to get more points. However, this is only feasible on a sufficiently high raid level (at least 400+) and requires good gear, as this will set back times.
During the second and third batch of siphons, a phantom of the bosses from the upper floor will appear and assist it in the fight. Players who face Elidinis' Warden during this phase will get Akkha's Phantom and Kephri's Phantom, while those who face Tumeken's Warden will get Zebak's Phantom and Ba-Ba's Phantom respectively. Any invocations that applied to their original will apply to the phantom boss, so players should be wary of this prior to the fight start. Often, players will fight Tumeken's Warden, since Zebak and Ba-Ba don't have any invocations that affects them for the Warden fight.
Enrage phase

Upon reaching 5% of its health, the Warden will stop slamming the ground and instead begin to shake violently, obtaining a one-time heal of 20.0% of its maximum health in the process. Its Defence is additionally raised 30 levels to 180, though the cap still remains at 120.
The phantom that was observing the fight from behind the Warden will begin to consume the arena, ripping out the furthest row of tiles in the arena periodically, up until the last row of tiles directly in front of the Warden. Instead of slamming attacks, bolts of lightning will begin to strike the arena, indicated with a growing shadow over the target tile. The rate of these bolts are unaffected by invocations. Getting struck by one will additionally deal moderate damage.
The phantom bosses will continue attacking as usual, but will have an increased attack speed with Insanity, which can be further increased depending on the boss' path level, if applicable. Players should be mindful of the second boss, as they will reduce the amount of space to move around and can deal high damage if the player runs into their attacks.
Due to the importance of clearing the phase quickly, players should retain ambrosia, using it if they fall below 50 or less health. Brewing is not recommended, as this will lower stats and likely get the player killed since they already have so much to focus on. If ambrosia is not available, the second best option is to heal with a Keris of the Sun special attack.
If the last row is reached, the player should prioritise standing on larger shadows, as there is a small grace time after it has been struck before it can be targeted again. Keep prayer high at all times, especially if a sun keris special has to be used to heal.
Once the Warden's health reaches 0, it will lose its grip on the arena as the phantom slowly consumes it, ripping it to pieces. A white teleportation crystal will appear from where the Warden once stood, leading players to Osmumten's chamber, where they may collect their rewards.
| Slot | Item (most effective → least effective) | ||||
|---|---|---|---|---|---|
| Tumeken's shadow | Twisted bow | Eye of ayak / Bow of faerdhinen / Zaryte crossbow / Eclipse atlatl (With full Eclipse moon armour) | Armadyl crossbow / Dragon crossbow | Rune crossbow |
The Wardens' Invocations
The fight with the Wardens can be made more challenging with the use of the following invocations:
| Invocation | Effect | Raid lvl modifier | Toggle (solo) | Toggle (group) | Reason | |
|---|---|---|---|---|---|---|
| Ancient Haste | During the first phase of the Wardens' fight, the Wardens will charge at a faster rate. | +10 | Yes | Yes | Phase can be cleared fast with decent gear. | |
| Acceleration | During the second phase of the Wardens' fight, the Warden attacks faster while the obelisk charges faster. | +10 | Yes | Yes | Warden does not deal much damage through prayers, obelisk attacks can be easily avoided. | |
| Penetration | During the second phase of the Wardens' fight, the obelisk will deal more damage with successful attacks and also temporarily disable overhead prayers. | +10 | Yes | Yes | Dodging obelisk attacks nulls this invocation's effects. | |
| Overclocked | During the final phase of the Wardens' fight, the slam attack is performed 1 tick faster. | +10 | Yes | Yes | Harmless invocation. | |
| Overclocked 2 | During the final phase of the Wardens' fight, the slam attack is performed 2 ticks faster.
Overclocked must be active in order to activate this invocation. |
+10 | Yes | Yes | Harmless invocation. | |
| Insanity | During the final phase of the Wardens' fight, the following are applied:
Overclocked 2 must be active in order to activate this invocation. |
+50 | Yes if experienced; no otherwise | Yes | Free invocation once mastered. | |
References
| NPCs |
| ||||||||||||||||||||||||||||||
|---|---|---|---|---|---|---|---|---|---|---|---|---|---|---|---|---|---|---|---|---|---|---|---|---|---|---|---|---|---|---|---|
| Bosses |
| ||||||||||||||||||||||||||||||
| Items |
| ||||||||||||||||||||||||||||||
| Rewards |
| ||||||||||||||||||||||||||||||
| Scenery | |||||||||||||||||||||||||||||||
| Music | |||||||||||||||||||||||||||||||
| Related |
| ||||||||||||||||||||||||||||||