General Graardor/Strategies
This copy was last processed on . The copied wiki revision is dated .
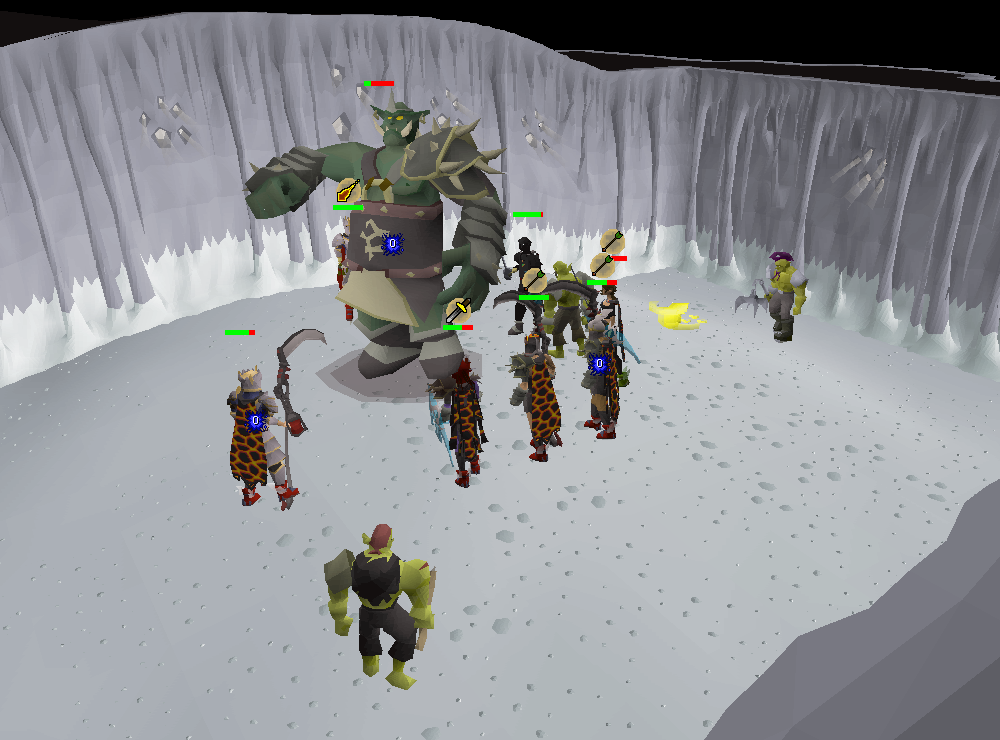
This is a guide for killing General Graardor with Melee and Ranged. It has the basics of attacking and tanking, as well as providing a few examples of what equipment to bring.
Note that ranged is the most straightforward combat style to use for solo players, since with proper play it is possible to avoid all damage from Graardor. In teams, it is recommended to have one player tank with melee while the rest of the party uses either melee or ranged.
Requirements
- Completion of Death Plateau and partial completion of Troll Stronghold after defeating Dad.
- Alternatively, Ghommal's hilt can be used to teleport to Trollheim without requiring either quest
- One rope is required to access the dungeon for the first time.
- Level 70 Strength is required to enter Bandos' Stronghold (cannot be boosted).
- At least 43 Prayer for access to the protection prayers.
- A hammer (if not bringing an Elder maul or Dragon Warhammer).
Mechanics
Attack Styles
Graardor attacks with both Melee and Ranged:
- The melee attack consists of a simple punch that deals up to 60 damage. He has a 2/3 chance of using melee whenever he attacks.
- As his Ranged attack, Graardor slams the ground to emit shockwaves to all players inside his chamber, dealing between 15 and 35 damage on successful hits. Despite it being a Ranged attack, Graardor can only use it within melee range of his current target. He has a 1/3 chance of using Ranged whenever he attacks.
Bodyguards
Graardor is protected by three goblin sergeants:
- Sergeant Grimspike is the Ranged bodyguard, who throws axes at his target, dealing up to 21 damage.
- Sergeant Steelwill is the Magic bodyguard, who launches yellow projectiles at his target, dealing up to 15 damage.
- Sergeant Strongstack is the melee bodyguard, who attacks his target with his flail, dealing up to 15 damage.
- The sergeants tend to target the player who last damaged Graardor (on the minions' 5th tick), and the player who deals Graardor's final blow will likely be targeted. Effectively, players with a faster attack speed will tend to be targeted as their attack is more likely to land on their 5th tick. This also means a tank with a Dinh's bulwark on Defence mode will never be focused on, allowing for prioritising Ranged Defence.
General Strategy
General Graardor is a formidable foe, with high Defence, extremely powerful melee attacks, and Ranged attacks capable of hitting every player in the room at once. He is also accompanied by three goblin sergeants who use Melee (Sergeant Strongstack), Ranged (Sergeant Grimspike), and Magic (Sergeant Steelwill) attacks.
In terms of Defence, as the bulk of incoming damage potential comes from his melee and Ranged attacks, players targeted by him directly should use Protect from Melee while wearing equipment with high Ranged Defence and moderate Magic Defence; in groups, those not targeted by him directly should use Protect from Missiles.
When Graardor dies, his sergeants will all focus on a single player, typically the one who landed the killing blow on Graardor. With most setups leaving players the most vulnerable to Magic, the targeted player should first switch to Protect from Magic and focus on killing Steelwill. After that, switch to Protect from Missiles so as to block Grimspike's powerful and accurate attacks, leaving Strongstack - the least threatening of the three - for last.
Solo
In solo encounters, the player has the option of choosing between all three combat styles; however, Ranged is only used for advanced methods that involve kiting Graardor due to the armour's terrible Ranged Defence. Melee is the simplest way to fight Graardor, but typically involves short trips and the slowest kills overall.
Without justiciar armour, the player will need to bring a ranged body as to protect from Steelwill's attacks as much as possible. Protect from Melee is mandatory to avoid getting killed by Graardor's melee attacks. The player should keep their health above 60 to prevent getting combo'd by Graardor and another sergeant as they will be frequently hit by ranged attacks. With justiciar, the full set can be taken with a spectral or elysian spirit shield, as it provides very high ranged defence and minimises the damage taken from any that should hit, along with reducing Steelwill's accuracy/damage respectively. Grimspike is unlikely to hit as hard in the process. An amulet of blood fury is usually prioritised over offensive alternatives. After killing Graardor, kill Steelwill and then use Guthan's or barrage stack Grimspike and Strongstack as needed.
Graardor has an attack speed of 6, or 3.6 seconds between attacks. 4-tick weapons attack once every 2.4 seconds, so the player can attack Graardor twice before he can attack. After attacking Graardor twice, walk under before attacking him again. If using both a shield and defender, the defender can be used on every odd-numbered attack, provided there is no interruption.
As magic, the player will need to be on the Ancient Magicks and cast Ice Barrage to freeze Graardor, ideally with an Ice ancient sceptre as it is 10% more accurate against an unfrozen target and binds them for 21.6 seconds. Once Graardor is frozen, attack him from a distance until he breaks free, after which the player should barrage him after a few seconds have passed, as subsequent freezes will not bind briefly once it wears off. If Graardor gets too close to the player, swapping to Protect from Melee is beneficial. Alternatively, advanced kiting methods can be utilised if using Tumeken's shadow for quickest kills.
When Graardor dies, players should ideally kill off Steelwill first, then lure Strongstack over to Grimspike, and use Blood Barrage to heal off both of them. Try to ensure that both attack on different ticks to avoid unnecessary damage while healing. A Blood ancient sceptre can be useful for this, as it allows the player to overheal 10% of their base hitpoints (108 hitpoints at level 99) while also healing 2.5% more effectively than a normal blood spell.
Graardor and his bodyguards drop bones upon death, so Bones to Peaches can be used to restore 32 health after each kill. Graardor drops Super restores and his bodyguards drop kebabs, chilli potatoes, and sharks as food to help prolong trips.
Altar-door
| Tile markers |
|---|
[{"regionX":48,"z":2,"regionId":11347,"label":"Shoot-Altar","regionY":42,"color":"#FFFF0000"},{"regionX":48,"z":2,"regionId":11347,"label":"A","regionY":48,"color":"#FFFF0000"},{"regionX":48,"z":2,"regionId":11347,"label":"D","regionY":51,"color":"#FF1DFF00"},{"regionX":48,"z":2,"regionId":11347,"label":"A","regionY":54,"color":"#FFFF0000"},{"regionX":48,"z":2,"regionId":11347,"label":"Shoot-Door","regionY":57,"color":"#FF1DFF00"},{"regionX":48,"z":2,"regionId":11347,"label":"D","regionY":45,"color":"#FF1DFF00"},{"regionX":54,"z":2,"regionId":11347,"label":"Shoot-Altar","regionY":42,"color":"#FFFF0000"},{"regionX":54,"z":2,"regionId":11347,"label":"D","regionY":45,"color":"#FF1DFF00"},{"regionX":54,"z":2,"regionId":11347,"label":"A","regionY":48,"color":"#FFFF0000"},{"regionX":54,"z":2,"regionId":11347,"label":"D","regionY":51,"color":"#FF1DFF00"},{"regionX":54,"z":2,"regionId":11347,"label":"A","regionY":54,"color":"#FFFF0000"},{"regionX":54,"z":2,"regionId":11347,"label":"Shoot-Door","regionY":57,"color":"#FF1DFF00"}] |
| Tile markers guide • Data |
The altar-door (or door-altar) method is one of the solo ranged kiting methods. It involves attacking in between Red-Xing the Bandos altar and the entrance door, which, if done correctly, will cause Graardor to never attack the player. This method requires a weapon with an attack speed of 4 to work; the most commonly used weapon for this method is the bow of Faerdhinen on rapid. It is strongly recommended to have the "Highlight current tile" setting enabled if playing on the official client, or the "Current tile" setting on the Tile Indicators plugin enabled if playing on RuneLite.
Middle row (subsequent kills:)
- Pray Protect from Missiles. Stand on the southmost tile. Shoot Graardor right as he spawns, then click the altar.
- Shoot Graardor when your true tile is on the red tiles marked "A". After shooting him, click later along the row or on the wall.
- If you need to heal, do so between the second and third attack, or between the third and fourth attack in the cycle. You cannot heal during the red-x click.
- If you have made a mistake and need to get back in cycle, skip attacking on the other tiles and run straight to the "Shoot-Door"/"Shoot-Altar" tile while praying Protect from Melee. As soon as Graardor's attack lands, click on the door/altar. Shoot on the next tile as normal. Switch back to Protect from Missiles whenever safe to do so; it is recommended to set your quick prayers to Protect from Missiles and Eagle Eye/Deadeye/Rigour.
- Once you have reached the tile marked "Shoot-Door", shoot Graardor, then click the door.
- Shoot Graardor when your true tile is on the green tiles marked "D". After shooting him, click later along the row or on the wall.
- Repeat steps 2-4 until Graardor is dead. Stack the minions and kill them with Blood Barrage.
West row (first kill:)
- Enter the room, praying Protect from Missiles. Spam-click the tile labelled "Shoot-Door" on the west row.
- As soon as your true tile is on that tile, shoot Graardor, then click the door. Carry on from step 2 above, as you would for subsequent kills.
- The west row can be used for subsequent kills, though it will be slightly slower than the middle row due to having to spam-click the "Shoot-Door" tile every time, which causes you to begin attacking later. However, this is safer for players inexperienced with the method, as getting out of cycle at the start of the middle row risks taking a melee attack from Graardor, thus requiring to get back in cycle and likely negating some of the time saved.
Team
Team settings allow for more flexibility at Graardor as more players will be damaging him, reducing the frequency of ranged attacks in general. Tanks can follow the conventional or justiciar melee setup to tank; due to the extra DPS, they will typically prioritise ranged defence over magic as the bodyguards prioritise those that damage Graardor. An ideal form of tanking is to bring full justiciar with Dinh's bulwark for even more ranged defence, although they are unlikely to gain any personal kills doing so.
Attackers can also prioritise offensive capability over defensive, although they will probably have to watch out for Steelwill who will hit more frequently. Do not attack Graardor until the base tank has obtained his attention, or you will likely have to tank for the duration of the encounter.
After Graardor dies, kill Steelwill, Grimspike and Strongstack in that order. It is common courtesy for the base tank to fight Strongstack alone with Guthan's; unless requested otherwise, Grimspike is also killed by the DPS.
A useful strategy for teams is to drop an item underneath Graardor's spawn spot and have everyone fight him in melee distance. When Graardor focuses on a player, that player will rapidly click on the dropped item. Due to unique mechanics similar to the chinchompa method for Kree'arra, Graardor will be stuck on the spot and be unable to attack. Everyone can attack Graardor in turn until he focuses on another player, in which that player goes under and rapidly clicks on the item until Graardor is killed. This is restricted to melee only, however.
Dolo
Killing General Graardor at max efficiency (50+ kills per hour) entails fighting him on two accounts at the same time (“dolo’ing”) and hopping between two worlds to avoid waiting out the respawn timer.
While various setups can be used to dolo Graardor, the most efficient method is to tank using blood barrage and DPS using max mage. The main account should be equipped with a Tumeken’s shadow and the best magic damage boosting gear possible. The alt account should be equipped with a staff or wand that can auto-cast ancients (such as a Kodai wand), as well as decent tank equipment that has minimal negative magic bonuses (a Bandos chestplate with an Elite void robe bottom is a good option).
Pray ranged on the main and pray melee on the alt. Upon entering the room or when General Graardor spawns, attack him on the alt account, then locate a mage or ranged minion that is not near the north or east walls of the boss room. Move the alt next to this minion, on its south side. This will drag the melee minion and General Graardor’s south-west tile (which determines if he is hit by the blood barrage or not) into a stack on top of the ranged or mage minion, and all three can then be barraged on the tank alt to heal over incoming damage.
Once the blood barrage stack is set and the tank is attacking it, move the main to DD (stand under) the tank account, then attack Graardor on the main. This ensures that the stack does not come apart if minions switch aggro. Continue to attack on both accounts until the boss and all minions are dead, then prepare to switch worlds and repeat the process.
A third account can be used to resupply the two accounts when necessary, avoiding unnecessary time spent gathering kill count.
Tips
- Goblins are an easy target for Bandos killcount, and also have a chance to drop a hammer (approx. 1/15, or 1/2 if you don't have one in your inventory).
- You do not need a hammer to bang the door if bringing a dragon warhammer or elder maul.
- Walking under Graardor can buy a tank some time to eat food without taking unnecessary damage. It can be also done at certain intervals to make Graardor "miss" an attack.
- Experienced players can "tick eat"; tick eating is healing on a critical level of health right before taking damage, essentially surviving a hit that would have normally killed the player.
- Bones to Peaches can help extend trips; each kill rotation yields 32 Hitpoints worth of bones.
- The minions will drop chilli potatoes and sharks. If there is an excess of food, continually pick up and drop food again to prevent it from disappearing (aka "juggling"). This is not necessary if utilizing a private instance, as the despawn timer for dropped items becomes 3 hours inside instances.
- Guthan's equipment may be used to heal on the melee and ranged minions if desired. Cooperate with your team to maximise healing opportunities. Bring fewer brews and more restores if you choose this method of healing. Guthan's armour also doubles as good primary equipment for tanks.
- If you are assigned General Graardor as your Slayer task, use your Slayer helmet variant of choice to take advantage of its accuracy and damage boost.
- An Amulet of blood fury is generally ideal for tank setups as it emphasises healing, defensive bonuses and prayer bonuses.
- During the fight, the bodyguards will target the most recent player who attacked Graardor. Because of this, weapons with a slower attack speed will result in the player being targeted less often in a team. This can be useful in a team where some players have significantly lower defences.
- Boost Potion Share and Stat Restore Pot Share can be used in teams to significantly extend trips, especially in duos, and the Holy wrench or items which share its effect are recommended on the player sharing the Super restores.
Suggested skills
80+ (95+ Tank)
80+
70+ (Required, 80+ Recommended)
70+ (90+ Tank)
80+
70+ (75+ Recommended)
44+ (Eagle Eye, 70+ Piety, 74+ Rigour)
Equipment
Solo
Killing General Graardor with Melee solo is generally not recommended except if looking to complete The Frozen Door or if you are comfortable flicking prayers between minions and Graardor himself, as the damage taken is significantly greater than with magic or ranged options. If choosing this, an Osmumten's fang is strongly recommended, and all equipment and gear downgrades will significantly affect the amount of kills that can be obtained, down to as few as one per trip with no flicking and poor damage output.


Inventory
 |  |  |  |
 | | |  |
| | | |
 | | | |
 | | | |
| |  |  |
- A weapon to autocast Ancient Magicks (such as a blood ancient sceptre, kodai wand or ancient staff) if using Blood Barrage, with a Magic robe top switch such as a virtus robe top or ancestral robe top
- Saradomin godsword or Elder maul/Dragon warhammer (for special attacks)
- Avernic or dragon defender switch if using dragon warhammer
- Rune pouch filled with runes for Blood Barrage
- Bones to peaches (tablet) tablets (or runes for Bones to Peaches in a rune pouch if not using Blood Barrage)
- 2-4 super combat potions
- 5-6 Super restores
- 8-10 Saradomin brews
- Teleport to house (tablet) or a one-click teleport (for emergency), can bring Max cape instead for the Construction and Prayer cape perks
- Rest high-healing food such as anglerfish or manta rays
General Graardor can effectively be killed with Tumeken's shadow, due to its extremely high accuracy and damage. However, due to its multiplicative effect, small downgrades in gear and levels can have a notable impact on damage output, and it is strongly recommended, if not essentially required, to have access to gear such as Ancestral robes, an occult necklace and confliction gauntlets. Pairing the Eye of ayak with confliction gauntlets can be an effective strategy if freezing General Graardor due to the increased accuracy buff the confliction gauntlets provide as well. While lower tier magic weapons can be used, they will be significantly less effective and should not be used except in combination with otherwise best-in-slot gear. With a 40% Earth spell weakness, Earth Wave or Earth Surge can be a competitive option for DPS, but being on the Standard spellbook means relying on other methods to restore health.
| Slot | Item (most effective → least effective) | ||||
|---|---|---|---|---|---|
 |  Slayer helmet (i) (on task) Slayer helmet (i) (on task) |  Ancestral hat Ancestral hat |  Virtus mask Virtus mask |  Ahrim's hood (or: Ahrim's hood (or: ) ) | N/A |
 | Occult necklace | N/A | N/A | N/A | N/A |
 | Imbued zamorak cape | N/A | N/A | N/A | N/A |
 | Ancestral robe top | Virtus robe top | Ahrim's robetop (or:) | N/A | N/A |
 | Ancestral robe bottom | Virtus robe bottom | Ahrim's robeskirt (or:) | N/A | N/A |
 | Tumeken's shadow | Eye of ayak | N/A | N/A | N/A |
 | Elidinis' ward (f) | Arcane spirit shield | Ancient wyvern shield | Malediction ward / Tome of earth[a] | Mage's book > Book of darkness |
 |  War blessing War blessing | N/A | N/A | N/A | N/A |
 | Confliction gauntlets | Tormented bracelet |  Barrows gloves Barrows gloves | N/A | N/A |
 |  Avernic treads (max) Avernic treads (max) | Eternal boots | Infinity boots / Aranea boots | Devout boots | N/A |
 | Magus ring | Seers ring (i) |  Ring of suffering (ri) Ring of suffering (ri) |  Ring of the gods (i) Ring of the gods (i) | N/A |
 | Accursed sceptre | Eye of ayak | N/A | N/A | N/A |
Inventory
- Kodai wand or other weapon to autocast Ancient Magicks (bring water runes for ice barrage if not using Kodai)
- Rune pouch filled with runes for Ice Barrage and Blood Barrage
- If using the standard spellbook, bring runes for earth spells, Entangle, High Level Alchemy, and Bones to Peaches
- Bones to peaches tablets
- Saturated heart
- 2-3 Saradomin brews, to be used in emergencies or immediately before the Saturated heart can be activated again
- 4-8 high-healing food such as anglerfish or manta rays
- Teleport to house (tablet) or a one-click teleport (for emergency)
- Rest Super restores
| Slot | Item (most effective → least effective) | ||||
|---|---|---|---|---|---|
| Slayer helmet (i) (on task) / Crystal helm[a] | Masori mask (f) | Bandos coif | Armadyl helmet | Karil's coif |
| Necklace of rupture | Necklace of anguish |  Amulet of fury Amulet of fury | N/A | N/A |
| Dizana's quiver | Ava's assembler | Ava's accumulator | N/A | N/A |
| Crystal body[a] |  Masori body (f) Masori body (f) | Armadyl chestplate |  Karil's leathertop Karil's leathertop | N/A |
| Crystal legs[a] | Masori chaps (f) | Armadyl chainskirt | Karil's leatherskirt | N/A |
| Bow of faerdhinen[a] | Zaryte crossbow | Armadyl crossbow / Dragon crossbow | Rune crossbow | N/A |
| Dragonfire ward | Twisted buckler | Odium ward | Book of law | N/A |
| War blessing /  Unholy blessing Unholy blessing | Diamond dragon bolts (e) | Diamond bolts (e) | N/A | N/A |
| Zaryte vambraces | Zamorak bracers / Bandos bracers | Barrows gloves | N/A | N/A |
| Avernic treads (max) | Zamorak d'hide boots / Bandos d'hide boots | Mixed hide boots | N/A | N/A |
| Ring of suffering (i) / Venator ring | Archers ring (i) | Ring of shadows | Ring of the gods (i) | Explorer's ring |
| Toxic blowpipe (for mage minion after melee/ranged are dead) | N/A | N/A | N/A | N/A |
Inventory
- A Bandos and a Zamorak item should be brought.
- Rune pouch with runes for blood barrage
- A magic weapon that can auto-cast ancient magicks and 1-2 pieces of magic equipment.
- Bones to peaches tablets for an additional 32hp restore per kill.
- 4-8 Saradomin brews or Cooked karambwan for eating mid kill.
- 2-4 Divine bastion potions, or divine ranging potions.
- Explorer's ring 4 for run energy restoration if needed, and for casting high level alchemy on rune item drops.
Team
Inventory
- Guthan the Infested's set (for healing off of minions)
- Saradomin godsword > Bandos godsword (special attacks)
- Bones to peaches (tablet) (or runes for Bones to Peaches, High Alchemy, and Trollheim teleport in a divine rune pouch if not using the Lunar spellbook)
- Divine rune pouch with the runes for casting Boost potion share, Stat restore pot share, and Vengeance spells
- 1 Anglerfish
- 4 Super combat potions
- 8 Super restores
- 7 Saradomin brews
- Teleport to house (tablet) or a one-click teleport (for emergency), can bring Max cape instead for the Construction and Prayer cape perks
- Hammer (if Nex banking or skipping killcount with Ecumenical keys)
Inventory
- Toxic blowpipe (special attacks) for healing off of minions)
- 1 Anglerfish
- Bones to peaches (tablet) (or runes for Bones to Peaches, High Alchemy, and Trollheim teleport in a divine rune pouch if not using the Lunar spellbook)
- Divine rune pouch with the runes for casting Boost potion share, Stat restore pot share, and Vengeance spells
- 4 Ranging potions
- 7 Super restores
- 12 Saradomin brews
- Teleport to house (tablet) or a one-click teleport (for emergency)
- Hammer (if Nex banking or skipping killcount with Ecumenical keys)
Inventory
- Guthan the Infested's set (for healing off of minions)
- Voidwaker (for special attacks)
- Divine rune pouch (with runes to cast Bones to Peaches, High Level Alchemy, and Trollheim teleport)
- 1 Anglerfish
- 3 Super combat potion
- 10 Super restores
- 6 Saradomin brews
- Teleport to house (tablet) or a one-click teleport (for emergency), can bring Max cape instead for the Construction and Prayer cape perks
- Hammer (if Nex banking or skipping killcount with Ecumenical keys)
- Bones to peaches (tablet) tablets if Bones to Peaches spell isn't unlocked.
Inventory
- Elder maul/Dragon warhammer (for special attacks)
- Guthan the Infested's equipment
- 3-6 Saradomin brews
- 6-8 Super restores
- 3-5 Divine ranging potions
- Rune pouch with runes for High Level Alchemy, and Trollheim Teleport, Bones to Peaches or empty for picking up Cosmic runes
- 2 Trollheim teleport (tablet) tablets if not bringing runes for Trollheim Teleport (revert once inside the dungeon for teleport out)
- Rest high-healing food such as sharks or better
Tumeken's shadow is particularly effective against General Graardor, but lower tier weaponry can suffice in teams where another player is tanking the melee hits and catching a freeze is not required. Regardless, strong magic equipment such as an occult necklace and confliction gauntlets are strongly recommended, and players using the standard spellbook to take advantage of Graardor's earth weakness should be mindful of their limited access to heals without access to blood barrage.
| Slot | Item (most effective → least effective) | ||||
|---|---|---|---|---|---|
| Slayer helmet (i) (on task) | Ancestral hat | Virtus mask | Ahrim's hood (or:) | N/A |
| Occult necklace | N/A | N/A | N/A | N/A |
| Imbued zamorak cape | Zamorak cape | Ardougne cloak 4 | Ardougne cloak 3 | N/A |
| Ancestral robe top | Virtus robe top | Ahrim's robetop (or:) | N/A | N/A |
| Ancestral robe bottom | Virtus robe bottom | Ahrim's robeskirt (or:) | N/A | N/A |
| Tumeken's shadow | Eye of ayak | Harmonised nightmare staff | Twinflame staff | N/A |
| Elidinis' ward (f) | Arcane spirit shield | Ancient wyvern shield | Malediction ward / Tome of earth[a] | Mage's book > Book of darkness |
| War blessing | N/A | N/A | N/A | N/A |
| Confliction gauntlets | Tormented bracelet | Barrows gloves | N/A | N/A |
| Avernic treads (max) | Eternal boots | Infinity boots / Aranea boots | Devout boots | N/A |
| Magus ring | Seers ring (i) | Ring of suffering (ri) | Ring of the gods (i) | N/A |
| Accursed sceptre | Eye of ayak | N/A | N/A | N/A |
Inventory
- Kodai wand or other weapon to autocast Ancient Magicks (bring water runes for ice barrage if not using Kodai)
- Rune pouch filled with runes for Ice Barrage and Blood Barrage
- If using the standard spellbook, bring runes for earth spells, Entangle, High Level Alchemy, and Bones to Peaches
- Bones to peaches tablets
- Saturated heart
- 2-3 Saradomin brews, to be used in emergencies or immediately before the Saturated heart can be activated again
- 4-8 high-healing food such as anglerfish or manta rays
- Teleport to house (tablet) or a one-click teleport (for emergency)
- Rest Super restores