K'ril Tsutsaroth/Strategies
This copy was last processed on . The copied wiki revision is dated .
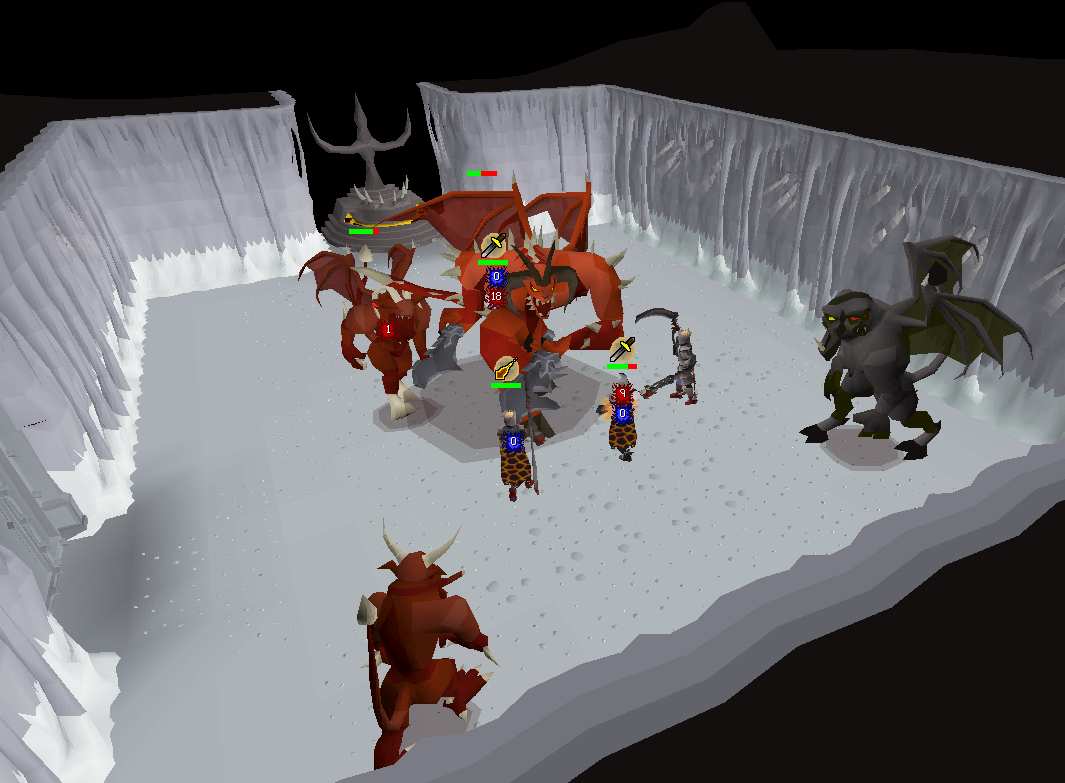
This is a guide on killing K'ril Tsutsaroth. K'ril Tsutsaroth is commonly killed for his drops which include the Zamorakian spear, staff of the dead and the Zamorak hilt. He can be fought with any of the three combat styles and either solo or in a team.
The Zamorakian encampment, including K'ril Tsutsaroth's chamber, appears shadowy and dark; the farther down players venture, the darker it becomes, becoming near pitch dark when outside the door leading to his chamber and inside itself. This is purely a visual change and has no actual gameplay effects. The shadow effect can be removed by consuming a Saradomin's light.
Requirements
- Completion of Death Plateau and the start of Troll Stronghold to the point where you defeat Dad
- Alternatively, Ghommal's hilt can be used to teleport to Trollheim without requiring either quest
- One rope is required to access the God Wars Dungeon for the first time.
- 70 Hitpoints (boostable) are required to access Zamorak's Fortress.
Mechanics
Attack Styles
K'ril attacks with both Magic and Melee:
- K'ril swipes at his target with his scimitars for his melee attack, dealing up to 46 damage. The attack also has a chance of inflicting poison, even through Protect from Melee, with damage starting at 16. He has a 2/3 chance of performing a melee attack.
- K'ril raises both of his scimitars in the air before slamming them down as his magic attack, emitting a magical shock wave at his target. This attack deals a minimum of 10 damage and a maximum of 30 damage if it hits. He has a 1/3 chance of performing this attack.
- Both attacks are single-target.
Prayer Smash
K'ril has a 1/9 chance of using this attack instead of a melee hit if his target is using Protect from Melee. He will yell when using his prayer smash, always dealing 35-49 damage and draining his target's current prayer points by half, rounded down. Using a Spectral spirit shield halves the prayer drain to 1/4. To fully avoid this attack, the tank should use Protect from Magic and maximize Melee defence; this also prevents damage being taken from the Magic-using Balfrug Kreeyath. This strategy will result in a much longer trip with your team.
Bodyguards
K'ril is protected by three demons:
- Balfrug Kreeyath, the magic bodyguard; a black demon that launches fire spells at his target, dealing up to 16 damage.
- Tstanon Karlak, the melee bodyguard; a greater demon that uses melee, clawing his target, dealing up to 15 damage.
- Zakl'n Gritch, the ranged bodyguard; a lesser demon that throws snowballs at his target, dealing up to 21 damage.
The bodyguards will focus on a random player in the room when K'ril is killed, regardless of whoever deals the killing blow.
Strategy
General strategy
K'ril attacks with both melee and magic, but his magic attack can only be used against players in melee range. As such, if using melee, it is recommended for solo players (or in groups, the tank) to wear armour with high magic defence and use Protect from Melee during the kill. While this approach does leave players susceptible to his occasional prayer smash attack, it is still generally more efficient than doing the opposite.
After K'ril has been killed, the minions each focus on a random player. Because of this, players should adjust their prayers accordingly and focus on killing minions which are focusing on the same player. As K'ril and his minions drop ashes, bones to peaches cannot be used, and players should manage their hitpoints adequately. In group encounters, using Guthan's is recommended; in solo encounters, Blood Barrage is more effective. When casting Blood Barrage, make sure to stack Tstanon on Zakl'n so both demons can be hit by the spell. Bringing water runes (or a Kodai wand) is optional for Ice Barrage, but can freeze Tstanon in place so the player doesn't have to flick between ranged and melee prayers as frequently.
Because bones to peaches cannot be used, it is worthwhile to bring runes for Boost Potion Share and Stat Restore Pot Share to extend trips when going in a team. If not using Lunar spells, players can use Ward of Arceuus to reduce damage taken, and Death Charge to boost special attack energy. In a team it is helpful (but not required) for one or more players to be on task.
Solo
A popular strategy for soloing K'ril is using a scorching bow with a lightbearer. The player can use the bow's special attack to bind K'ril in place and avoid all damage from him. This allows for long trips of up to 20-40 kills.
Players should pray Protect from Missiles to avoid damage from Zakl'n Gritch, and start each kill in the room's north-west corner (as this is far from where Tstanon Karlak spawns). One special attack from the bow will have the bind last for six attacks in total, so use it again on the seventh attack to reapply the bind, and move counterclockwise around the room to kite him and Tstanon Karlak. With good stats and gear, players should never run out of special attack energy, especially when on-task. Once K'ril is dead, kill Balfrug Kreeyath and then stack the other two minions to heal from Blood Barrage.
For those without access to a lightbearer, death charge can also allow for enough special attack energy replenishment for a long trip. As this requires the Arceuus spellbook, blood barrage will not be available and alternative healing sources such as Guthans or more brews will be needed, resulting in shorter trips.
Another strategy is to use the Tumeken's shadow in conjunction with the 5:0 method. Tumeken's shadow with max mage gear deals significantly higher DPS than other solo methods, but requires significantly more concentration, being tick perfect, and high click precision. Players can expect upwards of 30 kills per hour using this method, and if done correctly, can expect trips to last indefinitely if using a private instance to keep supply drops from despawning.
Tank
For tanks, K'ril Tsutsaroth can be extremely dangerous when using Protect from Melee, as there is a very slim chance to take incredibly high damage should K'ril's prayer slam and both Balfrug and Zakl'n hit on the same or near ticks. For this reason, the tank should bring typical tank setup as with Graardor.
Another alternative is to focus solely on melee and ranged defence, using Protect from Magic to cover the magic weakness, as K'ril will not be able to use his prayer slam, Balfrug becomes completely harmless while Tstanon and Zakl'n will have trouble hitting the player. This in turn means K'ril's melee attacks are the only thing to watch out for as a tank.
This defensive setup is particularly favourable using a full set of justiciar armour with echo boots or guardian boots; while the player will miss out on a slayer helm's bonuses if on a task, justiciar provides the best melee defence, which can be combined with an elysian spirit shield or dragonfire shield for very high defensive bonuses, complementing the set's passive damage reduction bonus, with the former adding onto it. The glove and amulet slots aren't as of much concern for a defensive setup, and should be focused on improving the player's accuracy.
Similar to tanking General Graardor, the player should hit K'ril Tsutsaroth twice for every hit he inflicts on them to avoid as much damage as possible. This means that a player using Melee will be hit every 8 game ticks, while a player using Ranged with an Armadyl crossbow will be hit every 10 game ticks. In a solo scenario, using Melee practically is the only viable option due to the high damage-per-second of the arclight compared to the Armadyl crossbow, however in a team, Ranged can also be used in combination with Armadyl armour for greater magic defence. Generally soloing K'ril Tsutsaroth is only viable on a Slayer task, and the same strategy should be used for soloing Graardor, see here. Finally the tank may use the Lunar spell Vengeance to occasionally reflect high amounts of damage back onto K'ril Tsutsaroth. Further details on each tanking strategy are given in the equipment tabs.
Attacker
At the beginning of the fight, the attackers should all stand in one of the corners near the altar, as this both is the furthest away you can get from K'ril Tsutsaroth's spawn and allows prayer restoration in the last few seconds before the boss respawns. Attackers should only attack K'ril Tsutsaroth once the tank has hit him, this is especially important when the tank is using ranged as it takes a little more time for a ranged attack to hit K'ril Tsutsaroth compared to a melee attack. As K'ril Tsutsaroth's attacks only hit the tank, the attackers should pray against whichever minion does the most damage to their respective combat style, and wear armour to tank damage against the other combat styles. This effectively means that attackers take relatively small amounts of damage during kills, especially if their Defence is high. Players using Melee should use Protect from Magic, players using Ranged should use Protect from Missiles. It is important to note that should K'ril Tsutsaroth focus on you, the armour you are wearing is generally quite bad at tanking him and you will take excessive amounts of damage. Should this happen, players using Melee should use Protect from Magic, players using Ranged should use Protect from Melee. All attackers should also bring an antidote++, both for this eventuality and to share with the tank should they run out of antidotes.
Suggested skills
Tank:
90+
90+
85+
85+ and
85+ or
85+
70+
Attacker:
Killcount
The 40 (35/30/25/15) Zamorakian followers kill count (reduced kill count requirement with the hard/elite/master/grandmaster combat achievements respectively) is quite easy to achieve although it will take longer than Bandos. There are several tips to get a quick kill count:
- Main room: The place north and east of the rope has Zamorakian followers fighting both Bandosians in the north and Saradominists in the east. There are two imps which can be quickly killed, and other followers such as bloodvelds, goraks, werewolves and icefiends battling spiritual warriors and spiritual mages.
- Zamorak's Fortress: There are four imp spawns which can be quickly killed for kill count. Switching back and forth between two worlds while killing the imps with ranged attacks is the fastest way to gain kill count.
Equipment
The scorching bow's special attack is highly recommended as using it on K'ril Tsutsaroth allows players to avoid most damage, extending trip length, along with the bow also providing the highest Ranged DPS.
| Slot | Item (most effective → least effective) | ||||
|---|---|---|---|---|---|
 |  Slayer helmet (i) (task only) Slayer helmet (i) (task only) |  Masori mask (f) Masori mask (f) |  Armadyl helmet Armadyl helmet |  Crystal helm (Bow of faerdhinen) Crystal helm (Bow of faerdhinen) |  Void ranger helm Void ranger helm |
 |  Necklace of rupture Necklace of rupture |  Necklace of anguish Necklace of anguish |  Amulet of fury Amulet of fury |  Amulet of glory Amulet of glory | N/A |
 |  Dizana's quiver Dizana's quiver |  Ava's assembler Ava's assembler |  Max cape Max cape |  Ava's accumulator Ava's accumulator |  Ranging cape Ranging cape |
 |  Masori body (f) Masori body (f) |  Armadyl chestplate Armadyl chestplate |  Crystal body (Bow of faerdhinen) Crystal body (Bow of faerdhinen) |  Karil's leathertop/ Karil's leathertop/ Hueycoatl hide body Hueycoatl hide body |  Elite void top Elite void top |
 |  Masori chaps (f) Masori chaps (f) |  Armadyl chainskirt Armadyl chainskirt |  Crystal legs (Bow of faerdhinen) Crystal legs (Bow of faerdhinen) |  Karil's leatherskirt/ Karil's leatherskirt/ Hueycoatl hide chaps Hueycoatl hide chaps |  Elite void robe Elite void robe |
 |  Scorching bow Scorching bow |  Twisted bow Twisted bow |  Bow of faerdhinen (Crystal set) Bow of faerdhinen (Crystal set) | N/A | N/A |
 |  Seeking dragon arrow Seeking dragon arrow |  Dragon arrow Dragon arrow |  Amethyst arrow Amethyst arrow |  Unholy blessing (Quiver or Crystal set) Unholy blessing (Quiver or Crystal set) | N/A |
 |  Zaryte vambraces Zaryte vambraces |  Barrows gloves Barrows gloves |  Zamorak bracers / Zamorak bracers / Black spiky vambraces Black spiky vambraces |  Void knight gloves Void knight gloves | N/A |
 |  Avernic treads (max) Avernic treads (max) |  Pegasian boots Pegasian boots |  Echo boots Echo boots |  Ranger boots Ranger boots |  Blessed boots Blessed boots |
 |  Lightbearer Lightbearer |  Venator ring Venator ring |  Archers ring (i) Archers ring (i) |  Ring of suffering (ri) Ring of suffering (ri) | N/A |
 | Scorching bow |  Toxic blowpipe Toxic blowpipe | N/A | N/A | N/A |
Inventory


 |  |  |
- A mage switch and rune pouch with runes to cast Blood barrage, if using the Ancient Spellbook.
- A toxic blowpipe for special attacks (with no Scorching bow)
- 3-4 Armadyl brew, Bastion potions or Ranging potions
- 9-10 Super restores or Prayer potions
- 1 Extended anti-venom+ or Antidote++(4)
- Guthan's equipment for healing (teams only)
- A Construction cape or house tab for escaping
- Some food: Marlins, Manta rays or Saradomin brews
- A Zamorak item if not equipped
- Ghommal's hilt 1 or better for teleporting there
- Explorer's ring 4 (For high alchemy)
The player focuses on Magic defence while using Protect from Melee to defend themselves against K'ril's powerful melee attacks. This will leave them vulnerable to his prayer smash attack however, so they should keep their health high to avoid being comboed out by the resulting damage from this attack and from minions.


Inventory
| | |
- 2-3 Super combat potions
- 7-8 Super restores or Sanfew serums
- 1 Antidote++ (If using Super Restores and not using a Serpentine helm)
- 14 Anglerfish
- Rune pouch with runes to cast Blood Barrage for healing
- A Construction cape or house tab for escaping
- A saturated or imbued heart to boost the player's Magic level to increase their Magic defence (Optional)
- Explorer's ring 4 (For high alch if not bringing runes)
By focusing on melee defence, players can use Protect from Magic to protect themselves from K'ril's magical attacks and his prayer smash. However, his melee attacks are significantly more accurate compared to his magic attack and have a higher max hit. K'ril's melee attack is slash-based, so high slash defence is recommended. Because of this it is not recommended to use this setup without Justiciar armour. The given inventory setup assumes a team of 3 players
Inventory
| | |
- Special attack weapon (if not Arclight)
- 3-4 Super combat potions
- 7-8 Super restores or Sanfew serums
- 1 Extended anti-venom+ or Antidote++
- 4-5 Saradomin brews
- Rune pouch with runes to cast Vengeance or Potion share
- Guthan's equipment for healing
- A Construction cape or house tab for escaping
- Some food: Marlin, Manta rays, Sharks or Saradomin brews
- Explorer's ring 4 (For high alch if not bringing runes)
As a melee attacker, you should maximise your damage per second while keeping your ranged and melee defences high. Fortunately melee gear has high ranged and melee defences, hence you can simply use your max DPS gear. It might be worthwhile to bring an extra antidote++ for the tank should they run out, as they have quite limited inventory space.
Inventory
| | |
- Special attack weapon (if not Arclight)
- 4-5 Super combat potions
- 9-10 Super restores or Prayer potions
- Rune pouch with runes to cast Potion share
- 1 Extended anti-venom+ or Antidote++(4)
- Guthan's equipment for healing
- A Construction cape or house tab for escaping
- Some food: Marlin, Manta rays, Sharks or Saradomin brews
- Explorer's ring 4 (For high alch if not bringing runes)
Tumeken's shadow provides the highest DPS against K'ril. Mage is not recommended with any weapon weaker than a Tumeken's shadow. Using the 5:0 method to avoid all damage from K'ril is highly recommended due to magic armour's low defences, while praying Protect from Range to protect against the range minion. Blood Barrage is used to heal off the melee and range minions in between kills. A Purging staff can be used, but requires the player to bring a way to heal themselves between kills, such as Sanguinesti staff.
Inventory
- Staff to autocast Ancient magicks against the minions like Eldritch nightmare staff, Kodai wand, or Blood ancient sceptre
- Saturated heart to boost magic level
- Sanfew serums, or Super restores and Antidote++
- Extended stamina potions or Stamina potions (it is unlikely that you will need any run energy restoration if you have a high enough agility level)
- Anglerfish or other high healing food (the better you get at performing the 5:0 method, the less food you will need to bring)
- Rune pouch with runes to cast Blood Barrage for healing and Ice Barrage to freeze Tstanon Karlak
- A Construction cape or house tab for escaping
- Explorer's ring 4 (for high alch and energy recharges)