Moons of Peril/Strategies
This copy was last processed on . The copied wiki revision is dated .
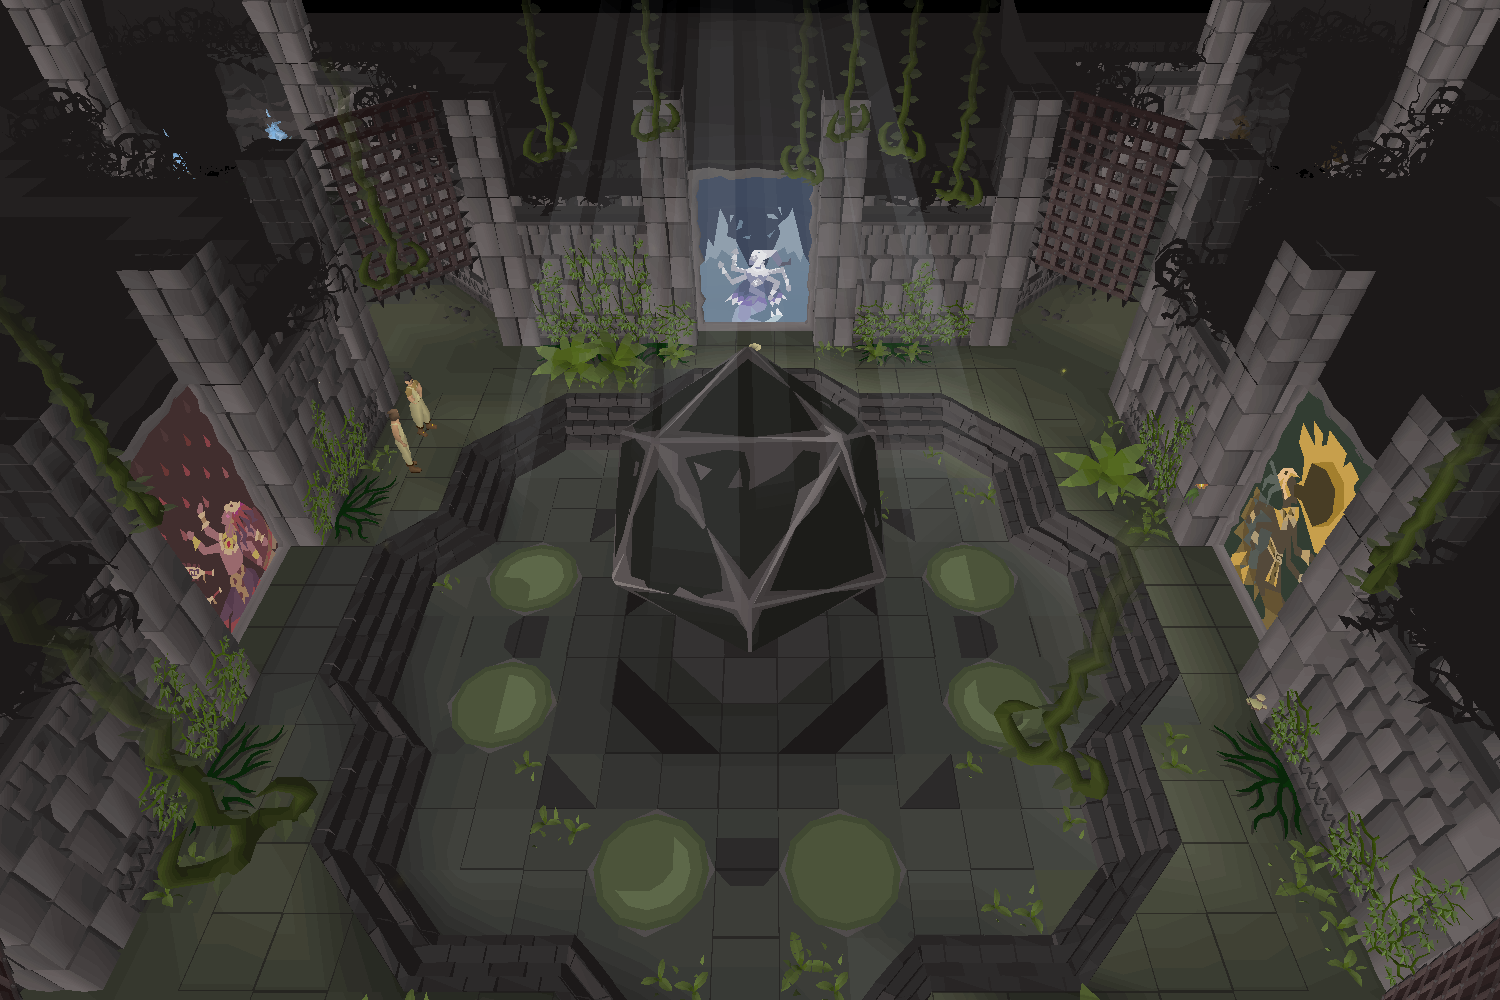
This page shows various strategies which may help you in Neypotzli, where you fight the Moons of Peril. This includes navigating the prison, gathering resources, and information on the bosses themselves, but does not include other monsters within that are not part of the fight, such as the Sulphur Nagua and Moonlight Cockatrice.
If the player dies while in Neypotzli their grave will appear at the antechamber.
Requirements
- Completion of
Perilous Moons to open the Lunar Chest
Suggested skills
For better equipment to attack and defend against the Moons:
70+
70+
70+
75+
34+ (For Steel Skin, Incredible reflexes and Ultimate Strength)
To create better supplies within the dungeon:
50+
50+
50+
50+
To further reduce supply use or extend trips:
Transportation
The entrance to Neypotzli is accessed from the northermost end of Cam Torum, which can be reached in the following ways:
- Teleporting with a calcified moth.
- Taking the Quetzal Transport System to the entrance of Cam Torum, then running all the way north once inside. Requires having built the landing site there.
- Taking the Quetzal Transport System to the Teomat, and then running around the west side of the mountain.
- Players with level 47 Agility may run south-east to the agility shortcut, then crossing the bridge west to the city entrance.
- Teleporting to Ralos' Rise with the Pendant of Ates, then climbing down the Agility shortcut. Requires activating the Statue of Ates at the location and 47 Agility.
Preparation and supplies
Neypotzli is a nearly self-contained area for resources, with food and potions stronger than anything that can be found outside. As such, the only items needed will be combat gear and an emergency teleport.
The campsites (indicated by the cooking range icon 
You may opt to gather one of two foods available, both of which can be found close to the campsite. Cooked moss lizards heal for 33% of your Cooking level or 50% of your Hunter level, whichever heals less. Cooked bream heals for 33% of your Cooking level or 33% of your Fishing level, whichever heals less; it is recommended to choose whichever gives you the highest amount of healing.
- Moss Lizards can be found in the Earthbound Cavern, and are caught by using a rope on the trappable rocks east of the campsite, then rustling the nearby bushes to scare the lizards, which will run into the trap. Each raw moss lizard produces 1-3 food items when cooked, and is therefore the better food source when chaining multiple runs as raw lizards can be kept in inventory and cooked as needed.
- Raw bream can be found in the Streambound Cavern, and are caught with a big fishing net at fishing spots east of the campsite. Players can align their net to the stream to increase the chance of catching bream. The fish can become out of sync. If you are missing a lot of fish, exit the fishing spot and try again. When catching fish at a stream, you can drop the net once the fishing animation starts to save the space for a fish.
In choosing which food to prepare, your Cooking level also plays a factor; when cooking raw moss lizards, a higher level may give up to three cuts of meat per lizard (giving more food per item), while cooking raw bream with a higher level allows to cook them quicker (two bream per action). Given that cooking speed is already very quick, players with a high Cooking level are recommended to catch moss lizards for food.
There is only one type of potion available - the moonlight potion - which gives the effect of a prayer potion, super combat potion, and divine super defence potion all in one (excluding the self-damaging effect from the divine). The main ingredient, moonlight grub paste, is obtained by picking moonlight grubs from grubby saplings (found close to both campsites in either cavern), and then grinding it into paste with a pestle and mortar. Simply mix the paste with a vial of water to create the potion. The potion is made with two doses, but having a higher Herblore level increases the chances of creating an additional dose or two per potion.
Lastly, moonlight moths scattered around every camp area can be caught at level 75 Hunter with a butterfly net (or 85 barehanded) to restore 22 Prayer points each. This can eliminate the need to consume moonlight potions outside of the boss chambers, saving time on preparing more.
Upon leaving Neypotzli, all raw or cooked bream/lizards will be destroyed, and moonlight potions will be reverted back into vials of water.
Boss mechanics
The Moons of Peril are located in their respective chambers within the prison.
Players can visually see other players in the same room fighting the moons, but unlike other bosses, the health bar only displays your personal contribution towards pacifying them.
Each Moon has 500 Hitpoints and share nearly the same combat stats; an Attack level of 258, Strength and Magic level of 100 and a Defence level of 60. Their melee attacks additionally have an accuracy bonus of +100 with ramping damage based on how many hits successfully land. Defensively, they have +100 melee defence to the styles they are not weak to, along with +500 magic and ranged defence.
Note: Protection prayers will not do anything against any of their attacks.
The Moon will inflict small amounts of damage to itself when attacking a player or using special attacks. This damage does not have visible hitsplats but deducts from the boss health bar. This damage is based on how much total health the moon has remaining and slows down significantly at low health. For this reason, the total damage necessary to kill a moon can be deceptive, as a player does not need to deal the full amount.
If the player enters a Moon's chamber while it is in the middle of a special attack, the attack will scale depending on how much time is left for the special attack when they enter, and the mechanic has a delayed application on them, which can either result in the mechanic doing nothing at all or being shorter than usual.
Upon defeating a boss, you will be teleported to one of the three campsites, next to the Cooking stove; which campsite depends on the order in which they have been defeated.
After killing Eclipse Moon, the player will be put in the Earthbound Cavern unless Blood Moon has already been killed, in which case the player will be put in the Streambound Cavern.
After killing Blue Moon, the player will be put in the Ancient Prison unless Blood Moon has already been killed, in which case the player will be put in the Streambound Cavern.
After killing Blood Moon, the player will be put in the Earthbound Cavern unless Blue Moon has already been killed, in which case the player will be put in the Ancient Prison.
If the player dies at the same time as one of the bosses, they will be sent out of the fight arena as normal with one health point and the fight will be considered a victory.
Eyatlalli's glyph
Surrounding the Moon are eight sigils that represent the moon's cycles; the waxing/waning crescent/gibbous, first/last quarter and the full/new moon. During the fight, Eyatlalli will imbue one of the sigils with her power; during non-special attacks, the player should stand on the sigil that is imbued, or they will take rapid damage; this initially starts at 1 damage per tick, but will quickly double up to 16 damage per tick while also applying a stack of the curse, which will rapidly kill players. The sigil will rotate clockwise after the Moon makes two standard attacks; upon hitting a full or new moon, the Moon will initiate a special attack. During a special attack, the player is generally allowed to stand anywhere in the arena.
Standard attacks
The Moon will face one of six potential directions based on the cycles above, where they will perform a unique melee attack that hits three times. The Moons have a ramping max hit based on how many of the attacks land in a row, so they can hit much harder than their combat level suggests. The first hit maxes 4, the second, 8, and the third, 20, for a total max of 32 damage in every series of hits. However, their attack has a unique rule in that if one of these hits miss, all hits succeeding it will also miss; for example, if the first hit in sequence does not land, the next two will also miss.
Each standard attack in the 3-hit cycle applies 1, 2, and 5 stacks of the Curse of the Moons. The effects of the curse differs between the three bosses, but maxes out at 127 and slowly degrades by 2 every 5 ticks. Because of their typeless attacks and how the curse is applied, players are recommended to bring more defensive armour (especially for lower levels) to reduce overall damage. The Curse of the Moons debuff disappears fully after defeating a Moon of Peril.
Due to the timing of the standard attacks, weapon speed plays a larger role in determining DPS. For example, a 4-tick weapon can hit 3 times per cycle, whereas a 5-tick weapon can only hit twice. Because your character will take 1-2 ticks to run to the next glyph, you can exploit the attack cooldown mechanic to get in extra max hits. For example, it is possible to hit twice with a 4-tick weapon and then once with a 5-tick weapon in one cycle without losing any ticks. Similarly to common uses of the crystal halberd when there is forced downtime, weapons like a leaf-bladed battleaxe or a zombie axe may have a higher damage per hit, making them more effective as switches.
Eclipse Moon
The Eclipse Moon is weak to stab attacks, and possesses 6 flat armour, which reduces all hitsplats dealt to her by 6; this is reduced to 4 during her Clone special attack.
Her Curse of the Moon will cause your attacks to occasionally be "glancing", stating . Glancing attacks reduce your max hit by 12 (8 during the Clone phase); this is twice her flat armour. This occurs at a random chance scaling up to 100% at 100 stacks of the curse.
The boss will alternate between the following special attacks:
- New Moon: Searing Rays - A moon shield will appear, and the Eclipse Moon will forcefully shove you behind it. She will begin attacking with rays of light, which can be avoided by moving alongside the moon shield. The shield will make one full rotation before the attack concludes. Getting hit deals minor damage, but it results in a large increase in the blinding effect.
- The shield moves at a walking pace and pauses on each corner of its route just long enough that a walking player can keep up with it. The timing is precise and may require occasional running if mistakes are made.
- An alternate running strategy is possible if you're familiar with the four corners of the pathway protected by the shield. Timing a run action from one corner of this pathway to the next, slightly after the shield begins moving, avoids all damage.
- Full Moon: Clones - You are shoved to the centre of the room and are bound in place. Clones of the Eclipse Moon will spawn around you, attacking you in five cycles of three, for a total of 15 attacks. You must face your character toward each clone as it spawns to prevent damage. Doing so will parry the incoming attack, sending a melee attack with no delay back at the boss.
- Clicking to face your character towards the clone as soon as each appears is enough to perfectly parry the phase. You can click one tile away and this will still work.
- Accuracy is increased to 100% for each parry, so swapping to a slower and higher-hitting weapon is strongly recommended. Slash and Crush weapons also benefit from this increased accuracy.
Blue Moon
The Blue Moon is weak to crush attacks, and possesses -5 flat armour, which increases all hitsplats dealt to her by 5. This makes multi-hitting weapons, such as Torag's hammers, the dual macuahuitl, the glacial temotli and the scythe of Vitur especially advantageous against her.
Her Curse of the Moon will cancel your next attack; this occurs once enough stacks of the curse have been accumulated:
- At 3 stacks, a message in the chatbox will state
- At 9 stacks, a message in the chatbox will state
- At 18 stacks, the Curse takes effect, with a message in the chatbox stating After this, 18 stacks are removed from the Curse.
The boss will alternate between the following special attacks:
- Full Moon: Weapon Freeze - The Blue Moon will freeze the player's weapon out of their hands, placing them into one of three blocks of ice; the block the player should target is the one that glows with a blue hue. The player must break the block of ice via unarmed combat. During this time, the blocks will periodically plant shards of ice that will shatter shortly afterwards, dealing light damage if caught in the radius. The player is not able to equip other weapons until the block of ice is broken. Failing to break the block of ice will deal up to 28 damage to the player.
- The player can attack a block of ice twice before having to move to safety.
- If you are logged out or disconnect during this attack, the weapon will need to be reclaimed from Eyatlalli.
- A safespot exists one tile north from the centre of the ritual symbol.
- If using the Soulreaper axe when this attack starts you will lose all soul stacks and not regain any HP, possibly a bug.
- If there is no weapon equipped when this attack begins, the player will take 3-15 damage accompanied by a message stating . Even though no weapons were frozen, the player still will need to destroy the Frozen weapons to avoid further damage.
- New Moon: Frost Storm - Two braziers at opposing ends of the chamber are extinguished as freezing storms are conjured. The boss will heal herself five times during the storm, restoring 10 health for each unlit brazier up to a maximum of 100 hitpoints. To prevent this, run to the braziers and relight them whilst avoiding the moving storms that deal damage and force you to walk for two ticks. Control and click will ignore the forced walk to get across faster if you are hit by a tornado. Restoring both braziers will also remove a portion of stacks from Curse of the Moon.
- There are safe spots on either side of the braziers, noted with footprints in the snow.
- You may choose to ignore the Frost Storm phase entirely, as long as you're dealing sufficient damage to make up for any healing the boss receives.
Blood Moon
The Blood Moon is weak to slash attacks, and possesses -2 flat armour, which increases all hitsplats dealt to her by 2. This makes multi-hitting weapons, such as the scythe of Vitur advantageous against her.
The Blood Moon is by far the most difficult of the Moons, possessing a unique passive effect that heals the boss whenever it or its mechanics damage the player. This forces the player to constantly out-damage the boss, and makes mechanical mistakes more punishing than they first appear.
This pitting of the player's damage output against their own defence rolls can also make the difficulty and length of any particular fight wildly inconsistent, especially for lower-level players.
Lower-level players may wish to prioritise defence instead of attack with their gear to minimise the amount of health she regenerates from harming the player. Additionally, while the sulphur blades' multi-hit mechanic may seem a good match for the boss, the additional accuracy and slash defence that comes from pairing a one-handed weapon with a Dragon defender can significantly outweigh that benefit.
Standard attacks
During the three standard attack hits, her Curse of the Moon will heal her for 1x the damage of her first hit and 2x her second. The multiplier of the third hit is erratic, but will heal her for 30-50 hitpoints regardless of the damage dealt. Successful hits are visually indicated by blobs of blood being sucked out of the player and into her.
It is possible to avoid the last hit and its heal by walking outside Eyatlalli's glyph during the attack. This maneuver requires concentration but will decrease your kill time significantly. To do this, look for a blood syphon coming out of you as Blood Moon's attack animation starts. If one appears, step under the boss for a tick, click back on the glyph and continue attacking.
Special attacks
The boss will alternate between the following special attacks:
- Full Moon: Blood Rain - The Blood Moon will disappear and rain blood from above, forming temporary pools of blood throughout the room. Move off of the blood pools on the floor to avoid standing on them. Getting hit by a blood pool will deal up to 9 damage, and the Blood Moon will heal for 2x the damage dealt. Standing off the pools will deal minor chip damage to her.
- While Eyatlalli's glyph will reappear before this special attack is finished, any blood pools on the active moon symbol will still be dangerous.
- New Moon: Blood Jaguar - Eight blood jaguars will appear around the arena, with the Blood Moon dealing up to 15 damage onto the player in order to create them. Eyatlalli will have one of the eight moon symbols glow, indicating where the player must stand to avoid being hurt from the curse. The Blood Moon will also summon blood pools around her. The jaguars attack with a cleave-style melee attack on the two tiles in front of them, which can deal up to 9 damage, while the blood pools can deal up to 6 damage. The pools will despawn slightly before the jaguar attacks. Any damage incurred from these attacks will heal the Blood Moon for 3x and 2x the damage respectively. The Blood Moon will summon seven sets of blood pools before concluding the attack, while the jaguars will attack six times.
- Players must attack the jaguar to restore their lost health and can restore up to 25 health in this manner. As such, players must time their movement so that they can avoid the blood jaguar and the pools at once. A 4-tick weapon will allow the player to be in sync, so players using 5-tick weapons should be more cautious.
Farming routes
General route
- From the antechamber, head through the north-eastern entrance to the Streambound Cavern.
- Restore run energy as needed at the camp spot, and search the supply crates for anything you might need.
- Collect moonlight grubs to create 2-8 moonlight potions. Use the potions to boost your melee stats and restore prayer between runs. Players with level 75 Hunter can also take a butterfly net to catch moonlight moths (or catch them barehanded with level 85 Hunter) to restore prayer in between bosses, if desired.
- Fish raw bream at the stream nearby and cook it. If your Hunter level is over 65 or is greater than your Fishing level, this can be skipped as moss lizards provide faster food than fishing.
- Enter the Eclipse Moon chamber to the south and fight the boss. After the fight, you will be teleported next to the camp spot in the Earthbound Cavern.
- Restore prayer (with potions or via catching moths), create additional moonlight potions and catch moss lizards as needed. With a high Cooking level, 1 raw moss lizard will provide 3 pieces of cooked moss lizard; as such, you can stock up on food by only cooking a handful of meats at a time and keeping the rest raw in your inventory, cooking more as needed in between bosses.
- Enter the Blue Moon chamber to the east and fight the boss. After the fight, you will be teleported next to the camp spot in the Ancient Prison.
- Enter the Blood Moon chamber to the east and fight the boss. After the fight, you will be teleported next to the camp spot in the Ancient Prison again.
- Head south to enter the Ancient Shrine to claim your loot. Head north to enter the Streambound Cavern.
Repeat steps 3-9 for as long as desired.
Blood Moon Only
Players wishing to efficiently farm only the Blood Moon boss can use the following route:
- Starting from the Lunar Chest after the first Blood Moon kill, return through the south door to the Ancient Prison.
- Run north to the cooking stove and restore run energy.
- Run east to the Blood Moon chamber and fight the boss. After defeating the boss, the player will be placed at the cooking stove in the Earthbound Cavern.
- Stock up on food and potions if needed, then run south-east through the cave entrance into the Streambound Cavern.
- Run directly south to the Lunar Chest room and claim your reward.
Blue Moon Only
Players wishing to efficiently farm only the Blue Moon boss can use the following route:
- Starting from the entrance to the Blue Moon boss, finish the kill and end up in the room with the Sulphur Naguas.
- Head south through the Sulphur Naguas.
- Loot the Lunar Chest.
- Head north through the passageway.
- Head north again through the passageway.
- Head north to the entrance to the Blue Moon.
Eclipse Moon Only
Players wishing to efficiently farm only the Eclipse Moon boss can use the following route:
- Starting from the entrance to the Eclipse Moon boss, finish the kill and end up at the cooking stove in the Earthbound Cavern.
- Head south-east and pass through the entrance to the Streambound Cavern.
- Run directly south to the Lunar Chest room and claim your reward.
- Head north through the passageway back to the Streambound Cavern, and stock up on food and potions if needed.
- Return back to the Eclipse Moon chamber.
Equipment
Each boss is weakest to a specific melee style and heavily resistant to magic and ranged attacks.
Due to the bosses' attack patterns, up to a certain point defence is a valuable stat for increasing DPS by reducing or eliminating the number of times a player must eat during the vulnerable phases. Defence additionally reduces the chance the Blood Moon will heal when attacking the player. Because of this, you should attempt to carefully balance strength boosting armour with armour that has high defensive stats. Avoid armour such as obsidian, which has low defensive stats but a small strength bonus, in favour of tankier armour such as Barrows equipment, which has high defensive stats but no strength bonus. Armour that features both high strength and high defence such as Bandos is particularly effective.
While it is possible to kill all three moons with approximately 60 Defence with rune armour if using Steel Skin, Ultimate Strength, and Incredible Reflexes, this is not particularly practical for repeat completions, and the Blood Moon in particular may be especially challenging.
Weapon choice
Additionally, the Moons of Peril utilise a defensive stat known as flat armour. This mechanic directly increases or reduces the damage dealt of each hit by a flat amount. This leads to interesting interactions with weapons that hit multiple times; such as the scythe of Vitur performing worse than the Ghrazi rapier against Eclipse, or the dual macuahuitl beating out even the Inquisitor's mace. As a result of both this mechanic and the different weaknesses of each boss, it is recommended to bring a different weapon for each boss. Some exceptions include powerful weapons like the soulreaper axe or scythe of Vitur which can comfortably kill each without a necessary swap. For a cheaper alternative the Zamorakian hasta is more than adequate for all three bosses if switching attack styles.
Defence-reducing special attacks and Death Charge have no effect on the Moons of Peril.
Other items
Hunter, Fishing and Herblore supply crates provide an infinite number of vials of water, pestle and mortars, big fishing nets, rope and butterfly nets to allow collecting and crafting all dungeon resources.
Moonlight potions fulfil the role of prayer restoration and combat stat boosts for the boss. Since the moonlight potion's boosts scale with Herblore level, you may want to bring 1 super defence or super combat potion if your Herblore level is less than 66.
Cooked bream and cooked moss lizard serve as easy to obtain and powerful food supplies in the dungeon. Cooked bream scales with Cooking and Fishing levels, while cooked moss lizard scales with Cooking and Hunter levels. You may want to bring alternate foods if your associated levels are below 50.


Players with lower damage outputs should expect to do most of their damage to Eclipse Moon in the Clone phase. While having a reliable stab weapon will speed up the fight, it is better to focus on obtaining a slower, harder-hitting weapon overall if higher tier weapons are out of reach.
| Slot | Item (most effective → least effective) | ||||
|---|---|---|---|---|---|
 |  Soulreaper axe[a] Soulreaper axe[a] |  Ghrazi rapier[b] / Ghrazi rapier[b] /  Scythe of vitur[a] Scythe of vitur[a] |  Blade of saeldor[b] / Blade of saeldor[b] /  Noxious halberd[b] Noxious halberd[b] |  Voidwaker[b] > Voidwaker[b] >  Osmumten's fang[b] > Belle's folly > Zamorakian hasta[b] > Abyssal dagger Osmumten's fang[b] > Belle's folly > Zamorakian hasta[b] > Abyssal dagger | Zombie axe > Dragon sword[b] > Arkan blade[b] > Dragon hasta[b] / Abyssal whip |
| Voidwaker / Crystal halberd[c] | Dragon claws / Dragon dagger | Burning claws[b][d] | N/A | N/A | |
| Slot | Item (most effective → least effective) | |||||
|---|---|---|---|---|---|---|
| Dharok's greataxe[e] | Soulreaper axe | Elder maul > Colossal blade > Noxious halberd | Godsword > Crystal halberd | Zombie axe > Belle's folly > Barrelchest anchor | Standard attack weapon |
| Slot | Item (most effective → least effective) | ||||
|---|---|---|---|---|---|
| Scythe of vitur[a] | Dual macuahuitl > Glacial temotli | Inquisitor's mace / Soulreaper axe[a][b] | Ursine chainmace (u) / Saradomin's blessed sword / Zamorakian hasta[a] / Abyssal bludgeon | Sarachnis cudgel / Zombie axe[a] > Torag's hammers[c] |
| Dragon claws / Crystal halberd[d] | Voidwaker | Burning claws[e] / Dragon dagger | Dragon mace | N/A | |
| Slot | Item (most effective → least effective) | ||||
|---|---|---|---|---|---|
| Scythe of vitur[a] | Soulreaper axe[a] | Noxious halberd[a] > Blade of saeldor | Ghrazi rapier[a] > Abyssal tentacle > Saradomin's blessed sword > Abyssal whip > Sulphur blades | Zombie axe[a] > Zamorakian hasta[a] > Dragon scimitar / Arkan blade |
| Dragon claws / Crystal halberd[b] | Voidwaker | Dragon dagger / Burning claws[c] | Abyssal dagger | Dragon mace | |
Inventory
- A soulreaper axe or other slow, high hitting weapon such as an elder maul, colossal blade, or godsword, is used on the Eclipse Moon during the Clone attack.
- Dharok's set, alongside either a dwarven rock cake or locator orb, can be used to quickly kill off the Eclipse Moon instead, but requires close monitoring of the player's health.
- Dragon claws, or other special attack weapon.
- Any additional weapon switches to match boss weaknesses.
- Supplies:
- Food: rope for catching lizards or big fishing net for catching fish if your Hunter is low. At high cooking, 1 raw moss lizard will yield 3 cooked moss lizards. Cooking raw moss lizards as needed can save inventory space. All available inside the dungeon.
- Prayer: pestle and mortar for making moonlight potions, more doses received with higher herblore. Alternatively also a butterfly net for catching moonlight moths to restore prayer if your Herblore is lower.
- Moonlight potions, which act as a super combat and prayer potion in one.
- Food in the form of cooked bream or cooked moss lizard. All made inside the dungeon.
- An emergency teleport. (Optional, all the fights have quick escapes)
- An optional Book of the dead and rune pouch with runes for Thralls.
| NPCs |
| ||||||||
|---|---|---|---|---|---|---|---|---|---|
| Items | |||||||||
| Rewards |
| ||||||||
| Scenery | |||||||||
| Other |
| ||||||||