Kree'arra/Strategies
This copy was last processed on . The copied wiki revision is dated .
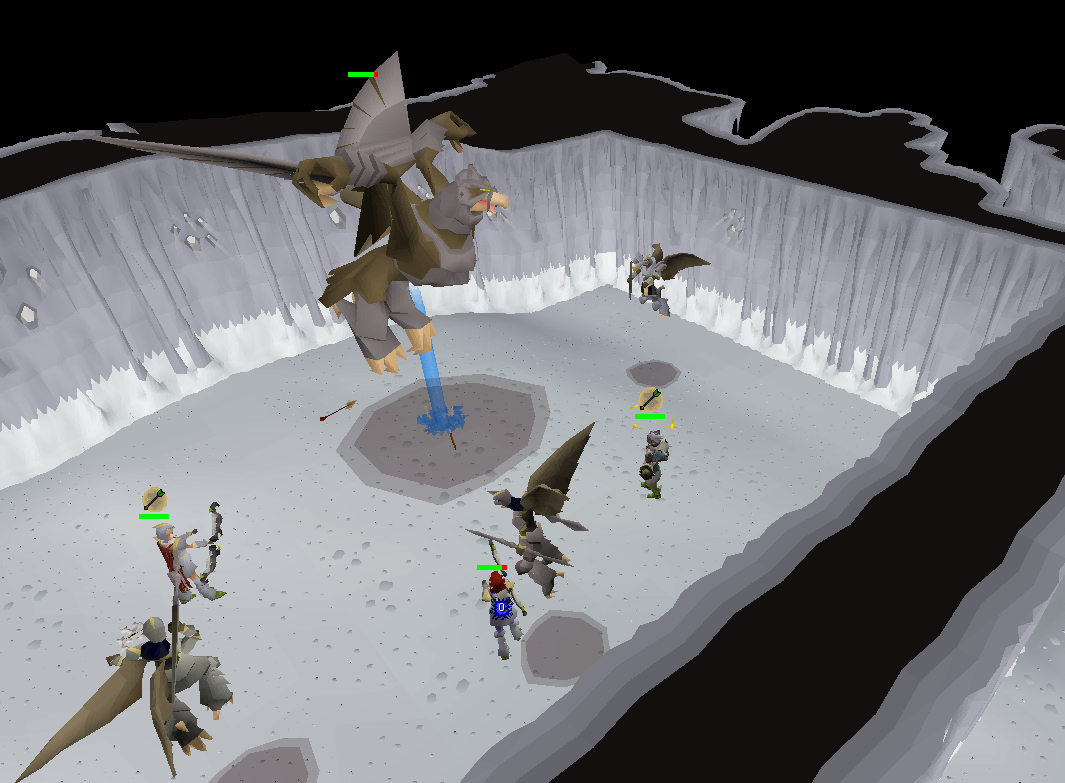
This is a guide to defeating Kree'arra, the Armadyl-aligned general in the God Wars Dungeon.
As Kree'arra is airborne, regular melee attacks will not work; instead, Ranged or Magic must be used to fight him. Halberds and salamanders are the only melee options, but due to Kree'arra's extremely high melee defence, this is not generally recommended unless using the soulflame horn in small teams.
Kree'arra and his minions count toward aviansie Slayer tasks; Slayer helm (i) and black mask (i) both give the 15% accuracy and damage boost to those on task.
Requirements
Quest requirements
- Death Plateau and Troll Stronghold to the point where you defeat Dad.
- Alternatively, Ghommal's hilt can be used to teleport to Trollheim without requiring either quest
Other requirements
- 40 Armadyl Kill count in the godwars dungeon (lower with varying tiers of Combat Achievements) or an Ecumenical key
- A crossbow of any type
- Mithril grapple.
Suggested skills
85+ (Required, 100+ Recommended)
70+ (80+ Recommended)
70+ (80+ Recommended)
92+ (Blood Barrage)
70+ (80+ Recommended)
44+ (Eagle Eye)
Strategy
General Strategy
When starting a trip at Kree'arra, many players prefer using an ecumenical key to skip kill count, as Armadylean kill count is very slow and requires the use of prayer. Kree'arra is also commonly killed on a Slayer task of Aviansie, so skipping kill count is even more desirable in this case as the player will progress their slayer task if they kill Aviansie for kill count, reducing the overall number of Kree'arra that can be killed on-task.
Kree'arra, unlike the other generals, utilises all three forms of combat. By default, he attacks with ranged and magic. The ranged attack consists of grey dust tornadoes, while the magic attack is a blue dust tornado. Kree'arra's magic attack is classified as ranged magic, meaning that its accuracy rolls against the player's ranged defence bonuses, rather than magic.[1] The ranged attack can deal up to 69 damage, while his magic attack deals up to 21. Both of these attacks hit all players in the room, and can knock the player back a tile unless they are standing in the corners of the chamber. It is important to keep Protect from Missiles on at all times while Kree'arra is alive, or players will likely meet a swift death.
Should Kree'arra not be targeted, he will go up to his target and swipe his talons at them, dealing up to 26 damage.
Kree'arra has three bodyguards; Flight Kilisa, Wingman Skree and Flockleader Geerin, who use melee, magic and ranged respectively, capable of dealing up to 15, 16 and 25 damage respectively. Only Kilisa will be a threat, as Skree is generally inaccurate and the player is protected from Geerin's attacks.
When killed, Kree'arra and his bodyguards will drop bones, which can be converted into peaches with bones to peaches tablets. Peaches heal for 8 health, so the player can heal for 32 health after each encounter with Kree'arra and his bodyguards. The bodyguards occasionally drop two manta rays or three mushroom potatoes, which heal for 44 and 60 health respectively. These should be juggled if inventory is full.
Regardless of the method used, it is recommended to bring a staff that can autocast ancient spells to heal larger amounts after Kree'arra dies, conserving food for later kills.
Tumeken's Shadow
Tumeken's shadow, with its passive effect enhancing powerful magic gear, is the strongest weapon for conventional methods of killing Kree'arra, and it is far cheaper and more efficient than throwing chinchompas. Additionally, the combination of Blood barrage to heal off the bodyguards and the special attack of an Eldritch nightmare staff, especially with the reduced cooldown granted by the Lightbearer, can allow players to remain in Kree'arra's lair indefinitely, limited only by runes and weapon charges.
However, it should be noted that this strategy requires near-max magic gear. Downgrades will significantly impact kill times and trip length, due to the multiplying effect Tumeken's shadow has on the magic stat bonuses of other pieces of equipment.
As ancestral armour has less defence bonuses than conventional ranged options, players will take more damage from Kree'arra's magic attacks and Kilisa. It is recommended to freeze Kilisa whenever possible and go under Kree'arra after every attack made, as he attacks on a 3 tick cycle compared to the staff's 5 tick cycle.
Chinchompas
Because of Kree'arra's exceptionally high defensive stats, one of the most effective ways to kill him is by dealing indirect damage using red or black chinchompas. Hitting Kree'arra directly is significantly harder compared to the other generals with most weapons. Chinchompas roll accuracy based on the player's current target; if the hit is successful, then all other monsters in range will generally take damage regardless of their Defence level and bonuses. This method is primarily preferred for players without access to strong weapons such as a Bow of faerdhinen.
To utilise the chinchompa method, the player must have both targets near or directly on each other. Monsters with a size of 2x2 tiles or larger have their hitboxes placed on the south-western most tile, which is also where any items dropped upon their death will appear.
It is important that when utilising the chinchompa method, Kree'arra must be targeted off-tick (when the player is not attacking); otherwise, he will attempt to use Melee; Medium Fuse has the same attack rate as Kree'arra. To achieve this, simply left-click Kree'arra after throwing a chinchompa at Flight Kilisa, and then left-click Kilisa again just before your next attack. Repeating this cycle will ensure you take no melee damage from Kree'arra during the fight.
When an untouched room is entered, Kree'arra and his minions will be wandering around. Players should move to the south-western corner of the chamber to line up both Kree'arra and Kilisa. The player throws the chinchompas at Kilisa, allowing the chinchompas to damage Kree'arra in the process. Kilisa will clearly die before Kree'arra does at the start of the encounter, so switch to your crossbow or bow to kill Kree'arra while waiting for Kilisa to respawn, if she does so. On rapid, a crossbow will fire at a rate of 5 ticks (3.0 seconds), a twisted bow 5 ticks (3.0 seconds) and a bow of faerdhinen 4 ticks (2.4 seconds), so walk under Kree'arra after every attack to reduce the frequency of his own attacks.
When the room is cleared and Kree'arra respawns, when he attempts to melee the player, his hitboxes will also collide with Geerin, allowing chinchompas to be used on both of them for equal effect. The primary advantage of two chinchompa targets allows players to maintain more consistent damage, although there are also a few disadvantages in doing so; if the player's reflexes are too slow, Kree'arra will move out of the chinchompa's AoE, forcing the player to fully lure Kree'arra onto Kilisa and reducing the overall amount of health healed if Geerin does not respawn before Kree'arra dies.
When Kree'arra dies, switch to your toxic blowpipe and kill off Skree. Kilisa and Geerin can be stacked for Blood Barrage, unless Kilisa is dead or on low health, in which the player should use Blood Blitz on Geerin instead. Geerin and Skree will generally attack on different ticks (as Skree spawns all the way to the east, out of visible range when standing on the western edge), allowing their attacks to be flicked. It is also possible to flick all three bodyguards' attacks if they attack on different ticks, which saves even more food.
Team
In team encounters, all players will take damage from Kree'arra's attacks, so there is no designated tank. Due to the extra players, chinchompas are unnecessary and players should bring their best ranged weapon.
Equipment
Tumeken's shadow is currently the only weapon capable of killing Kree'arra directly that is competitive with black chinchompas. Note that it is dramatically more effective than any other magic weapon in this encounter, dealing roughly three times as much damage as the next strongest option. As such, no other magic weapons are recommended for killing Kree'arra directly.
| Slot | Item (most effective → least effective) | ||
|---|---|---|---|
 |  Slayer helmet (i)[a] Slayer helmet (i)[a] |  Ancestral hat Ancestral hat |  Virtus mask Virtus mask |
 |  Occult necklace Occult necklace | N/A | N/A |
 |  Imbued zamorak cape Imbued zamorak cape | N/A | N/A |
 |  Ancestral robe top Ancestral robe top |  Virtus robe top Virtus robe top | N/A |
 |  Ancestral robe bottom Ancestral robe bottom |  Virtus robe bottom Virtus robe bottom | N/A |
 |  Tumeken's shadow Tumeken's shadow | N/A | N/A |
 |  Rada's blessing 4 Rada's blessing 4 |  Honourable blessing / Honourable blessing / Rada's blessing 3/2 Rada's blessing 3/2 | N/A |
 |  Confliction gauntlets Confliction gauntlets |  Tormented bracelet Tormented bracelet | N/A |
 |  Avernic treads (max) Avernic treads (max) |  Eternal boots Eternal boots | N/A |
 |  Magus ring / Magus ring / Lightbearer[b] Lightbearer[b] |  Ring of suffering (ri) Ring of suffering (ri) |  Seers ring (i) Seers ring (i) |
 |  Eldritch nightmare staff Eldritch nightmare staff | N/A | N/A |
Inventory
|  |  | |
 | | | |
| |  | |
| | | |
| | | |
| |  |  |
 |  |  |  |
 |  |  |  |
- Eldritch nightmare staff to autocast Ancient Magicks or something else such as a Kodai wand or Blood ancient sceptre
- The eldritch nightmare staff not only autocasts Ancient Magicks, but also has a special attack that restores Prayer which can be used on the melee or ranged minion
- Elidinis' ward (f) to pair with the Ancient Magick switch
- Ecumenical key to get into the room
- 3-5 Saradomin brews
- 5-7 super restores
- High-healing food such as anglerfish or manta rays
- Any crossbow with a mith grapple to get to the lair, if not already using a crossbow
- One-click teleport
- Rune pouch with necessary runes to cast Blood Barrage to heal off the minions and ice spells to freeze Flight Kilisa.
- Imbued heart or its saturated version to boost Magic level.
- Any necessary god items[a] and/or secondary bolt if using any (optional)
- Trollheim Teleport[b]
By using chinchompas, one can kill Kree'arra quickly even if they are soloing, though it is also expensive.
To use this method, stand in the south-western corner of the room and wait for both Kree'arra and Flight Kilisa, the melee bodyguard, to close in on you.
When both are in position, start throwing chinchompas at Flight Kilisa; the chinchompas will almost always hit her due to her lower Defence, and the AoE damage will hit Kree'arra.


Inventory


| 1500 | 1500 | 375 |
- Toxic blowpipe for killing the minions and specs
- Bow of faerdhinen to hit Kree'arra when he and Flight Kilisa are not stacked, which happens at spawn and if Flight Kilisa dies before Kree'arra
- Blood ancient sceptre or something else to autocast blood spells such as a Kodai wand or ancient staff
- The eldritch nightmare staff not only autocasts Ancient Magicks, but also has a special attack that restores Prayer which can be used on the melee or ranged minion
- Ecumenical key to get into the room
- 2+ bastion potions or ranging potions
- 6-10 Saradomin brews depending on your combats and if you are using Blood Barrage
- 11+ super restores
- Bones to peaches tab for extra healing
- Any crossbow with a mith grapple to get to the lair, if not already using a crossbow
- One-click teleport
- Rune pouch with necessary runes to cast Blood Barrage to heal off the minions
- Any necessary god items[a] and/or secondary bolt if using any (optional)
- Trollheim Teleport[b]
Inventory
- Mith grapple
- One-click teleport (such as ectophial or teleport tabs)
- Any necessary god items[a]
- 12-16 Saradomin brews
- 6-8 super restores
- 2-3 ranging potions
- Ecumenical key (optional)
- Trollheim Teleport[b]
The Twisted Bow and Bow of Faerdhinen are both viable methods for killing Kree'arra. While weaker than Black Chinchompas, they're much cheaper to use and less click intensive.
Twisted Bow is stronger than the Bow of Faerdhinen if the player has Masori armour (f) and Dragon arrows—if missing two of those three items, the Bow of Faerdhinen with Crystal armour is stronger.
Players should stand under Kree'arra after each hit to minimise the amount of attacks Kree'arra can use against the player, especially if using a Twisted Bow as its attack speed is slower than Bow of Faerdhinen
Inventory
| 1500 | 1500 | 375 |
- Toxic blowpipe for killing the minions and specs
- Blood ancient sceptre or something else to autocast blood spells such as a Kodai wand or ancient staff
- The eldritch nightmare staff not only autocasts Ancient Magicks, but also has a special attack that restores Prayer which can be used on the melee or ranged minion
- Ecumenical key to get into the room
- 2+ bastion potions
- 6-10 Saradomin brews depending on your combats and if you are using Blood Barrage
- 8-10 super restores
- Bones to peaches tab for extra healing
- Any crossbow with a mith grapple to get to the lair. The grapple can be held within Dizana's quiver if owned.
- Rune pouch with necessary runes to cast Blood Barrage to heal off the minions
- Any necessary god items
- 2 Trollheim Teleports - Revert one after teleporting Trollheim to get a house teleport back.
- Bracelet of slaughter to extend slayer tasks if applicable
Even though Kree'arra has extremely high melee defences, the special attack of the soulflame horn can be used to make the player's next melee hit always land. Since the horn's special attack only works if another player is near the user, it is mandatory to kill Kree'arra in a small team with this method, with duos and trios working the best. Additionally, the player must be using a halberd since Kree'arra is airborne; the noxious halberd is the only viable halberd for this method.
All players should stand under Kree'arra after every attack, and use the soulflame horn's special attack while under him. While it is possible for a team to use only one soulflame horn and simply trade the horn between players after killing the minions, it is recommended for all players to have a soulflame horn in the event the player currently using the horn uses all of their special attacks (and thus guaranteed hits for the party) before Kree'arra is dead.
Despite melee armour giving high ranged defence bonuses, it is still recommended to pray Protect from Missiles to avoid potentially getting comboed by Kree'arra. Switch to Protect from Magic after Kree'arra dies to kill the magic minion.
| Slot | Item (most effective → least effective) | ||
|---|---|---|---|
| Slayer helmet (i)[a] | Torva full helm | Oathplate helm > Neitiznot faceguard |
| Amulet of rancour | Amulet of torture | Amulet of blood fury |
| Infernal cape | Fire cape | N/A |
| Torva platebody | Oathplate chest > Bandos chestplate | Blood moon chestplate |
| Torva platelegs | Oathplate legs > Bandos tassets | Blood moon tassets |
 | Noxious halberd | N/A | N/A |
| Rada's blessing 4 | Unholy blessing /Honourable blessing | N/A |
| Ferocious gloves |  Barrows gloves Barrows gloves | N/A |
| Avernic treads (max) | Primordial boots | Aranea boots / Dragon boots |
| Lightbearer[b] | Ultor ring > Berserker ring (i) | Ring of suffering (ri) |
| Soulflame horn | N/A | N/A |
Inventory
| | | |
- Soulflame horn
- Lightbearer to switch to after a kill if using another ring (e.g. ultor ring)
- Rune pouch with necessary runes to cast Blood Barrage and Ice Barrage if using Ancient Magicks, or Death Charge if using the Arceuus spellbook
- While water runes for Ice Barrage are optional, it allows players to avoid damage from the melee minion by freezing them on top of the ranged minion
- Magic gear switch and a weapon that can autocast Ancient Magicks (e.g. blood ancient sceptre, kodai wand)
- Ecumenical key to get into the room
- 2+ super combat potions or divine super combat potions
- High-healing food such as manta rays or tuna potatoes
- 8 super restores
- Bones to peaches tab for extra healing
- Any crossbow with a mith grapple to get to the lair.
- Any necessary god items
- Ghommal's hilt or Trollheim Teleport