Doom of Mokhaiotl/Strategies
This copy was last processed on . The copied wiki revision is dated .
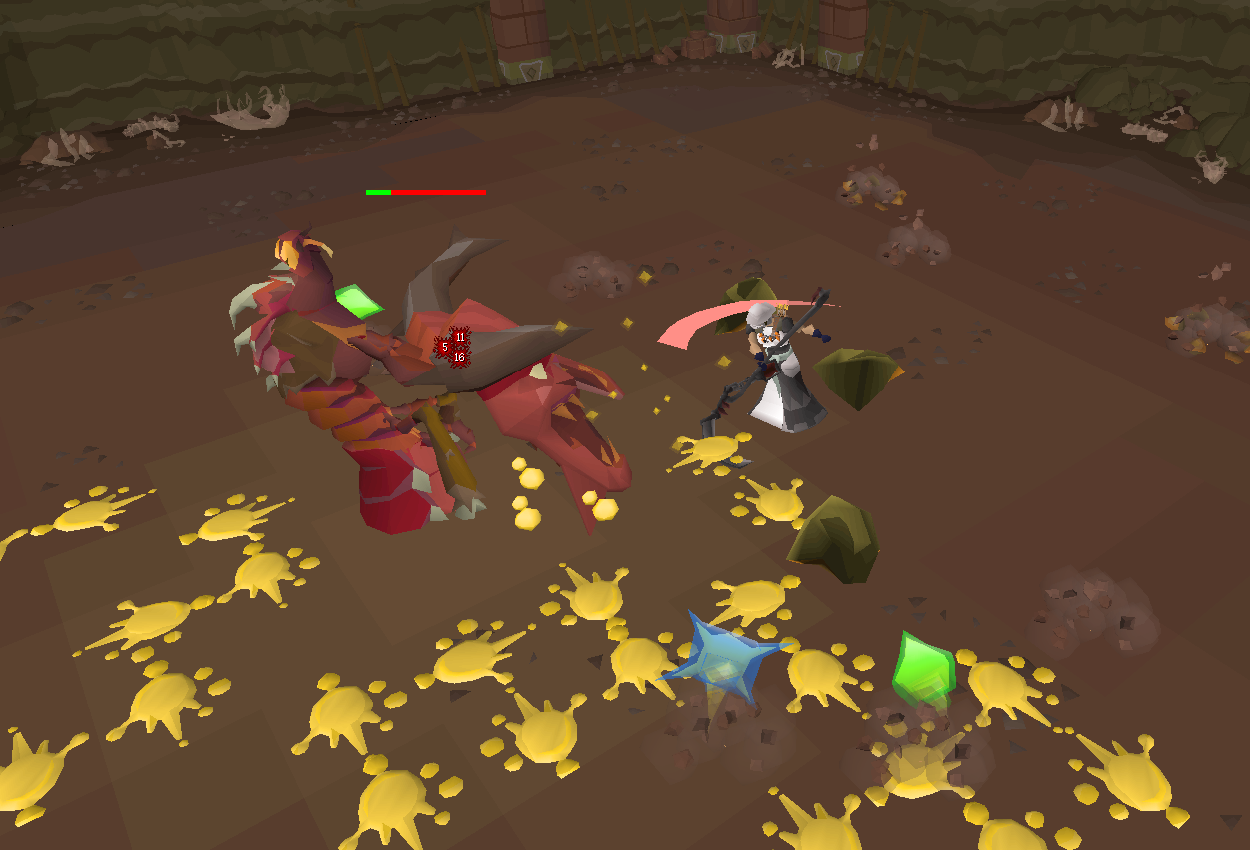
After completion of The Final Dawn, players can challenge the Doom of Mokhaiotl, who is found in the Ruins of Mokhaiotl by returning through the northernmost entrance.
Similar to Yama, players who die fighting the Doom are sent back to the lobby area instead of their respawn point, where their graves are also located. Players will have their reclamation fee reduced by 75% until they have 20 total delves, after which the standard death cost will apply.
Requirements
- Completion of
The Final Dawn
Recommendations
- Completion of
- Completion of
- Completion of
Hard Western Provinces Diary for access to elite void and the crystal halberd
90+ Ranged
43 Prayer minimum for access to all three protection prayers.
75 Agility for the pit jump shortcut in the ruins.

Transportation
- The Mokhaiotl waystone is a single use item that teleports players to the centre of the ruins, just south of the pit jump shortcut.
- The pendant of ates teleport to Kastori takes players south-east of the lift platform that takes players just south of the entrance to Mokhaiotl.
- The Quetzal Transport System can also be used to travel to near the boss.
- Tal Teklan - West of the lift to the boss, a bank is available in town.
- Kastori - South-east of the lift to the boss, no bank available.
West of the lift platform underground, a chest can be opened to obtain two ancient teleporters, which can be used to speed up the run north to the entrance to Mokhaiotl. It is optimal to place the initial teleporter a tile or two north of the lift platform, then placing the destination teleporter adjacent to the door to skip the delay before entering the door after teleporting.
Fight overview
As a delve boss, defeating the Doom will cause it to delve deeper into the archive, growing in power as it does so. Pursuing it into deeper delve levels will increase the difficulty of the fight, up to delve level 8.
Starting from delve level 1, the Doom of Mokhaiotl starts with a combat level of 558 and 525 Hitpoints. For every delve level after - up to delve level 8 - it will gain 50 additional combat levels and 25 Hitpoints. This excludes delve levels 6 and 7, which both have 650 Hitpoints. The boss' stats remain identical across delve levels, though the damage it deals increases with every delve level.
The Doom will not appear until the player clicks out of the prompt (after jumping through the gap or descending down a level), after which it will spawn shortly afterwards.
The Doom possesses a Defence level of 90 and Magic level of 275. It possesses +300 stab and slash defence, +60 crush defence, and +160 magic and overall ranged defence. Additionally, the Doom has a defence drain cap of 30, meaning that its Defence can only be lowered to a minimum of 60. It is not immune to poison, with any hits that would inflict venom instead being converted to poison.
Further delve levels - referred to as deep delves - will remain at the same difficulty as delve level 8 in theory (having 625 Hitpoints instead of 675), but the persistent acid blood that remains in the arena makes it practically more difficult.
Mechanics
The Doom's standard attack consists of a single projectile, with its colour and shape indicating the combat style to pray against:
- blue for magic,
- green for ranged,
- and red for melee (used at delve level 2 and higher)
These attacks calculate damage on impact and (as such) can be protected against after the Doom launches the projectile. An unblocked attack has a max hit of 47, which gradually increases to 65 damage by delve level 8. The travel speed of these projectiles is slow at the first few delve levels, but steadily increases through delve level 6. The Doom’s attack speed also increases through delve level 7, at which point the Doom attacks at a 4 tick speed.
Standing next to the Doom will result in a melee attack (whipping the player with its tongue) that deals up to 40 damage. Protect from Melee reduces the damage of the attack by 50%.
The Doom has a multitude of special attacks and hazards, with various additions, enchantments and combinations as the delve level increases.
Demonic larvae
Occasionally, demonic larvae will drop from the ceiling and begin moving towards the Doom. These larvae will always spawn around the player's position.
If a larva reaches the very centre of the Doom, it will heal it and damage the player, as well as gaining one stack of "demonic charge". This initially starts at 10 health healed and 1 damage dealt, but additional stacks of demonic charge will increase the amount the Doom heals and the damage the player takes. Demonic stacks are not reset between delve levels, so it is important to kill the demonic larvae when the opportunity allows.
Demonic larvae have 2 Hitpoints and can only be one-shot by demonbane weapons, multi-hit weapons, and the Eye of Ayak; any other weapon will only deal 1 damage, requiring two attacks to kill one. They may be attacked on attack cooldown: Non-demonbane attacks incur the weapon's attack delay afterwards, whereas demonbane attacks and the Eye of Ayak will not incur any attack delay. Fast non-demonbane weapons (e.g. a blowpipe) may be used to overwrite the original attack cooldown, allowing for faster attacks on the Doom.
When demonic larvae are killed, they will explode and deal up to 21 damage in a 3x3 area; however, if this hits the Doom, it will deal 5-10 damage (or 100 shield damage) instead, and the player will not take any damage from the explosion. Try to avoid killing larvae when they are out of Doom's range.
The demonic larvae will begin to increase in intensity as the delve level increases:
- At delve levels 1-3, they will have a random protection prayer active (or none at delve level 1)
- At delve levels 4+, they will have two protection prayers active, with their colour indicating which combat style to use: blue for magic, green for ranged, and red for melee. Melee demonic larvae will only appear during the shield phase.
- At delve levels 5-7, two larvae will spawn at a time outside of the shield phase.
- At delve levels 8+, a giant demonic ranged/magic larva can spawn outside of the shield phase. These larvae have doubled health, have a 4x4 AoE explosion around itself and tripled penalties if allowed to reach the Doom; e.g a missed large larvae, at 0 charge stacks, will heal Doom for 30 hitpoints and deal 3 damage to the player.
Larvae will despawn after ~20 or so seconds have passed after spawning, however this can only occur when the Doom has repositioned itself during the burrowing phase, or if the Doom has been completely surrounded by boulders. They will always be able to reach the Doom otherwise.
Rock Throw
The Doom launches a large rock into the air, exploding after 7 ticks into multiple falling rocks that target the area where the player stood, indicated by looming shadows. One will always land on the tile the player stood on at the time it exploded, which will remain in place as a rock, while the others do not. Standing on a shadow when the rocks land will result in the player taking 15-20 damage. If the player does not move from their initial tile at the time of explosion, the resulting rock will shove the player away to a random valid tile in a 3x3 area surrounding it.
Immediately after the large rock explodes, the player's protection prayers are disabled and a number of projectiles will be launched at the player. The colour of the rock determines which attack style is used first; if it is a normal rock, then the first hit is always ranged. If the rock is glowing blue, then the first hit will be magic. Projectiles from the rock have 100% accuracy, though protection prayers still negate all damage accordingly. Melee projectiles are never used with these rocks.
The rock throw attack will increase in intensity as the delve level increases:
- At delve level 1, only one projectile is launched.
- At delve levels 2 and 3, two projectiles are launched, with the second landing one tick after the first.
- The projectiles will never repeat in a row (i.e. a ranged projectile will always be followed up with a magic projectile and vice versa)
- At delve levels 4+, three projectiles are launched, and often sync up with the Doom's standard attacks, which can result in the player being hit 4 times in 4 ticks.
- At delve level 7, the projectiles will reach the player 2 ticks (1.2s) after the debris lands.
- At delve level 8, two rock throws are performed, which will always be identical.
- To avoid damage from the attack, the player must pray after the second rock explodes; projectiles from the first rock will not reach the player until this occurs.
- The looming shadows from the second rock will never overlap with the first's, and the projectiles from the first rock appear after the shadows from the first rock have expired. With proper timing, players can utilise shadows from the first rock to avoid taking damage from the second rock's shadows.
Special Beam Cannon
The Doom enters a defensive stance and begins to charge up, indicated by a yellow charge bar appearing. If allowed to charge completely, the Doom will unleash the Special Beam Cannon, dealing 60 damage. This increases to 80 at delves level 4-5, and deals 99 damage at delve level 6+. This makes it the highest priority attack to deal with, as the Doom will also charge faster at higher delve levels.
There are three distinct occasions in which the charge bar appears, and the player must attack the Doom to interrupt/reset the charge bar. Attacks whilst charging are 100% accurate and will always result in a successful hit.
- Melee Charge - on all delve levels, the Doom will pray against ranged and magic (
) and begin charging. This is always accompanied by the Rock Throw attack. Only a melee attack will interrupt the charge.
- Shield Charge - at delve levels 3+, the Doom will begin using a demonic shield with 500 shield health and begin charging constantly. Only demonbane (excluding holy water) will reset the charge.
- Burrow Charge - At delve levels 5+, the Doom's burrowed form (commonly referred to as "car phase") will always be charging constantly. Any attack will reset the charge.
Melee punish

Whenever the Doom begins a melee charge, only a melee attack will interrupt the charge, which will also deal bonus damage that deals damage, where is the player's visible Strength bonus. As such, offensive prayers and set bonuses (such as Void Knight equipment) will not increase the bonus damage. When using multi-hit weapons such as the dual macuahuitl or the crystal halberd's special attack, the bonus damage duplicates itself once per hitsplat.
Melee charges are only performed in tandem with rock throw attacks, but is not always guaranteed. This will never occur in the rock throws that are used right before shockwaves during the volatile earth phase.
The Doom's next attack is additionally delayed by several ticks if melee punished; this starts with a 8 tick delay at delves 1 and 2, 7 ticks at delves 3-6, and 6 ticks at delves 7+. Using any weapon with an attack speed of 5 or lower, such a scythe of vitur or noxious halberd, will always allow for the player to get a hit in with their ranged weapon before the Doom resumes its attack rotation regardless of delve level.
Additionally, if the Doom is defeated by a melee punish during delves 1-8, projectiles resembling holy water will be launched around it, restoring 28 Hitpoints, 14 prayer points, and 25% special attack energy, as well as clearing up acid blood in a 3x3 area around the projectile's landing tile.
Shockwave
Generally performed around a minute into the fight (or directly after the burrow phase) and can be triggered before the Demonic shield if the boss isn't phased fast enough. This attack is indicated by the multitudes of volatile earth spawning in the area. 20 ticks (12s) after they appear, the Doom will initiate its shockwave attack, dealing 30-41 damage per shockwave. This equates to three attacks from the Doom before this occurs, and one of these will always be a standard Rock Throw. If a standard attack is used as the last attack, it will be partially cut off by the shockwave animation.
To protect against the shockwave, the player must attack two volatile earth (which does not incur attack delay) to generate an earthen shield, then stand within it for protection. Please note that the player's hit delay, i.e projectile travel, plays a role in when the earthen shield will spawn. The volatile earth will only begin spawning the shield once the player's projectile has landed. So it is important to be relatively aware of how far away one is when attacking the second orb in order to time the spawning of the shield properly.
Notably, a player will deal their maximum hit to a volatile earth (despite having 1 Hitpoint), meaning health or prayer restoring special attacks such as the toxic blowpipe and eldritch nightmare staff can be used to effectively restore off them.
The first volatile earth destroyed determines the destination of the shield, while the second determines its spawn point. Additionally, the shield will move at walking speed (half at delve level 1) prioritising diagonal movement before moving straight towards its destination. The centre tile of the shield will also remove acid blood if present in its path.
The earthen shield will dissipate upon reaching its destination or when the Doom's shockwaves end, whichever happens first. As such, players must get the timing right for spawning the earthen shield as well as pick two points far enough apart to last the entire attack. It is advised for players to zoom out, and attempt to find the straightest path between two of the volatile earth. This, in addition to using ctrl+click to avoid having to manually path whilst dealing with a number of other mechanics. Keep these in mind when deciding where to stop and start the shield path, using the shield to remove acid blood and avoiding rocks that will block the player's path.
The shockwave attack will increase in intensity as the delve level increases:
- At delve levels 1 and 2, there will be only one shockwave.
- At delve levels 3 and 4, there will be two shockwaves, occurring two ticks in between.
- At delve levels 5 and 6, there will be three shockwaves.
- At delve level 7, there will be four shockwaves.
- At delve levels 8+, there will be five shockwaves.
With top-end gear, the player may occasionally defeat the Doom right as the volatile earth spawn in. In these cases, it is recommended to quickly destroy a pair to create a path that would clear the most acid blood before descending further, as they will only remain for a short duration before all of them despawn upon the Doom's defeat.
It is also possible to create an earthen shield by killing the boss a few ticks before attacking the second volatile earth at a distance. This can be approximated by checking if the boss is at low health and estimating whether the subsequent hit will kill the boss based on the XP drop. Because the boss is dead and no further shockwaves can occur, the shield lasts until it reaches its destination.
Acid blood
Starting at delve level 3, the Doom will begin to spray acid blood in a square-shaped area surrounding it, choosing a random cardinal direction to spray, which will inflict up to 7 venom damage per tick if stood on. It will spray acid blood whenever it is damaged outside of its shield or car phase; this includes hits from thralls and multi-hit weapons. As such, players should be mindful of using thralls and multi-hit weapons such as a crystal halberd or scythe of vitur if going deep down.
The amount of blood splattered depends on the delve level; 2-3 splatters at level 3-7, then 4 at 8+. The targeted tiles are completely random as stated above, but can land on already splattered tiles.
Acid bloods are carried over between delve levels, with the exception of delve level 6, where reaching it will wipe the entire area clear for one time only. The only other ways to clear acid blood after delve level 6 is to trigger holy water projectiles (until delve 8), or the use of the earthen shield's central tile.
Demonic shield
Starting at delve level 3, the Doom will start initiating a shield phase with 500 shield health and begin charging constantly for its Special Beam Cannon. It will usually attempt to do so upon reaching 75% health, after two attacks (unless it was preparing a melee charge), giving a small leeway for an additional attack before it enters this phase.
As the Doom does not change appearances, there are a number of ways to determine whether it has started this:
- If the in-game setting "Show boss health overlay" has been enabled, the health bar will change from green to blue.
- When the Doom's name is changed to "Doom of Mokhaiotl (Shielded)"
- The appearance of a blue health bar or a purple game message stating
- Use of a RuneLite plugin
- The player will stop attacking Doom after the transition.
If an attack was launched during the transition from actual health to the shield phase, it will deal actual damage to the Doom if it lands before the shield is set up. If the shield is set up and the attack lands shortly afterwards, it will damage the shield and interrupt charge.
The Doom's shield can only be harmed with demonbane weapons (excluding holy water), which have 100% accuracy and will also reset the charge bar; as such, the Doom must be attacked every now and then to interrupt the charge. Letting the boss fully charge will result in the shield phase instantly ending; this is a popular speedrunning technique, albeit a risky one. Additionally, demonic larvae will continuously spawn from one direction and move towards the Doom, usually from the south-west, west, north-west or north, rather than strictly around the player. If these are not available due to a wall blocking their path, they will spawn in other directions. During the shield phase, exploding larvae will deal 100 shield damage to speed things up considerably, especially at higher delve levels when the rate of spawning larvae increase.
Be sure to stay out of melee distance from the Doom before the shield phase ends before delve level 5, as Doom will immediately resume attacking, which can often result in a melee attack without any animation.
At delve levels 5+, the Doom will always initiate the shield phase after two attacks from the last shockwave in sequence.
Burrowing (car phase)
Popularly known as the "car phase". Starting at delve level 5, after the shield phase ends, the Doom will enter a burrowed form and cause numerous rocks to fall from above. During this transition, there is a short grace period in which players can run over acid blood and stand in larva explosions without consequence.
Once burrowed, the Doom checks which of the 8 compass directions the player is located in relative to its center, then spawns a yellow eye four tiles past the player in that direction. After a short duration, the Doom will zoom straight towards the eye, destroying any rocks and trampling players in the way, before doing so a second time. If the player is hit by Doom at the end destination, they will additionally be shoved out of the way.
During the car phase, the Doom will be charging constantly for its Special Beam Cannon, making it an opportune time to use a Zaryte crossbow, dragon knife or rosewood blowpipe special attack as all attacks made whilst charging are 100% accurate. Any attack will reset the charge.
The car phase will increase in intensity as the delve level increases:
- At delve level 5, the Doom will zoom twice, and trample damage dealt is at 10.
- At delve level 6, the Doom will zoom, launch 1-3 standard attacks depending on distance travelled, then initiate a Car Slam attack. It will do this three times. Trample damage is also increased to 20.
- Instead of an earthen shield, the rocks that fall when it begins burrowing serve as protection from its slams.
- At delve level 7, trample damage is increased to 30.
- At delve level 8+, fewer falling rocks are provided when the car phase is initiated. Additionally, the Doom's zoom speed is significantly increased, reaching its destination in 1 or 2 ticks. Trample damage is also increased to 40.
Rockblock
At delve levels 6 and above, the Doom will utilise Car Slams, destroying every rock within 15 tiles from its centre tile, excluding rocks that were protected by another rock. As such, players must be mindful about where they lure the Doom, lest they have it destroy a set of rocks that the player intended to use in a subsequent Car Slam. This is especially important at delve levels 8+ when fewer rocks will fall when it burrows.
With some planning, players may use rocks that are placed from Rock Throw attacks to their advantage by standing on specific tiles as the rock explodes, then luring the Doom towards it so that its centre tile is right where a rock is. When the Doom performs a Car Slam, that rock will fully block it and result in no rocks (besides itself) crumbling for that Car Slam. This is known as "Rockblock".
| Tile markers |
|---|
[{"regionX":35,"z":0,"regionId":14180,"regionY":31,"color":"#FFFFFFFF"},{"regionX":34,"z":0,"regionId":14180,"regionY":33,"color":"#FFFFFFFF"},{"regionX":35,"z":0,"regionId":14180,"regionY":34,"color":"#FFD02BA7"},{"regionX":36,"z":0,"regionId":14180,"regionY":32,"color":"#FFFFFFFF"},{"regionX":36,"z":0,"regionId":14180,"regionY":31,"color":"#FFFFFFFF"},{"regionX":35,"z":0,"regionId":14180,"regionY":40,"color":"#FFD02BA7"},{"regionX":34,"z":0,"regionId":14180,"regionY":41,"color":"#FFFFFFFF"},{"regionX":36,"z":0,"regionId":14180,"regionY":43,"color":"#FFFFFFFF"},{"regionX":36,"z":0,"regionId":14180,"regionY":42,"color":"#FFFFFFFF"},{"regionX":37,"z":0,"regionId":14180,"regionY":42,"color":"#FFD02BA7"},{"regionX":28,"z":0,"regionId":14180,"regionY":41,"color":"#FFFFFFFF"},{"regionX":27,"z":0,"regionId":14180,"regionY":40,"color":"#FFD02BA7"},{"regionX":26,"z":0,"regionId":14180,"regionY":43,"color":"#FFFFFFFF"},{"regionX":39,"z":0,"regionId":14180,"regionY":40,"color":"#7FFFFF00"},{"regionX":26,"z":0,"regionId":14180,"regionY":42,"color":"#FFFFFFFF"},{"regionX":25,"z":0,"regionId":14180,"regionY":42,"color":"#FFD02BA7"},{"regionX":25,"z":0,"regionId":14180,"regionY":41,"color":"#FFD02BA7"},{"regionX":34,"z":0,"regionId":14180,"regionY":45,"color":"#7FFFFF00"},{"regionX":37,"z":0,"regionId":14180,"regionY":32,"color":"#FFD02BA7"},{"regionX":31,"z":0,"regionId":14180,"regionY":31,"color":"#FF832BD0"},{"regionX":25,"z":0,"regionId":14180,"regionY":37,"color":"#FF832BD0"},{"regionX":39,"z":0,"regionId":14180,"label":"1","regionY":34,"color":"#7FFFFF00"},{"regionX":38,"z":0,"regionId":14180,"label":"2","regionY":29,"color":"#7F00FFFF"},{"regionX":33,"z":0,"regionId":14180,"label":"3","regionY":30,"color":"#FF832BD0"},{"regionX":28,"z":0,"regionId":14180,"label":"1","regionY":45,"color":"#7FFFFF00"},{"regionX":23,"z":0,"regionId":14180,"label":"2","regionY":44,"color":"#7F00FFFF"},{"regionX":24,"z":0,"regionId":14180,"label":"3","regionY":39,"color":"#FF832BD0"},{"regionX":41,"z":0,"regionId":14180,"label":"rock","regionY":37,"color":"#FF00FF3A"},{"regionX":31,"z":0,"regionId":14180,"label":"rock","regionY":47,"color":"#FF00FF3A"},{"regionX":28,"z":0,"regionId":14180,"regionY":30,"color":"#FF832BD0"},{"regionX":24,"z":0,"regionId":14180,"regionY":34,"color":"#FF832BD0"},{"regionX":26,"z":0,"regionId":14180,"regionY":34,"color":"#FF832BD0"},{"regionX":25,"z":0,"regionId":14180,"label":"3t","regionY":34,"color":"#FF832BD0"},{"regionX":28,"z":0,"regionId":14180,"regionY":32,"color":"#FF832BD0"},{"regionX":28,"z":0,"regionId":14180,"label":"3t","regionY":31,"color":"#FF832BD0"},{"regionX":39,"z":0,"regionId":14180,"regionY":44,"color":"#7F00FFFF"},{"regionX":38,"z":0,"regionId":14180,"regionY":45,"color":"#7F00FFFF"}] |
| Tile markers guide • Data |
There are multiple ways to execute Rockblock. With the tile markers provided, players should stand on the green tile in the north or east side and wait until the Doom uses a Rock Throw. When the rock begins to dip down (one tick before it explodes), running towards the white/pink tiles will always place the rock at tile the player stood on and put them outside of the 9x9 debris field. This makes it useful to avoid the looming shadows from a rock throw, and at delve levels 8+ allows the player to commit more focus on praying and dodging the second rock throw.
When the Doom uses another Rock Throw, place the rock around the purple tile labeled "3" if possible; otherwise, the white/pink tiles will suffice. Players may damage the boss too quickly for it to use a second Rock Throw in delve levels 6 or 7, in which case players may have to hold back on proccing shield phase until it does or hope that the start of the car phase will put falling rocks in a favourable position.
Once the car phase starts, keep attacking the Doom whilst doing the following:
- Stand by the gold tile labeled "1" until the Doom's eye appears over it.
- Move to the cyan tile labeled "2" until the Doom's eye appears again, using the rocks placed around the aforementioned area to protect against the second slam. Doing these first two steps correctly should preserve a sufficient amount of rocks in the south-western area.
- Stand around the purple tile labeled "3". If the player is able, standing beyond the row of three purple tiles labeled "3t" will cause the Doom to move for one extra tick, which can sometimes be enough to squeeze in one more attack.
Double Rockblock
At delve levels 8+, players can improve upon Rockblock and perform a Double Rockblock instead. While possible at delve levels 6 and 7, this can take some time as it is reliant on waiting for the Doom to perform two Rock Throws instead of one. Players can still perform a Double Rockblock at those delve levels for practicing or if the fight lasts long enough pre-shield for the Doom to perform two Rock Throws.
Similar to regular Rockblock, when the rock begins to dip down (one tick before it explodes), move out of the way for the first rock to be set. In the demonstration provided, moving to the next green tile will then place the second rock in position and complete the setup for Double Rockblock. Players should stand somewhere north of the Doom so that additional Rock Throws can be used for protection against the third Car Slam.
With this setup, any tiles between the two gold tiles will have the Doom place its eye on the tile where the first rock is. For the second rock, players must be standing on the centre-west tile of the Doom on the 5th tick after the first Car Slam for it to place its eye on the tile where the second rock is. Otherwise, it will place its eye one tile north of the second rock and only offer protection south of the Doom.
Performing the Double Rockblock correctly will result in only two rocks being destroyed by the Doom for the first two Car Slams, and allowing much greater flexibility in dealing with the car phase.
-
The player times their movements to correctly set up rocks for the Double Rockblock.
-
The Doom performs a second Rock Throw, and the player moves north to place them in a favourable position.
-
A player executes the Double Rockblock, using the rocks from the second Rock Throw to protect themselves for the third Car Slam.
Attack rotations
During delve levels 1-4, the Doom uses standard attacks, charges with protection prayers, Rock Throw, and Shockwave attack in its rotation. Shockwave attacks during these delve levels generally begin roughly one minute into the fight.
During delves 5 and higher, the attack rotation is slightly changed due to the addition of the car phase:
- Standard delve level 1-4 attack rotation
- Shield phase (upon reaching 75% health)
- Car phase (two zooms)
- Volatile earth spawn
- 3 standard attacks
- Shockwave
- 2 attacks, of which one will always be a Rock Throw
- Loop back to shield phase
After delve level 6, the attack rotation would always be as follows:
- Standard delve level 1-4 attack rotation
- Shield phase (upon reaching 75% health)
- Car phase (Zoom then Car slam, does this 3 times)
- Volatile earth spawn
- 4 attacks, of which one will always be a Rock Throw
- Shockwave
- 2 attacks, of which one will always be a Rock Throw
- Loop back to shield phase
Table of attacks by delve level
| Delve level | HP | Rock Throw projectiles | Shockwave | Demonic larvae | Beam damage | Acid blood | Shield phase | Car phase | Trample damage | Car slams |
|---|---|---|---|---|---|---|---|---|---|---|
| 1 | 525 | 1 projectile | 1 slam | Neutral | 60 | None | None | None | No | No |
| 2 | 550 | 2 projectiles | 1 slam | Neutral | 60 | None | None | None | No | No |
| 3 | 575 | 2 projectiles | 2 slams | Neutral | 60 | Yes | Yes | None | No | No |
| 4 | 600 | 3 projectiles | 2 slams | Coloured | 80 | Yes | Yes | None | No | No |
| 5 | 625 | 3 projectiles | 3 slams | 2x Coloured | 80 | Yes | Yes | 2 zooms, no projectiles | 10 | No |
| 6 | 650 | 3 projectiles | 3 slams | 2x Coloured | 99 | Arena cleared | Yes | 3 zooms with projectiles | 20 | 3 slams |
| 7 | 650 | 3 projectiles | 4 slams | 2x Coloured | 99 | Yes | Yes | 3 zooms with projectiles | 30 | 3 slams |
| 8 | 675 | 2 sets of 3 projectiles | 5 slams | Giant | 99 | Yes | Yes | 3 zooms with projectiles | 40 | 3 slams |
| 8+ | 625 | 2 sets of 3 projectiles | 5 slams | Giant | 99 | Yes | Yes | 3 zooms with projectiles | 40 | 3 slams |
Equipment
While the Doom is weakest to crush attacks, the fight has many mechanics which make melee unfriendly, especially at deeper delves. Players are instead recommended to use ranged, as despite its higher defence bonuses, its low Defence offsets it. The twisted bow is the best weapon to use, given Doom's Magic level of 275. If a twisted bow cannot be used, the scorching bow is the next best alternative, given its cheapness and only trailing slightly behind the twisted bow in terms of damage output due to Doom's demon attribute. However, despite the scorching bow being the second best choice, it should be noted that it prompts doom to generate about 20% more acid due to its faster attack speed, slightly higher accuracy and lower max hit. It also has an attack window disadvantage where two extra hits can be acquired at higher delve levels.
Special attack weapons
The Zaryte crossbow is the most powerful special attack weapon and should be paired with regular enchanted ruby bolts for cost efficiency, as the dragon variant provides no additional benefit in this scenario. When to use it will vary - at delve levels 1-4, a successful special attack can help speed up the fight and reach deeper quicker. However, at delve levels 6+, it is not recommended to use the crossbow special attack as the opener due to the necessity of the Rockblock strategy at higher delve levels. As such, it is recommended to use the crossbow special attack once the car phase starts to guarantee a high successful hit (as all attacks are 100% accurate in that form), or if health/supplies are low, preserve energy for a special attack that restores hitpoints or prayer on the volatile earth (ex. a toxic blowpipe) for a large amount of restoration.
For players who do not have a Zaryte crossbow, their next best option is to use a crystal halberd, reserved for melee punish. Every melee punish with a crystal halberd will guarantee a minimum of 46 damage (two bonus hits of 23). This is the same guaranteed damage as a Scythe of vitur would deal (three bonus hits of 15). The additional range, much higher average upfront hit, and availability to all players makes the crystal halberd much more desirable than even the scythe on depths 6+. Bringing extra switches for melee punish is not necessary given its randomness, but players who wish to do so are encouraged to bring the best melee amulet and gloves. This will increase death costs, so players are not recommended to bring these swaps unless they are already repaying the highest amount possible.
Rosewood blowpipe special attacks are a viable alternative to Dragon knife special attacks as they give only a slight loss of damage whilst costing significantly less, 225 and 4,209 respectively, losing only 2 max hits in either void or masori.
Immediately when car phase starts, use a Zaryte crossbow special or dump 3-4 dragon knife special attacks. Note that at deeper delves, these short-ranged weapons are likely to have diminishing returns unless the player is able to manipulate Doom and attacking from a safe distance. Phasing deep past 75% health and starting car phase with a Zaryte crossbow special, or dragon knife/rosewood blowpipe dump, will make it much more likely that the boss dies before it gets the chance to pull off a shockwave attack, as it and exploding rocks have a very high chance of death if handled improperly.
Due to the importance of special attacks on key phases of the fight, a lightbearer is highly recommended over any other ring. Upgraded Death Charge from Yama is extremely beneficial as well, as Death Charge procs on both Doom and its larvae. With upgraded death charge and a lightbearer, players can restore 40-50% energy per level. Similarly to Fortis Colosseum, special attack energy restoration is reset between waves, e.g if a player defeated the Doom 3 seconds before their energy restores, it will be an additional 30 seconds (or 15 seconds with lightbearer) after starting the next wave before special attack energy will regenerate.
While a defence-draining weapon such as the Tonalztics of ralos, dragon warhammer, or elder maul can improve accuracy, the Doom's defence cap of 60, relatively low hitpoints, and guaranteed accuracy during the melee punish and car phase make them less helpful than expected. If you factor in guaranteed damage from demonic larvae, melee punishes, and car phase, defence-draining weapons can often increase the average time to kill.
Players with low combat stats, ironmen without a Zaryte crossbow or dragon knives, or players struggling to get many attacks in during car phase can use any of the mentioned defence-reducing special attacks at the start of the fight. Although generally slower, you will still gain additional consistency of attacks leading up to the volatile earth shockwave while still retaining special attack for melee punishes.
Summary
Best in slot:
- Bring a Zaryte crossbow, scythe, and crystal halberd.
- On 1-4, immediately crossbow spec. Use scythe for punishes.
- On 5-8+, do not immediately crossbow spec. Use the halberd spec on melee punish attacks.
- When car phase starts, crossbow spec as your first attack.
Budget:
- Bring rosewood blowpipe and a crystal halberd.
- On all phases, use halberd spec on melee punishes.
- Toxic blowpipe spec can restore the maximum health possible on volatile earth if deemed necessary.
Masori vs Elite void
Players have the option of choosing between Elite Void Knight equipment or fortified masori against the Doom. Both give a very similar performance, but there are various factors that can influence the gear used.
When using a scorching bow as a primary, elite void is recommended, as the 4-tick speed, the Doom being susceptible to demonbane, and being able to use dragon arrows helps alleviate accuracy issues during the fight. Additionally, elite void has very low reclaim cost, allowing players to focus on upgrading other slots and minimising death costs. While the accuracy bonus is not as impressive as masori, elite void provides a higher max hit. This is especially useful after delve level 5+, where there are many phases that provide 100% accuracy.
When using a twisted bow as a primary, fortified masori is recommended for more accuracy to help the twisted bow's accuracy, increasing the chances of overall high hits, especially during phases where accuracy is not 100%. However, it deals slightly less damage than elite void, especially when 100% accuracy is guaranteed. The defence bonus of fortified masori slightly helps in reducing the chances of Doom's attacks hitting by ~12%, but can be quite expensive which will result in high reclaim costs upon death, which can be detrimental if the player dies frequently. As such, it is only recommended for very experienced delvers.
Spellbook choice
If using the Eye of Ayak, players may choose to use the Lunar spellbook for access to Cure Me with Spellbook Swap for Death Charge, though keep in mind the Eye will not disrupt the Doom's shield phase charging and will increase death costs if not protected.
If not using the Eye of Ayak, players should stay on the Arceuus spellbook, with runes for Death Charge. Ward of Arceuus is optional, as it weakens the Doom's standard attacks, but has no effect on any of its other attacks. Thralls are not recommended for the fight, as their attacks will cause more tiles to be affected by acid blood, and they have very little uptime; they will not attack Doom during shield phase, and car phase usually doesn't last long enough to justify their damage.
Masori equipment is the best equipment when combined with a Twisted bow for normal attacks on Doom. Elite void ranged is instead better when attacks are 100% accurate, is much cheaper, and is better overall when used with the Scorching bow. Additionally, there are certain pieces of equipment that gain additional strength bonus towards melee punishes without losing much ranged damage, such as Aranea boots or Barrows gloves, although ranged strength bonus should be prioritised where possible.


In addition to the demonbane weapon for the shield phase, it is faster to bring a one way demonbane or multi-hit swap for each style to deal with larvae. Emberlight is a marginal upgrade over Arclight/Darklight/Silverlight if used for the melee punish, as it is primarily used for 1-shotting larvae. A staff that can auto-cast demonbane spells is very convenient due to the rapid switches between styles. A cheaper staff like the Slayer's staff should be preferred to reduce death costs. Superior Demonbane can be used on autocast instead of Dark Demonbane so that magic demonic larvae can be dealt with even after drinking brews, as two sips of brew will prevent players from autocasting Dark Demonbane. Alternatively, if not bringing runes for Death Charge, Inferior Demonbane can be used to reduce cost.
| Slot | Item (most effective → least effective) | |||
|---|---|---|---|---|
 |  Darklight and other variants[a] Darklight and other variants[a] |  Burning claws Burning claws |  Sulphur blades / Sulphur blades /  Glacial temotli / Glacial temotli /  Earthbound tecpatl Earthbound tecpatl |  Dual macuahuitl[b] Dual macuahuitl[b] |
 |  Eye of ayak[c] Eye of ayak[c] |  Any staff that can autocast demonbane spells Any staff that can autocast demonbane spells |  Any powered staff Any powered staff | N/A |
 |  Scorching bow Scorching bow |  Holy water Holy water | N/A | N/A |
It is also very worth bringing a multi-hit melee weapon for the melee punish attack (explained above). Bringing additional strength bonus gear can be worth it to increase your bonus damage, but learners should not replace food to bring strength bonus beyond just the weapon. Do not bring void melee helm or a super combat potion, they will not increase bonus damage. Activating piety will help marginally with the damage of the initial hit, but provide no bonus to the bonus hit, as nothing will increase the bonus damage except for strength bonus.
| Slot | Item (most effective → least effective) | |||
|---|---|---|---|---|
|  Noxious halberd[a] Noxious halberd[a] | Dual macuahuitl or other multi-hit melee weapons | Darklight or its variants[b] | N/A |
 |  Crystal halberd[c] Crystal halberd[c] |  Dragon claws[d] / Dragon claws[d] /  Crimson kisten Crimson kisten | N/A | N/A |
Inventory setups
            |
|  | |  |
 |  | |  |
 | | | |
 | | | |
| | |  |
| | | |
 |  |  |  |
 |  |  |  |
- Twisted bow + Zaryte crossbow for special attacks
- Scorching bow, Darklight, and Slayer's staff (e) for ranged, melee, and magic larvae.
- Scythe of vitur + Noxious halberd for melee punish. Scythe for delve 1-5. Halberd during delve 6+ to reduce acid splatter.
- Masori armour / Ranged Void.
- If the player doesn't have Dizana's quiver, an inventory spot would instead be replaced with ammo.
- 1-2 divine ranging potions, 1-3 regular ranging potions or Armadyl brews
- Supplies such as Anglerfish, Saradomin brews, Super restores, and / or Armadyl brews depending on how confident the player is on avoiding damage and how deep they are capable of delving.
- An Extended anti-venom+ or best available anti-venom potion.
- Mokhaiotl waystone for faster return trips, or a Pendant of ates.
- Divine rune pouch with runes for Thralls and Death Charge. Requires an extra inventory slot without Aether runes.
        |
| |  | |
| | | |
| | | |
| | | |
| | | |
| | | |
| |  | |
| | | |
- Necklace of anguish can easily be replaced with Amulet of fury or Amulet of glory to lower death costs
- Scorching bow + Crystal halberd for special attacks on the melee punish.
- Darklight, and Slayer's staff (e) for melee and magic larvae.
- Ranged Void Knight equipment.
- Best available blowpipe for better damage during burrowing (car) phase.
- 1-2 divine ranging potions, 1-3 regular ranging potions or Armadyl brews
- Supplies such as Anglerfish, Saradomin brews, Super restores, and / or Armadyl brews depending on how confident the player is on avoiding damage and how deep they are capable of delving.
- An Extended anti-venom+ or best available anti-venom potion.
- Mokhaiotl waystone for faster return trips, or a Pendant of ates.
- Divine rune pouch with runes for Thralls and Death Charge. Requires an extra inventory slot without Aether runes.
Plugins
All of the following plugins are available on both officially approved third-party Game clients. On RuneLite they must be installed separately from the Plugin Hub, accessed from the Configuration button (wrench icon on sidebar), then clicking the Plugin Hub button (right-most plug icon). On HDOS these plugins come preinstalled.
Better NPC Highlight
- Check "Highlight Menu Names" at the bottom of the plugin settings
- For true tile highlighting, paste
14711:2,14713:1,14712:5,14788:2,14789:5,to "Hull" or "True Tile" -> "True Tile IDs" for demonic larvae at delve level 4+, and giant demonic larvae at delve level 8+.- For burrowed Doom and the earthen shield: paste
14709,14715:5,in "True Tile IDs", on the end of the Larvae ID's (if included).
- For burrowed Doom and the earthen shield: paste
- To distinguish regular Doom and shielded doom: Add
*mokhaiotl:1, *mokhaiotl (shielded):5,to "Tile" -> "Tile Names".- Select the "Tile Highlight" tickbox to enable NPC highlighting and choose the colour and highlight settings preferred.
Custom Menu Swaps
- To have the demonic larvae attack options appear on top of anything else: Add
Attack,demonic*larva*to "Custom Swaps"- For waves 8+, add
Attack,giant demonic*larva*to "Custom Swaps" for giant larvae
- For waves 8+, add
Visual Metronome
- Visual Metronome checked, 'Tick Count' set to 20
- Under Tick Number Settings, check 'Show Metronome Tick Number'
- To change the color of the number, edit the 'Tick Number Color' setting under Tick Number Settings
- To change the background, edit the color values under 'Color Settings'
- Set Hotkey Settings > Tick Cycle Reset Hotkey to any comfortable key, and Reset to Tick to 0
- Press the hotkey when the Volatile Earth spawns, the boss will begin the shockwave attack when the timer hits 20.
Radius Markers
Radius Markers (found in the sidebar after installation) can be used to outline specific attack ranges from the Doom, to enable safe drag attacks with a halberd. Copy the below import and then click the import icon, which will add a 4-width floor outline around Doom, and meleeing Doom with a halberd while on the inner edge of the line will always safely not drag you into melee distance. Additionally, this marker will change from blue to green when the Doom initiates their shield phase, so that you do not mistakenly attack with a halberd and cause a long attack delay.
[{"id":1753576896012,"name":"Delve","visible":true,"collapsed":false,"z":0,"spawnX":1311,"spawnY":9540,"spawnColour":"#FF00FFFF","spawnVisible":false,"wanderRadius":5,"wanderColour":"#FFFFFF00","wanderVisible":false,"maxRadius":7,"maxColour":"#FFFF00FF","maxVisible":false,"aggressionColour":"#FFFF0000","aggressionVisible":false,"retreatInteractionColour":"#FF0000FF","retreatInteractionVisible":false,"npcId":14707,"attackRadius":4,"attackColour":"#FF516864","attackType":"MAGIC","attackVisible":true,"huntRadius":1,"huntColour":"#FFFF7F00","huntVisible":false,"interactionRadius":1,"interactionColour":"#FF00C800","interactionVisible":false},{"id":1753642974880,"name":"delve shield","visible":true,"collapsed":false,"z":0,"spawnX":2936,"spawnY":3281,"spawnColour":"#FF00FFFF","spawnVisible":false,"wanderRadius":5,"wanderColour":"#FFFFFF00","wanderVisible":false,"maxRadius":7,"maxColour":"#FFFF00FF","maxVisible":false,"aggressionColour":"#FFFF0000","aggressionVisible":false,"retreatInteractionColour":"#FF0000FF","retreatInteractionVisible":false,"npcId":14708,"attackRadius":4,"attackColour":"#FF308000","attackType":"MAGIC","attackVisible":true,"huntRadius":1,"huntColour":"#FFFF7F00","huntVisible":false,"interactionRadius":1,"interactionColour":"#FF00C800","interactionVisible":false}]
Ground Object Hider
Hide various objects on the ground to improve visual clarity.
- IDs to hide:
56834,56832,45443,56833,56837,56836,56835,56840,56838,56839
| Monsters | |||||||
|---|---|---|---|---|---|---|---|
| Signature drops |
| ||||||
| Related | |||||||


.webp)