The Whisperer/Strategies
This copy was last processed on . The copied wiki revision is dated .
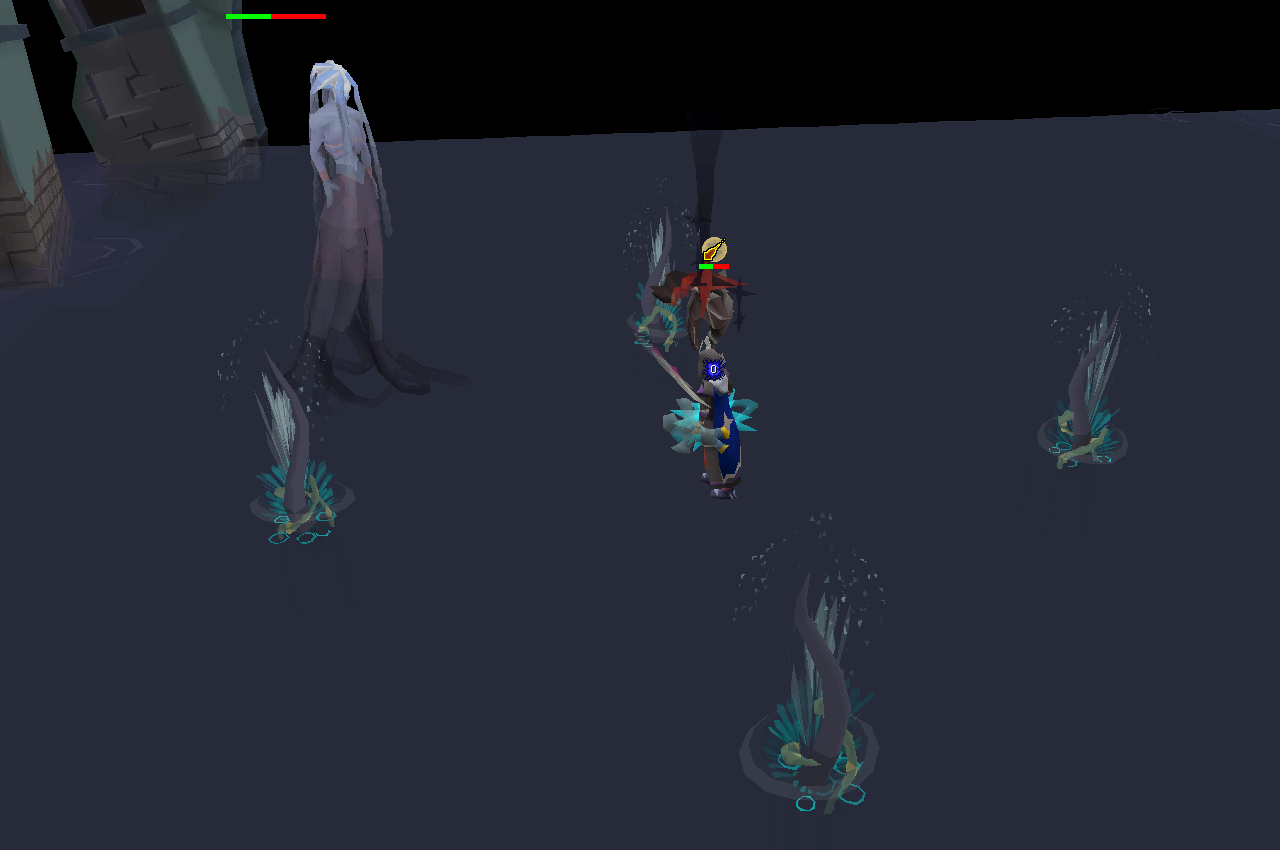
After the completion of Desert Treasure II - The Fallen Empire, players can fight a stronger variant of the Whisperer than the one fought during the quest. An even stronger awakened variant can be fought by disturbing the Odd Figure with an awakener's orb in the player's inventory and selecting "Yes" when prompted in a fresh instance - having obtained an orb in the instance will not cause the prompt to appear.
If the player dies while fighting the Whisperer, their grave will appear in the Ruins of Camdozaal, by the rope leading to the Lassar Undercity. Players will have their reclamation fee reduced by 75% until they have five kills, after which the standard death cost will apply.
Requirements
- Completion of
Desert Treasure II - The Fallen Empire
Suggested skills
75+
80+
Transportation
The quickest methods of reaching the Lassar Undercity, where the Whisperer resides, are:
- Using the ring of shadows to teleport to the Lassar Undercity exit. This requires having used the sirenic tablet on it, which is a 1/25 drop from the Whisperer.
- Using the Mind Altar Teleport spell (or tablet/portal), then running south-east to Camdozaal.
- Using the Lassar Teleport spell or tablet, then using the shortcut to the north-west (requires
68 Agility), or running around the mountain.
Once in the Ruins of Camdozaal, climb down the rope in the north-west end to enter the Lassar Undercity. Then, use the teleporter to reach the cathedral.
Fight overview
The player must bring the blackstone fragment to initiate the fight, as parts of the fight will require the player to enter the Shadow Realm; the player will refuse to fight the Whisperer without it.
As the fight takes place in the Lassar Undercity, sanity is present throughout the fight, though it is present throughout the whole fight rather than just the Shadow Realm. When outside the Shadow Realm, the player will slowly restore 1% sanity every 4 ticks; inside, the player will lose 3% sanity along with 3 prayer points. Sanity can be further decreased regardless of which realm the player is in if they are hit by her tentacles or fail to avoid/stop her special attacks. If the sanity bar fully depletes, the player will go insane and will quickly die within 10 ticks; therefore, if this occurs, teleportation is mandatory.
The fight begins by disturbing the Odd Figure, who will then knock the player back and begin attacking as the Whisperer.
The Whisperer's regular attack involves shooting three projectiles per attack in either Ranged or Magic. The ranged attacks consist of grey barbs, while the magic attacks consist of a cluster of three blue orbs; the Whisperer's chest will additionally emit a blue aura. Protection prayers fully block the projectiles' damage if activated before the projectile hits the player; if not blocked, they can deal up to 40 and 36 damage respectively. The pattern of these projectiles changes depending on how far into the fight the player is. Taking damage from a projectile will disqualify from a perfect kill; if it misses, the player is still eligible.
- Upon beginning the fight, she will only use Magic (M) or Ranged (R) for all three projectiles.
- After one special attack has been used, she will use M-M-R or R-R-M. This will continue to be used after the second special attack.
- After all three special attacks have been used, she will use M-R-M or R-M-R.
- During her enrage phase, she will start with ranged, and switch styles every two attacks.
After each regular attack, four shadow tentacles will surface four tiles from the player, converging on the tile they were on when they first appeared. If an object is in the way of the tentacle's spawn point (including the Whisperer herself), it will not spawn. Getting hit by this will deal 20 damage and drain sanity by 20%, regardless of how many tentacles actually hit them. Initially, these converge in an "X" formation, but after two special attacks, a "+" formation will also be used. Both formations can be dodged every time by performing an L movement (two tiles forward/backward, then one tile left/right - analogous to a knight move in chess!). Getting hit by a tentacle will disqualify from a perfect kill.
The Whisperer also possesses a melee attack if a player stands next to her, whacking them with her tentacles, dealing two hits in two ticks. Unlike the other attacks, the melee attack will hit through prayer (although it slightly reduces damage), always lands as a successful hit and the second hit additionally mirrors the damage dealt by the first; e.g if the first hit dealt 40 damage, the second will also deal 40. Unlike most monsters, the Whisperer will actively check if the player is in melee distance; if the player runs into melee distance while she is in the middle of a volley, she will cancel it for an immediate melee attack, which will likely spell swift death. Therefore, players are recommended to stay at least five tiles away from her to avoid misclicking and running into her.
Special attacks
When the Whisperer reaches or falls below 720 (80%), 495 (55%), and 270 (30%) hitpoints, she will perform a special attack. The possible special attack rotations are:
- Corrupted Seeds -> Screech -> Soul Siphon
- Screech -> Soul Siphon -> Corrupted Seeds
During the special attack animation, the Whisperer will take 70% less damage outside of the Shadow Realm and 60% within. Thralls are unaffected by this damage reduction.
- Corrupted Seeds: The Whisperer will appear in the centre and scatter corrupted seeds around her. The player must step on all the light green seeds to stop the attack, which can only be seen in the Shadow Realm; if the timer runs out before the attack is stopped, the player will take 75 damage and lose 75% sanity. Stopping the attack without stepping on any dark green seeds will restore sanity by 15%. Stepping on a dark green seed will deal 15-25 damage.
- There are two layouts in which the seeds can spawn, and each layout has two patterns for the light green seeds. Each pattern has two lines of symmetry. To preserve sanity and prayer, players can memorise the seeds' locations, then activate the blackstone fragment again and step on them in the real world.
- An easy way to memorize the current layout is to assign nicknames to them and spending minimal time in the shadow realm to check which one is active. For example, route 1 can be thought of as "Diagonals" due to only needing diagonal movement. Route 2 can be thought of as "T shapes". Route 3 can be thought of as "Buildings and fences" due to the large square alignment on opposite sides and small lines adjacent. Route 4 can be thought of as "Triangles and boxes" due to the triangle shapes opposite of each other and the small squares adjacent.
- With a N-tick weapon, players can destroy N-1 seeds between attacks (e.g. with a five-tick weapon players can destroy four seeds between attacks).
- An alternate view of all possible correct seed spawns/locations to step outside of the realm is also shown in addition to the route images. Do not stand on singular number seeds unless attempting to determine the pattern without entering the realm. For example: 1/2 (both patterns 1 and 2 use this), but number 2 is only used by pattern 2.
-
Route 1
-
Route 2
-
Route 3
-
Route 4
- Screech: The Whisperer will teleport to the southern end of the cathedral and gather energy for three screeches. At the same time, floating columns will emerge from the water to block the incoming attacks. The pillars have 20, 40, or 60 health; the health bar can only be seen when in the Shadow Realm. Players must stand within the 2x2 square behind a pillar (clipping inside a pillar does not count) to avoid getting hit by the screech, even if the angle looks as if it would be safe otherwise. The Whisperer will deal 20 damage to every pillar each screech, and also destroy the pillar the player is hiding behind, so you must save the 60-health pillar for the final screech. Taking a screech will result in the Whisperer dealing 45 damage and draining sanity by 45%.
- To avoid the attack, enter the Shadow Realm, look for the 60-health pillar, and then look for a 40-health pillar nearby the 60-health pillar. The player should hide behind pillars in the following order: any 20-health pillar, the 40-health pillar, and finally the 60-health pillar.
- To preserve sanity and prayer, players can enter the Shadow Realm and quickly check which pillars to stand behind, then exit and move in the real world. One must be quick however, as the blackstone fragment will deactivate within a few seconds.
- Soul Siphon: The Whisperer will appear in the centre and summon twelve lost souls, beginning to siphon energy from them for a powerful chant that completes in 20 ticks (12 seconds). Players must activate their blackstone fragment to enter the Shadow Realm and kill at least one set of souls chanting the same phrase. If the player fails to kill a full set of souls within the time limit, the chant will complete, dealing 50 damage to the player and heals her for 100 health. Souls can only be damaged in the Shadow Realm.
- The beginning of the special is signalled by the Whisperer disappearing and reappearing in the centre of the room. To maximise the number of souls killed, immediately switch weapon once she disappears, and right afterwards click the blackstone fragment.
- A venator bow can kill all of the spirits within the time frame. Any spirit can be attacked in the "L" formation (as the shot will bounce on all three); against spirits in a "\" or "/" formation, the player has to attack the bottom or top spirit; attacking the middle will only bounce the shot to one other spirit.
- Depending which set(s) of souls are killed, they will cause the following effects:
- (2 yellow souls): Restores ~20% of the player's Hitpoints level.
- (3 blue souls): Restores ~20% of the player's Prayer level.
- (3 cyan souls): Restores 15% sanity.
- (4 green souls): Deals 50 damage to the Whisperer (increased to 75 if all twelve souls are killed).
- Without a venator bow, the next best weapon to use is any sailing blowpipe or a toxic blowpipe, which can kill up to 7 souls if the player enters the Shadow Realm as soon as possible. Players who are unable to clear all souls should simply clear the yellow spirits and leave to avoid prayer drain.
After each special attack, the Whisperer will usually launch a binding projectile at the player, which will always bind them regardless of their bonuses and lasts for ~8 seconds. She will then move towards the player in an attempt to melee them. During this state, any ice spell or standard spellbook binding spell will successfully freeze her in place even if it misses. This will automatically cause the bind to wear off if this happens. Standing at least 10 tiles away from her position after she launches the projectile provides enough distance to run away from her, as she will stop before reaching melee range.
Less experienced players are recommended to be on the standard or ancient spellbook when killing the Whisperer. Alternatively, the Arceuus spellbook can be used for its thralls, making use of the 10 tile distance to avoid her melee attack in lieu of a bind. The player should note that thralls will not carry over between realms, making it beneficial to limit time in the Shadow Realm. Additionally, grasp spells don't guarantee a bind unless using Undead Grasp whilst under the effects of Mark of Darkness.
Depending on how damaged the Whisperer is before using a special attack, there is a possibility that she may forgo the binding projectile after the special attack and use auto-attacks instead. This seems to occur the most after the first special attack, so players should keep note of this to avoid getting caught by surprise. If she has been damaged to the point where the next special attack threshold triggers, she will immediately initiate it rather than launch the projectile.
With a weapon that has a distance of 10, players can "lure" the Whisperer by dragging her to the extreme end of the arena after each special attack, allowing the player to get several free hits in before she resumes combat. Stand at least two or three tiles from the marked tiles; run after the first attack, switch to long ranged as she closes in, then back to accurate. The player can also stand one tile from the marked tiles but they will need to move just as she closes in on them.
After the third special attack, the Whisperer will path to the player as normal; however, if she falls below 100 health doing so, she will automatically cancel the melee attempt.
Enrage phase
Upon reaching 0 health, the Whisperer will heal 140 hitpoints, restore any drained stats and pull the player into the Shadow Realm. Now, she will alternate between ranged and magic every two attacks and increase her attack speed to 2 ticks (1.2 seconds). A single tentacle is launched alongside every attack, rather than a cluster of four.
During the phase transition, immediately restore prayer as best as possible.
The tentacles will still drain sanity as usual if hit by them. Focusing on movement should be prioritised because of this, since getting hit too much will likely result in the player going insane. Having high health and prayer going into the enrage phase is very beneficial, as it can be difficult to heal or restore prayer due to needing to constantly move and switch prayers.
There are then two general strategies that can be used:
- Basic movement (recommended for beginners). This relies on the fact that when running in a straight line, the player will naturally dodge the vast majority of tentacles; even running directly into a tentacle will usually not cause damage, as long as the player keeps moving. To take advantage of this, run in a large square around the Whisperer (stay out of melee range), or back-and-forth in a line in front of her, taking care not to stop for more than a few ticks. When the second auto-attack of the same style (ranged or magic) is just about to hit the player, click to move and then switch prayers. Fit in your own attacks where possible, and then immediately keep moving. If you get hit, do not panic, simply click to move a good distance away to gain recovery time, and ensure your prayers are correct.
- Advanced movement. Utilises L-movement to dodge all tentacle attacks. See the video to the right for an example.
Once the Whisperer dies, the player's sanity is instantly restored to 100% and any attacks launched in transition will not cause damage. She will respawn as the Odd Figure in roughly 18 seconds.
Tips for mobile: The sanity interface, chat menu, and world map all take up extremely valuable space on the screen, and this can especially be a problem during the enrage phase. Long tap the world map icon to collapse the world map before the fight begins, and collapse the chat menu after the Whisperer’s specials to help you focus more on the direction of the tentacles during enrage.
Awakened mode
In Awakened mode, the Whisperer has the following changes:
- The black mask and Slayer helmet do not apply their usual on-task damage and accuracy bonuses while on a Whisperer boss slayer task.[1]
- The Whisperer's health increases from 900 to 2,700.
- The Whisperer is immune to stat drains.
- Sanity does not restore outside of the Shadow Realm. While in the Shadow Realm, the sanity and prayer drain is increased to 4.
- The Whisperer's regular attacks now consists of five projectiles rather than three.
- Upon beginning the fight, she will use two of one style and three of the other (e.g R-R-R-M-M)
- After two special attacks, she will use one of one style, two of the other, and then two of the first style (e.g. R-M-M-R-R)
- After the seventh special attack, she will alternate between both styles per hit (R-M-R-M-R)
- Damage from the Whisperer's regular attacks is significantly increased.
- Her regular magical attack can deal upwards of 45 damage, while her regular ranged attack can deal upwards of 53 damage. Praying correctly fully negates the damage.
- Her regular melee attacks deals between 50-72 damage if not prayed against. If prayed against, it deals between 37-52 damage. This still respects normal mode modifiers (e.g first hit deals 50, second hit also deals 50).
- The Whisperer's tentacle formations are changed - the "X" now becomes an attack with seven tentacles (without any formation change) while the "+" becomes an attack with six tentacles all next to each other (which starts to appear after four special attacks are used), making the player run at least two tiles to the sides to avoid the attack. The damage and sanity drain is also increased from 20 to 30.
- Unlike other bosses who retain their normal mode mechanics at set health percentages, the Whisperer does not and will instead perform her special attacks at roughly 10% hitpoints thresholds:
- ~2400 health, ~2120 health, ~1820 health, ~1600 health, ~1310 health, ~1050 health, ~800 health and ~500 health for a special attack.
- The possible special attack rotations are:
- Screech -> Soul Siphon -> Corrupted Seeds -> Screech -> Soul Siphon -> Corrupted Seeds -> Screech -> Soul Siphon
- Corrupted Seeds -> Screech -> Soul Siphon -> Corrupted Seeds -> Screech -> Soul Siphon -> Corrupted Seeds
- The Whisperer's Screech attack hits five times rather than three, and damage/sanity drain is increased from 45 to 70.
- An additional four lost souls are added for the Soul Siphon attack, increasing the total from 12 to 16, with these new souls being added to all cardinal directions. The timer is increased to 21 seconds (35 ticks) to compensate.
- However, all souls must be killed in time, as the Whisperer will manipulate the remaining souls to perform the full attack. If sets of souls are left, then they will restore her as normal, while the sets the player killed will have their effects applied to them.
- The timer for the Corrupted Seeds mechanic is reduced to 15.6 seconds (26 ticks), damage/sanity drain is increased from 15 to 20 if not stopped, while stepping on a dark green seed deals between 60-75 damage.
- After a bind attack, the boss runs for 1.2 seconds (2 ticks) prior to walking 3.6 seconds (6 ticks) towards the player, instead of walking for the entire duration.
- During the enrage phase, she now heals from 140 to 250, sends two or three tentacles every two attacks instead of one, starts with magic instead of ranged and also swaps styles after every attack.
Due to the player not regaining sanity outside the Shadow Realm, the player must essentially perfect every mechanic or they will go insane at some point during the fight. Utilising L-movements will dodge every tentacle attack other than the changed "+" formation, which the player will have to dodge reactively.
During the Screech mechanic, the player must quickly identify the pillars' health, as staying in the Shadow Realm for the entire mechanic will drain 40% of the player's sanity; doing it even once will likely result in failure. Likewise, getting hit by a screech will result in failure due to the 70% sanity drain incurred.
During the Soul Siphon mechanic, the player must bring a blowpipe to deal with the souls that spawn in the cardinal directions alongside a venator bow. Kill a cluster of souls with a bow, then switch to the blowpipe to kill the lone soul and repeat. Immediately exit the realm once the last soul is killed. This will deal additional damage to the boss. Alternatively, for players wish to absolutely minimise the time spent in the Shadow Realm, they can simply kill the cyan spirits () and leave. This method will require players to tank a hit of 76 damage, and the kill will be slightly prolonged as the boss will heal 100 hitpoints for each instance of this mechanic. It can also deplete food supplies, which can be problematic during enrage.
During the Corrupted Seeds mechanic, quickly enter the Shadow Realm, then leave once the pattern is discovered to minimise time spent inside. Avoid stepping on a dark green seed, as the damage is significantly increased that stepping on two seeds without healing will result in death.
After every special attack, do not attack the Whisperer until she launches the binding projectile and stay at least 8 or more tiles away from her. Once this projectile is launched, immediately freeze the Whisperer, as she will run towards the player, and trying to get an auto-attack in will likely result in her reaching the player and using melee, causing severe damage or death.
Before starting the enrage phase, it is highly encouraged to begin with over max health and as much prayer as possible, as focusing on the Whisperer's attacks is much more important than trying to eat or restore prayer. Likewise, the player should enter the enrage phase with ~60% or more sanity; the higher is better in case mistakes are made. Some players using a shadow may opt to bring a 4-tick weapon such as a sanguinesti staff to match the Whisperer's attack speed and tentacles on enrage, though this is completely optional.
Equipment
Use the best magic gear possible. Due to the Whisperer's relatively high magic level, players with worse gear may struggle to consistently kill her at a reasonable pace, so a limited amount of weapon and armour downgrades should be considered.
Players can take advantage of her weakness to earth. Paired with the Tome of earth, casting Earth Wave with the Mystic smoke staff can outperform the Trident of the Seas and casting Earth Surge will often outperform most powered staves.
Casting Earth Wave with the Tome and Twinflame staff, without post-99 boosts, can outperform most endgame weapons except a Shadow or surging with the Tome and Harmonised nightmare staff.
For the special weapon, the player can ideally use an eldritch nightmare staff, as it restores prayer upon a successful hit. The accursed sceptre or Seercull can be used to lower the boss' stats, though it is only useful for pre-enrage since her stats reset when enrage triggers.
A fast ranged weapon is necessary for the souls phase. Mid-level players may use the Rune thrownaxe's special attack, while the Venator bow is best-in-slot.


Inventory recommendations
 |  | | |
 |  | | |
 |  | | |
| | | |
| | | |
| |  |  |
 |  |  |  |
 |  |  |  |
- Blackstone fragment
- Saturated heart or forgotten brews
- Special attack weapon
- An accursed sceptre helps reduce the boss' Magic level if it hits, making kills a bit faster, though this is completely optional. Otherwise, an eldritch nightmare staff will help sustain trips far longer.
- The boss also drops a single 3-dose prayer potion and 2-dose ancient brew, which helps sustain trips even longer.
- An accursed sceptre helps reduce the boss' Magic level if it hits, making kills a bit faster, though this is completely optional. Otherwise, an eldritch nightmare staff will help sustain trips far longer.
- Venator bow (with cheap arrows) or another fast ranged weapon for Lost Souls
- Rune pouch and book of the dead for thralls, or runes for ice spells (up to player preference)
- If using the standard spellbook, bring runes for your strongest earth spell; the book of the dead and Explorer's ring can be replaced with another super restore and runes for High Level Alchemy
- Ring of shadows for teleporting if sirenic tablet has been acquired
- Fill rest of inventory with prayer potions or super restores (can replace with more food and/or combo eats, i.e. cooked karambwan, if inexperienced)
- Bluefin may be brought in place of other regular food to hold even more prayer, if desired.
- An Explorer's ring 4 can be helpful to alchemise the dragon plateskirts that are dropped at a rate of 1/100.
- The boss drops plenty of manta rays to help sustain food, assuming the player does not make too many mistakes. Even then, a single small mistake is often recovered with the Soul Siphon mechanic.