
| Death to the Dorgeshuun (#106) | ||||
|---|---|---|---|---|
| Released | 21 June 2006 (Update) | |||
| Members | Yes | |||
| Quest series | Dorgeshuun, #2 | |||
| Lead developer(s) | John A | |||
Death to the Dorgeshuun is the second quest in the Dorgeshuun quest series and sees the return of Sigmund, who attempts to destroy the Dorgeshuun once again. It also sees the first appearance of Zanik, the series' main protagonist.
Details
| Start point |  Talk to Mistag in the Dorgesh-Kaan mine. Show on map Talk to Mistag in the Dorgesh-Kaan mine. Show on map |
|---|---|
| Official difficulty | Intermediate |
| Official length | Medium |
| Description | Humans have been visiting the Dorgeshuun mines for some time now, but no Dorgeshuun has visited the surface since the signing of the Lumbridge-Dorgeshuun treaty. The Dorgeshuun Council fears that the H.A.M. group may be planning another attack, and want to send an agent to the surface to investigate. But they do not want to send someone to the surface without a guide... |
| Requirements | |
| Items required |
|
| Recommended |
Optional (to quickly complete the Tears of Guthix quest while in the Lumbridge Swamp Caves):
|
| Enemies to defeat |
|
| League notes | Not completable, as it requires access to Misthalin. |


Walkthrough
Note: If planning to obtain the robes yourself, first start the quest to increase the chance of receiving them. For ironman accounts, it is recommended to obtain one additional pair of boots and two robe bottoms for easy Treasure Trails.

With a light source such as a lantern, head to the Lumbridge castle cellar below the cook, and enter the cave to the rear. Follow Kazgar through the caves (right click).
Talk to Mistag who will ask you to obtain two sets of H.A.M. robes so that you may show one of their agents around the surface and the H.A.M. Hideout without detection. Note that this is the full set of clothing, not just the Ham robe. Get two sets of H.A.M. robes any way you can (by pickpocketing H.A.M. Members, killing H.A.M. Guards, or buying them on the Grand Exchange). A full set of H.A.M. clothes consists of:
Once you have these, return to the Lumbridge Castle cellar, and talk to Zanik who will have appeared next to the ladder.
- Note: You cannot have a pet following you before talking to Zanik.
 |
First Sunshine |
|
The jingle that plays upon Zanik witnessing sunshine for the first time.
| |
Zanik follows you around rather like a pet and tends to get stuck behind walls and doors but she will return to your side like any other pet. Unlike pets, any teleports will make her return to the basement below the cook, and talking to her will make her follow you again. The following can be completed in any order but the quickest is as listed:
- Talk to the cook in the kitchen.
- Take her to Duke Horacio upstairs in the castle.
- Take Zanik outside the castle. A cutscene will occur. If you accidentally stop the conversation, logging out and logging back in will reset the conversation.
- Talk to Hans who roams around the castle.
- Take her to see Bob in his axe store.
- Talk to Father Aereck and the Prayer tutor in the church just outside the castle.
- Talk to any man or woman. Zanik must engage in conversation with the man or woman you speak to; if she doesn't, move on to another man or woman and try again.
- Talk to the Lumbridge Guide outside the castle.
- Take her to see a goblin. Approaching one should automatically initiate a conversation, but if it doesn't, try examining Zanik while near one.
- Talk to the shopkeeper or shop assistant in the general store.
Infiltrating the H.A.M. hideout

After speaking to all the aforementioned denizens of Lumbridge, ask her, "Have you seen enough of Lumbridge yet?" (Zanik will tell you to go back to Lumbridge if you ask this question inside the H.A.M. headquarters.) Zanik will now explain about the mark on her forehead; she received it whilst doing Tears of Guthix, and it indicates that she is destined to do something great.
Zanik will now suggest going to the H.A.M. headquarters. Put on your set of H.A.M. robes, and go to the H.A.M. headquarters.
When you arrive at the trapdoor that leads down to the H.A.M. headquarters, right-click and select pick-lock on the trapdoor. This may take some time.
Talk to a regular H.A.M. Member or guard, and go through all the questions. They will tell you that the leaders are planning something big in order to get rid of the Dorgeshuun, but they won't tell any regular members.
Talk to Johanhus Ulsbrecht near the jail about the Cave Goblins.
Wander around the south part of the main H.A.M. room where Zanik will spot a trapdoor located slightly west of Johanhus and south of the stage. Pick-lock the trapdoor, and go down. You are now in a storeroom. You will need to distract each of the guards in such a way that Zanik can shoot them from behind.
- Note: In this section you may be jailed by a guard if caught. Zanik will free you - if you interrupt her, you may instead pick the lock on the door. You will have to repeat the process of killing the guards.
- The first guard will see you and tell you to go back upstairs—as regular members aren't allowed down there. He says that the other guards will not be so kind. Walk past the guard, and talk to him; Zanik will shoot him.
- Over to the west side, just where the guard was standing, squeeze through the crack in the wall to get into the south-west room. Wait for the guard in the narrow hallway to walk away so he doesn't detect you. Run through the second crack to the north, around the corner, and talk to the guard. Zanik will shoot him. Note: picking the door to access the guard might make your character move south and end up in jail. Squeezing through the crack is easier.
- You'll see a guard patrolling the central corridor. Speak to Zanik again, and when the guard has his back turned, select the "Now!" option. Zanik will snipe him.
- Move to the eastern side of the central corridor, stopping just before the guard can see you. Make sure you wait until Zanik is next to you, otherwise she may not take the shot.
- Then, run east and south down the room at least 2 steps, making the north-east guard follow you. Zanik will shoot him as he passes the central corridor again. Don't tell Zanik to wait, as she will not shoot the guard.
- For the final guard, go to the end of either the left or right passages, and talk to Zanik again, tell her to wait there; then, go to the other passage, and distract the guard by making yourself visible. Zanik will shoot him. (NOTE: Do not walk past the corner of either wall, as the guard will jail you once you are in line of sight.)
- Listen at the door. After Zanik hears a bit of info, a senior guard will respawn and arrest you.
Reviving Zanik
You find yourself in the jail. Talk to Jimmy the Chisel. He will tell you that Sigmund took Zanik outside. Pick the lock to escape. If you accidentally leave the jail before talking to Jimmy, you can speak with Johanhus again and he will tell you about Zanik and you can continue.
Go back outside, and you'll find Zanik lying on the ground, dead. Investigate her and your character will find that her mark is glowing. Take her body to Juna in the Chasm of Tears.
- Note: If you for some reason die with Zanik, she will spawn again at the H.A.M hideout.
If the Tears of Guthix quest has already been completed
Go to the Tears of Guthix minigame. A games necklace will teleport you nearby. Juna will tell you to collect 20 tears using Zanik's bowl, which will restore Zanik to life.
- Note: This provides no experience and does NOT count for your weekly Tears of Guthix game.
|
Zanik Lives Again! |
|
The jingle that plays while Zaniks is brought back to life.
| |
A cutscene will follow, where Zanik tells you what she heard just before she died. Johanhus, Sigmund, the H.A.M. deacon, and a senior guard will talk about using a drilling machine at the Lumbridge water wheel, to cause the swamp caves to flood!
|
Zanik's Theme |
|
The jingle that plays while Zanik's talks about the mark on her head.
| |
If Tears of Guthix has not been completed
If you meet the Tears of Guthix requirements, now is a good opportunity to complete that quest during this step, in which case you also need a chisel and a sapphire lantern.
Either enter the hole in Lumbridge Swamp or enter the Dorgesh-Kaan mine through the hole in the Lumbridge Castle cellar. In the mine, go directly south of the entrance and Kazgar to a blocked tunnel, mine it with your pickaxe, and squeeze through into the Lumbridge Swamp Caves. In the south-eastern part of the cave, directly south of the entrance from the Dorgesh-Kaan mine, cross the stepping stone in the stream. Warning: If you fail, it will extinguish your light source. On the southern side you will find the entrance to the Tears of Guthix Cavern. Go through it and follow the path, climb down the rocks and speak to Juna.
Warning for Hardcore Ironmen: It is recommended you enter the Lumbridge Swamp caves via the dark hole entrance in the western part of Lumbridge Swamp. This way you bypass the Cave Crawlers that if aggressive will poison you. Also bring plenty of food as the Wall Beasts deal on average 9 damage, with a max hit of 18.
Warning: If you happen to slip on the stepping stones carrying a candle lantern it will break, leaving you stranded without a light source (apart from a candle itself after the lantern breaks, which is risky to use in the Swamp Caves). For safety precautions, bring any kind of quick teleportation if needed.
Juna will ask you to gather blue tears from the waterfalls. Your hands must be empty for this. Once you talk to her with empty hands and you are holding the bowl, just click on the blue waterfalls as they spawn until you are at 20. A cutscene will begin and Zanik will be revived. Zanik tells you what she heard just before she died. Johanhus, Sigmund, the H.A.M. deacon, and a senior guard will talk about using a drilling machine at the Lumbridge water wheel, to cause the swamp caves to flood!
To complete the Tears of Guthix quest, after talking to Juna use the optional Sapphire lantern on a Light creature to be carried to the upper level of the south mine. There you can mine the Magic Stone; use a chisel on it to make the Stone Bowl and return to Juna to complete Tears of Guthix.
Preparing for battle
Return to Lumbridge and grab your combat equipment, then head to the chicken farm near the water mill, across the river from Lumbridge Castle and heading north. You will need to bring Zanik with you - if you teleport she will need to be retrieved from the cellar before continuing. If she doesn't appear, try logging out and in.
Equip the full H.A.M. outfit then search one of the southern crates (the empty ones, not the ones with machine parts in them), Zanik will suggest she hides in it whilst you carry it, pick her up, and go down the trapdoor. You must have free hands (no weapon or offhand).
- Note: If you walk too far away from the trapdoor Zanik will leave the crate and suggest "we get down there and save my city!".
Also, immediately exiting the cave will make you unable to re-enter the trapdoor due to Zanik waiting for you in the cave. Logging out and back in will resolve this but you may have to return to the Lumbridge basement to have her follow you again.
The battle

Go to the west room after climbing down the ladder of the nearby trapdoor. Sigmund (level 50) will appear along with three level 22 H.A.M. Guards.
Sigmund will use a protection prayer based on the attack you are using, so focus on his henchmen first. The crates nearby may be used as a safespot with Magic or melee using halberds.
Once the henchmen are dead, Zanik will attack Sigmund with her crossbow, causing him to switch to Protect from Missiles. Attack him with melee or magic. At 1 HP, he will escape with a ring of life. Smash the drilling machine in the same location.
Exit through the southern tunnel to find yourself back with the Dorgeshuun leaders. You must exit through the tunnel, or the cutscene will not play.
Congratulations, quest complete!
- Note: If you don't have a light source, Zanik will provide you one after the cut scene when going through the short cut.
Rewards
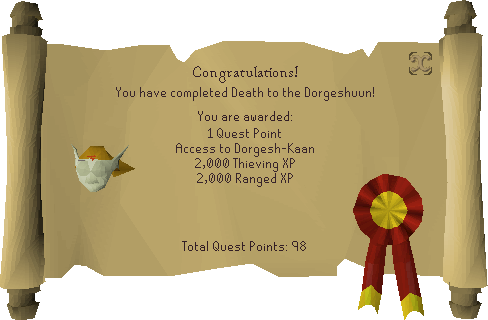
- 1
2,000 Thieving experience
2,000 Ranged experience
- Access to the H.A.M. Store room, where you can loot gems, jewellery, and coins from chests
- Access to the water wheel tunnel (Dartog will appear there, and you'll be able to travel between the Lumbridge Castle cellar, the Dorgeshuun Mines and the water wheel tunnel at will)
- Ability to use the bone dagger and Dorgeshuun crossbow special attacks
- Access to Dorgesh-Kaan, the Dorgeshuun city
- A torch if you did not have a light source in your inventory at the end of the quest
Required for completing
Completion of Death to the Dorgeshuun is required for the following:
Transcript
Changes
| Date | Changes |
|---|---|
| 18 December 2014 (Update) |
Leaving Lumbridge castle via the back door with Zanik now triggers the correct cutscene. |
| 21 March 2013 (Update) |
The Death to the Dorgeshuun quest is now accessible. |
| 22 February 2013 (Update) |
Old School RuneScape servers are officially launched, with the Death to the Dorgeshuun quest temporarily disabled. |
Trivia
- When introducing Zanik to the cook, the cook says it is the Duke's birthday and he needs the basic ingredients to bake a cake. This is a reference to the Cook's Assistant quest.
- When introducing Zanik to the denizens of Lumbridge, you may optionally introduce her to the Crafting tutor, the Banker tutor, the Cooking tutor, the Prayer tutor, the Woodsman tutor, the Melee combat tutor, the Ranged combat tutor, the Magic combat tutor, the Smithing apprentice, Donie, Gee, Fred the Farmer, Millie Miller, and the Border Guard. Donie and Gee share dialogue, but all others have unique dialogue for Zanik.
- When examining Zanik's dead body while at Juna, it says "Alas, poor Zanik." referring to a line from Shakespeare's Hamlet: "Alas, poor Yorick."
- The quest was disabled for a month starting at the launch of the Old School RuneScape servers. It is most likely because the quest is involved in a famous graphical glitch, known as "the box glitch" in which a player could carry the crate with Zanik in it anywhere. The glitch would be fixed much later in RuneScape's history of development.
- If you complete the quest with no light source, a lit torch will be given to you. If you have a full inventory, you will instead be sent back to the watermill cellar.
- After resurrecting Zanik, if you go back through the Lumbridge Swamp Caves on your way to the water mill Zanik will do the agility shortcut animation over the stepping stones shortcut after the player character's animation finishes.
References
| NPCs |
| ||||||
|---|---|---|---|---|---|---|---|
| Items |
| ||||||
| Locations | |||||||
| Music | |||||||
| Related | |||||||


