A Soul's Bane
This copy was last processed on . The copied wiki revision is dated .

| A Soul's Bane (#102) | ||||
|---|---|---|---|---|
| Released | 3 April 2006 (Update) | |||
| Members | Yes | |||
| Quest series | None | |||
| Lead developer(s) | Tim C | |||
A Soul's Bane is a combat-focused quest focused on helping Launa Talvoy find her son, who disappeared into a mysterious rift 25 years ago.
Details
| Start point |  Talk to Launa east of Varrock, just south of the Earth Altar. Show on map Talk to Launa east of Varrock, just south of the Earth Altar. Show on map |
|---|---|
| Official difficulty | Intermediate |
| Official length | Short |
| Description | A rift in the ground has opened up releasing all manner of strange monsters into the lands near the Digsite. A sorrowful mother waits at the top of the rift for her long lost son, who has been missing for 25 years. You can journey down into the rift for an adventure full of twisted monsters all created from the mind of a young boy driven to madness through incarceration. |
| Requirements | The ability to defeat level 45+ enemies. |
| Items required | |
| Recommended |
|
| Enemies to defeat |
|
| League notes | Not completable, as it requires access to Misthalin. |

Walkthrough
- Note: This is a combat heavy quest. Attack pures should be aware that completing the rage section will award 40 Attack experience.
The missing family
Head east of Varrock, through the gate by the Earth Altar, and speak to Launa. The Digsite pendant teleport will place you slightly south-east of the entrance. Alternatively, take a glider to the Digsite.
Launa explains that she is looking for her son, Tolna, as well as husband, who went down into the rift to find him. Offer to help her find them, then use a rope on the rift and climb down to start a cutscene.
 |
Tolna Leaves |
|
The jingle that plays while Tolna leaves home.
| |
Be careful not to click during this cutscene or subsequent ones, else you'll teleport out and be forced to go through them again.
Tolna's rift

The rift contains four combat rooms, as well as a final boss room at the end. After completing a room, players may choose to leave the rift to get food or supplies, with their progress saved. Any incomplete rooms will be restarted, however. Logging out will also cause the player to leave the rift.
Be aware that the entire quest is instanced. On death, all unprotected items will be moved to a grave outside the rift, and any items left on the ground will be lost. Do not drop anything you'll need later on.
Rage
| “ | "Why should I, Tolna, be trapped in such a wretched place? Arrghh, It's not fair! Feel my ANGER!" | ” |
|
Angry |
|
The jingle that plays once entering the rage room.
| |
This room represents Tolna's anger by frustrating players, as they can only hit monsters with certain weapons.
The rage room has four types of monsters, which must be killed to fill a rage meter. When entering this room, players will see a weapon rack, which contains four types of weapons. Each of the weapons only work on a specific monster, and will deal normal damage multiplied by 10 when correctly chosen. To defeat the monster, unwield your weapon and shield, and select one of the weapons from the rack and wield it. Only one weapon can be taken at a time. Once you have the weapon, kill the monster it can damage, based on the table below:
| Monster | Monster name | Weapon | Weapon name |
|---|---|---|---|
| Angry unicorn | Anger sword | ||
| Angry bear | Anger spear | ||
| Angry giant rat | Anger mace | ||
| Angry goblin | Anger battleaxe |
Players will do large amounts of damage on these creatures, but no experience will be gained. Each creature killed will fill the "rage level" bar at the top of the screen. After several kills of the player's choice of angry creatures, the bar will reach maximum and the player will yell, spin, and kill all remaining monsters in the room. This grants the player 40 Attack experience.
A cutscene will then play, in which Tolna leaves his mother for a more lucrative life. Players can then exit out of the rage room near the east end of the cave, and proceed to the next room.
Fear
| “ | "It's so quiet and dark. I FEAR I may never escape this horrid place. Mum, Dad, help me!" | ” |
This room represents Tolna's fear, giving players a frightening jolt when they don't know whether or not a fear reaper will attack.
|
Fear |
|
The jingle that plays once entering the fear room.
| |
In this room, you will find multiple dark holes lining the outer walls. One of these holes is too dark and frightening to search, while the others have a chance of triggering a 'jumpscare' and summoning a fear reaper. You will have to kill five of these in order to progress. Which hole that spawns a fear reaper is random and changes after each kill, requiring you to move around the room and search different holes after each encounter. Depending on your luck, you might need to circle the room up to five times to get defeat all five reapers. The creatures are large and only attack with melee, allowing them to be easily safespotted.
| Kill count | Message |
|---|---|
| 1 | I don't like looking in these holes but I must! |
| 2 | I don't feel quite so afraid now. |
| 3 | These holes aren't that spooky. |
| 4 | This isn't so scary after all! |
After the final kill, your character will remark "Phew, I don't feel so scared now. This feels like the figment of someone's imagination!", and a cutscene will be triggered. Following the cutscene, the hole to the west will be lit up, and you will be able to proceed.
Confusion
| “ | "Where am I, How long have I been here? Am I still the person I once was? Oh why am I so CONFUSED?" | ” |
This room represents Tolna's confusion, flabbergasting the player because some doors lead nowhere and some beasts can't be hurt.
|
Confused |
|
The jingle that plays once entering the confusion room.
| |

In this room, there are six confusing doors. There are also five confusion beasts, but only one of them is real at the time; the others are illusions, and cannot be damaged (although they will still grant combat experience).
- Tip: On the RuneLite client, it is possible to colour each beast with external plugins. Change each beast to a different colour. When you find the right one, that same colour will be the correct beast all 6 times.
The illusions will disappear after you hit eight zeroes on them; players can simply keep attacking the beasts until they disappear, or disengage by running to the opposite corner and then attacking another beast.
Once you kill the real confusion, one of the confusing doors will vanish, and the rest of the beasts will respawn. Repeat the previous process four more times, until only one door remains, at which point a cutscene will trigger.
Ranged or Magic is best for this step, as the beasts attack from a distance. When using melee, they have a chance to inflict poison, which can be negated by attacking with a long-distance weapon. Throwing knives, multi-hit weapons, or other fast weapons are helpful for speedy kills on the illusions.
Illusions will chase you after attacking, and will keep you from attacking any of the other monsters while you are still in combat.
You will see a cutscene after the last kill. After that, you can proceed through the final Confusing Door.
Hopelessness
| “ | "What's the point? No-One will ever help me. I'm not worth anything, will anyone ever combat my HOPELESSNESS?" | ” |
This room represents Tolna's hopelessness — players must not give up when the creatures reappear after dying.
|
Hopeless |
|
The jingle that plays upon entering the hopeless room.
| |
In this room are five hopeless creatures, which need to be killed three times each to fully die. Be careful of eating, as the monster's health will be restored. Additionally, if they are poisoned, the poison effect is lost when they reach their next phase. The creatures can use melee on their second and third forms, but will default to ranged after some time if they cannot reach the player. It is recommended to kill them from a distance as their ranged attacks are much weaker.
Once they have all died, the Bridge of Hope will appear. After crossing the bridge, go through the exit, which will trigger a short cutscene.
Tolna
|
A Monster |
|
The jingle that plays upon entering the final room.
| |
The final room contains Tolna, a three-headed beast which must be slain in order to revert him back to a human.
The final room is a multicombat zone, and all three heads will attack at once. They use a ranged attack from a distance, and the northern head will very rapidly melee when up close. They are not very strong, but they attack quickly and can poison, so players should bring an antipoison and a decent amount of food. The three heads are very easy to beat with Ranged or Magic, although be warned that if using range without an accumulator, player will not be able to retrieve their arrows.
After killing each head, Tolna will become human again. Talk to Tolna, and he will take you back to the surface. Talk to him again to finish the quest.
Congratulations, quest complete!
- Tip: Re-enter the dungeon right after completing the quest to complete a medium Varrock Diary task.
Rewards
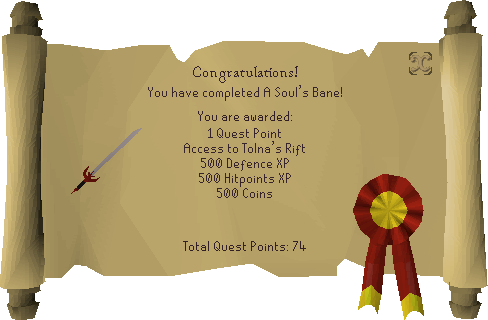
- 1
500 Defence experience
500 Hitpoints experience
- 500
Coins
- Access to Tolna's rift for combat training
Required for completing
Completion of A Soul's Bane is required for the following:
- Medium Varrock Diary - Enter the Tolna dungeon after completing the quest.
Transcript
Changes
| Date | Changes |
|---|---|
| 28 April 2016 (Update) |
The Confusion beasts from A Soul's Bane quest are now immune to venom. |
Trivia
- The map of the final room resembles a brain, possibly representing Tolna's troubled mind as the player fights him to bring things back to normal.
- The music track "Fear and Loathing" is likely a reference to the author Hunter S. Thompson, who used the phrase in the title of several of his works. The quest's themes of psychological descent and emotional manifestation may have taken inspiration from his writing.
- The house in the first flashback when Tolna leaves home is the same house the player helps fix up for Old Man Yarlo in Daddy's Home.
| NPCs |
| ||||
|---|---|---|---|---|---|
| Items | |||||
| Locations | |||||
| Music | |||||
| Related | |||||


